Making a Cleft Gate
I’ve already posted stuff about the virtues of sweet chestnut, so I won’t bang on about it again now. If you’re interested, please check out “Making a cleft sheep hurdle” and “Sweet Chestnut Fencing”
Design
There are infinite designs of bespoke gates, so eat some cheese and dream up your own creative design to fit in with the spirit/theme of your garden. There are lots of images on google if you need some inspiration or I’d be flattered if you wanted to copy mine or bounce design ideas off me.
 The good thing about cleft gates is they look rustic and organic. Celebrate this and try not to make your design too regimented or uniform.
Making your gate
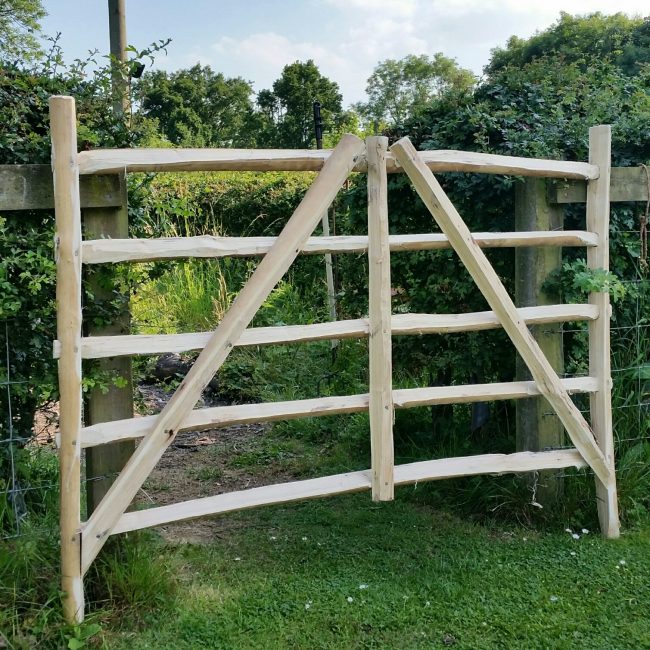
Basically the principals are pretty similar to those when making a cleft hurdle, albeit chunkier bits of wood. You will need to decide for yourself how chunky you’d like your wood depending on size and how you want it to look when finished.
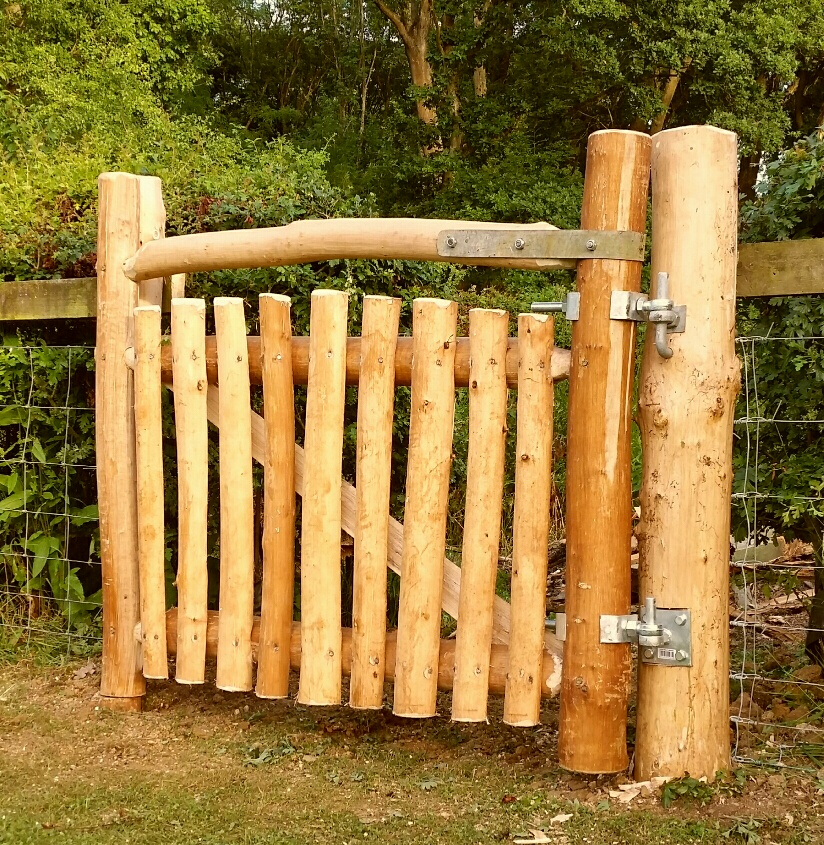
The ends of my gate are made from peeled round-wood of around 10cm diameter. The hinge end is usually thicker than the closing end on gates. Then I’ve got a couple of cleft horizontal bars and a bendy round bar on top. I’ve also fitted a diagonal brace to the gate so it doesn’t lozenge (posh term for sag) over time. Please do fit a brace or it will sag and that would be disappointing.
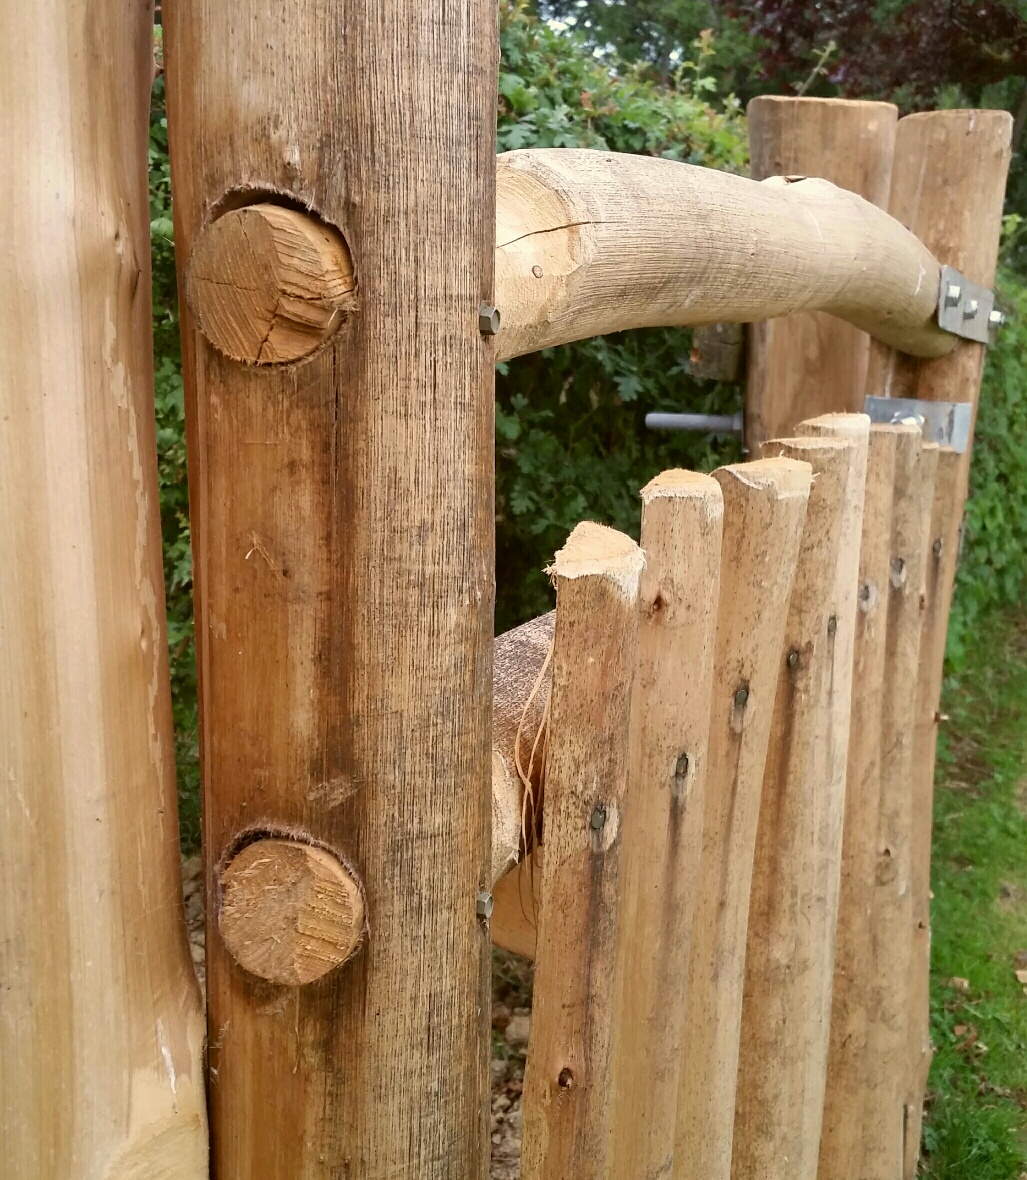
In the same way as I built the hurdle, I’ve drilled holes in the ends of my gate and shaped my horizontal bars to fit into them. The holes are drilled with a 51mm core drill and the bars shaped to size with a sanding disc on a grinder. Once they are a nice snug fit I’ve drilled them and wound a landscape screw into the wood to hold them into position.
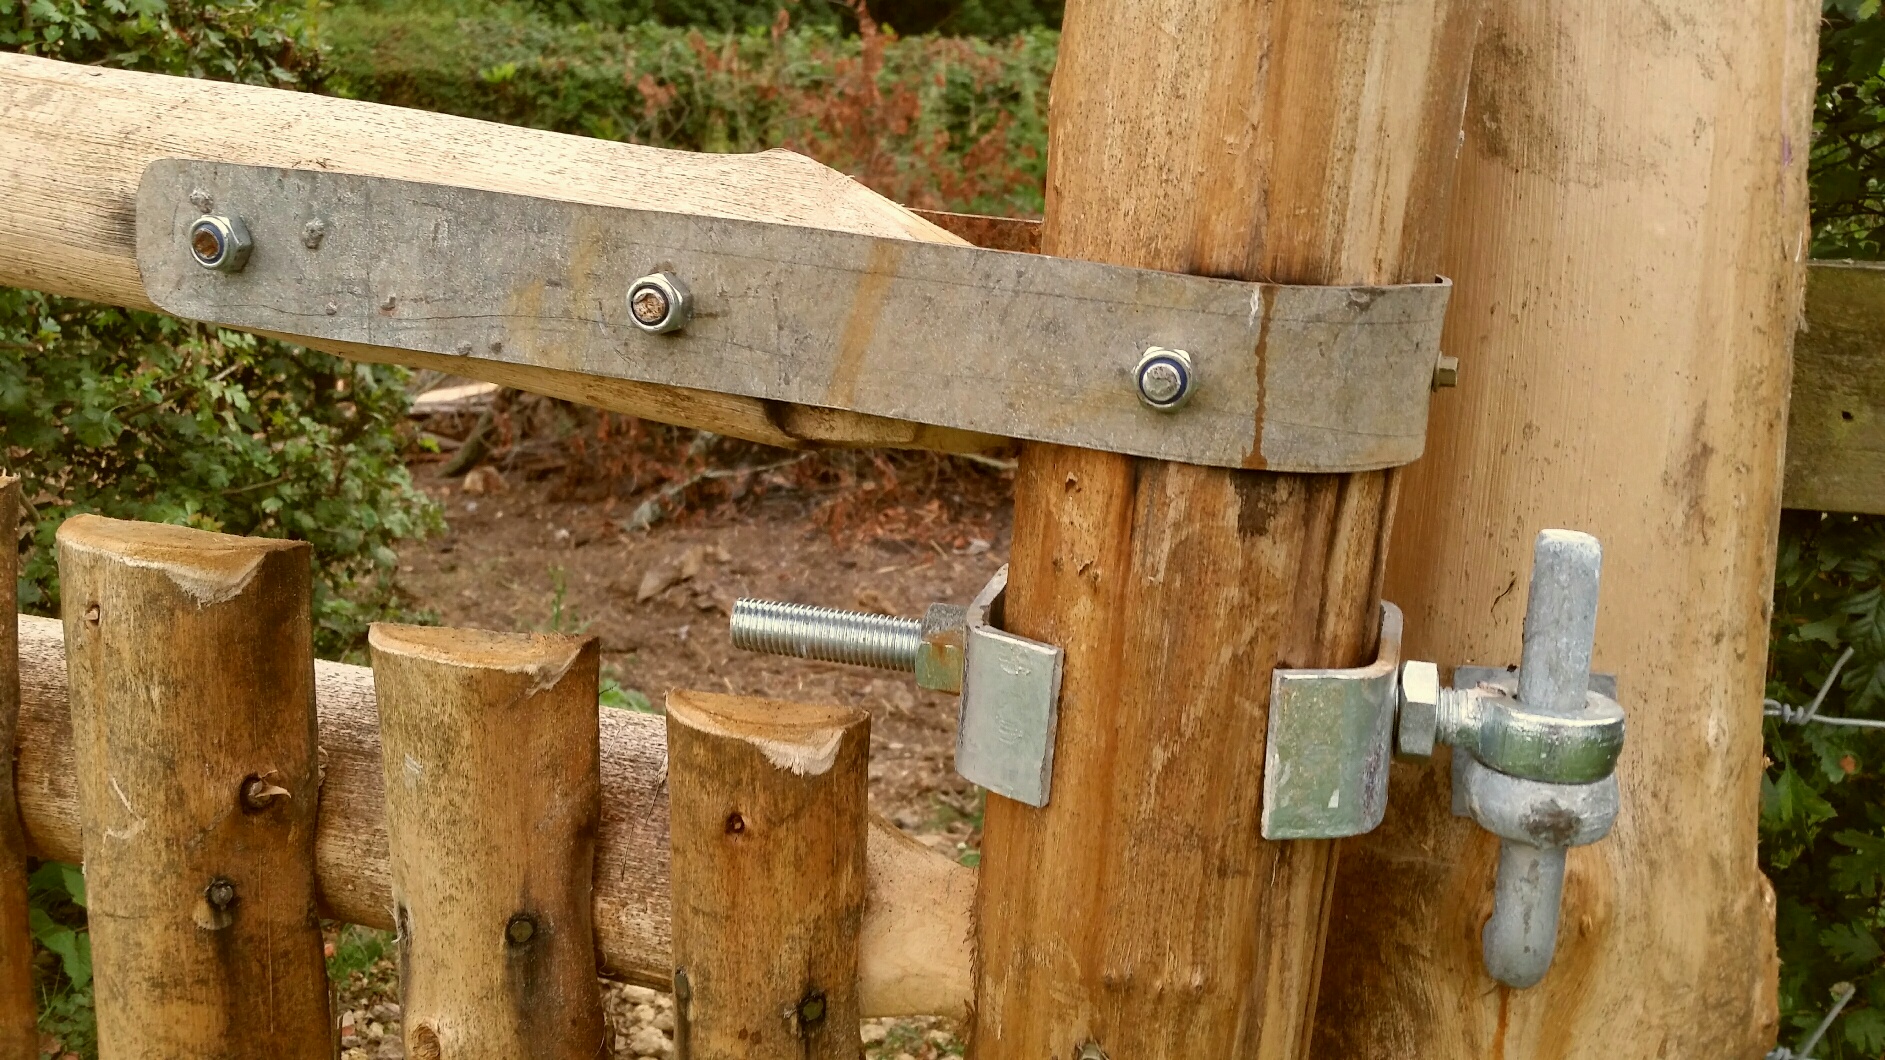
I’ve bolted a metal tie to the hanging end to stop that joint being pulled apart. If you think about the stresses on the gate, it’s the top hinge end that’s trying to pull out. The metal tie and the diagonal brace might be a bit of overkill, but I like stuff to last. In this instance it really is belts and braces!
I’ve then clefted and peeled some uprights, pre drilled them and nailed them in place to create one rustic looking farmhouse gate.
Hanging your gate
You will need some chunky bits of wood for gateposts that are at least seven foot long. Imagine someone swinging on your gate as it opens and closes. That’s a lot of leverage on your gatepost. You want to get that post dug in at least three feet, if not a little more. Pound the soil back in around your post as you fill it. Don’t just fill the hole and heel in the surface. Start firming in the backfill from the bottom of the hole by throwing in a few inches of soil at a time and pound it firm until your hole fills up. That way your post will be rock-solid! Resist the builders solution of pouring concrete into your post hole. As the wood of the gatepost shrinks in dry weather, it will become like a lose tooth in the concrete. You’re better off with firmed soil as it continues to grip your post rain or shine.
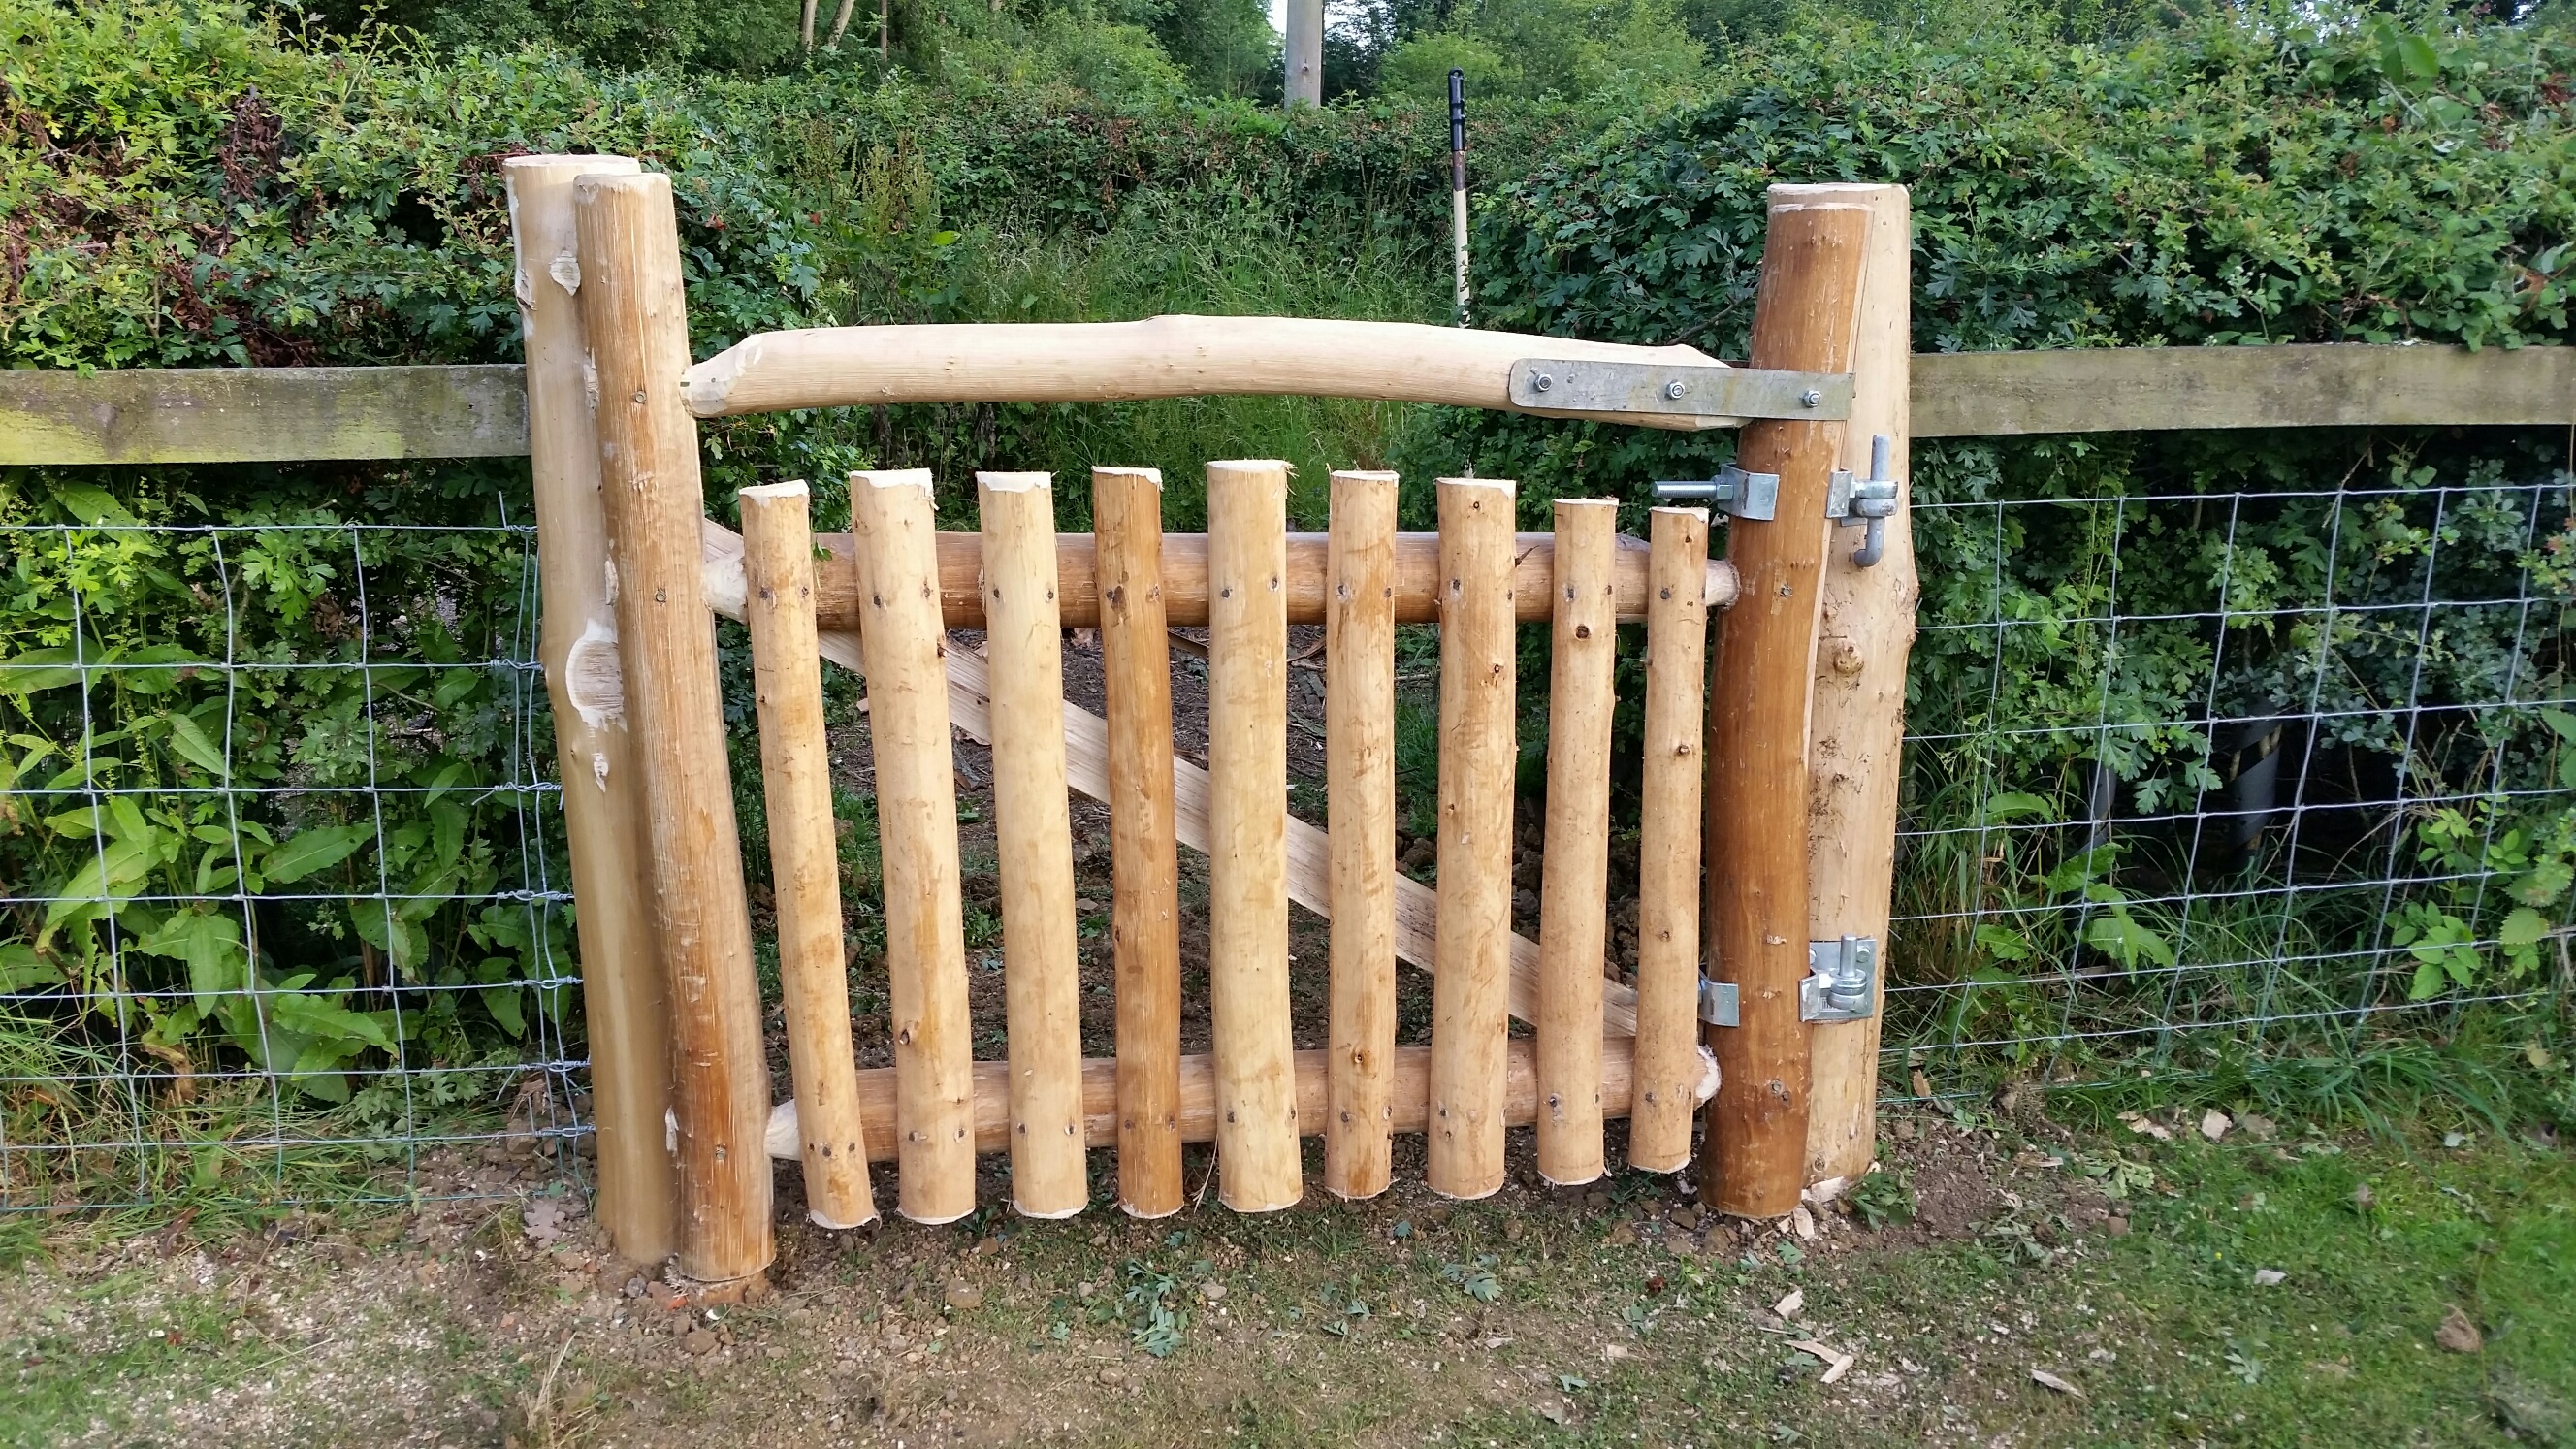 Dig your hanging post in first and hang your gate off it. I’ve used adjustable agricultural field gate hinges so I can ensure my gate looks level(ish) by eye. Don’t even get your spirit level out of the shed as there’s no straight edge to put it on. Trust your eye or get a second opinion if you cant decide if it looks right. Then dig your shutting post in so it meets the end of your gate. Don’t try and dig in both posts and then hang your gate. This never never works as the shutting post is never quite in your perfect place.
Even better as it weathers
Over time that fresh yellow gate will become weathered and turn silver. I think they look even better after six months and that fresh colour fades. You might also think about cleft fencing to compliment your gate. They look lovely together.
There’s no limit to designs for your gate. You might want to replicate an existing style or design a new one. If you need a hand with design, production or installation, feel free to drop us a line at info@conservationandaccess.co.uk and we’ll get back to you. Thanks for reading.
6 comments on Making a garden gate

Great projects, great products, great blogs and presented in a gentle practical manner. 👍🏻
Very best from fellow bespoke timber works outfit.
Thank You for sharing this tip which is very necessary for making a garden gate. Blog post can be a very good way to interact with others and involve in new and relevant discussion.
I love the rustic look of wooden garden gates. They are so timeless and always look so welcoming.
I have the plan to make a garden gate, and this guide is for me. Your step-by-step instructions and accompanying photos were really helpful and informative, and it’s clear that you have a lot of expertise in woodworking. I appreciate the attention to detail you provided in your instructions, from measuring and cutting the wood to assembling the gate and attaching the hardware. It’s great to see how a relatively simple project like this can add so much to the overall aesthetic and functionality of a garden. Are there any specific types of wood or finishes that you would recommend for making a garden gate?
Thank you so much. I recommend naturally durable woods like oak or sweet chestnut, so you don’t need to use wood preserver – certainly for the posts. As the gate doesn’t touch the ground, your choice is much greater, including moderately durable softwoods such as larch or douglas fir. Good luck with it!!.
Thanks for sharing this! Your rustic gate design looks amazing and super strong. We handle Augusta fencing projects and love learning from your creative ideas. The way you explained everything makes it easy to follow. Appreciate your helpful tips—we’ll definitely keep them in mind on future jobs!