History
For centuries hurdles were used by sheep farmers to pen sheep into confined areas for grazing or animal welfare.
I spoke to an old Wiltshire farmer who remembers men carrying several hurdles each on their backs, supported by a stick over their shoulder. Although men were men back then, weight would have still been an issue and hurdles were built strong but lean. It’s quite likely the athletics sport of hurdling began with these fit young farmers racing each other over their sheep hurdles.
Nowadays hurdles are somewhat chunkier given that we don’t physically carry them any great distance. This makes them more durable and gives them a more rustic appearance.

An old traditional ash hurdle
The Wood
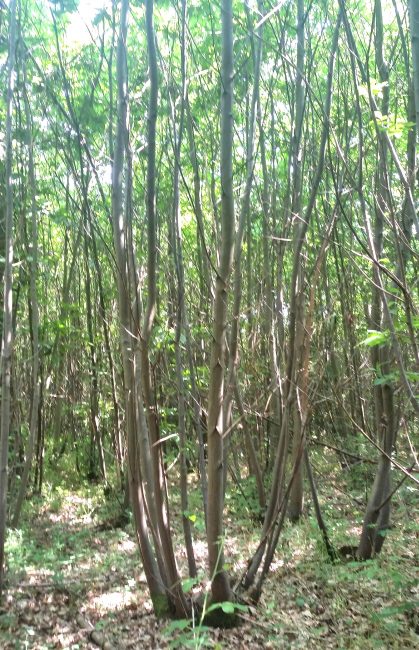
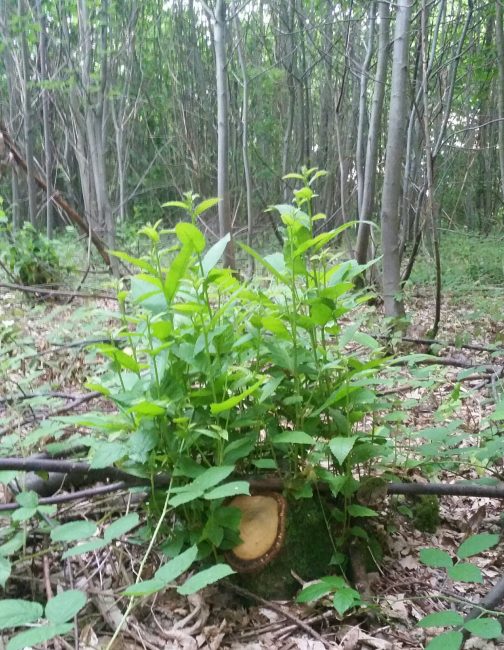
I’m using sweet chestnut for my hurdles as it’s readily available in the south east of England. The old one pictured is made of ash, which is also surprising durable in this application. Both these woods cleft, (split along the grain), very nicely. I don’t see why you couldn’t use oak either, although I’ve never heard of it. The beauty of ash and sweet chestnut is its readiness to coppice. This means it grows again from the stump you’ve just cut. For every piece of wood you take, three or four more grow that can be harvested again in another eight to ten years. Not often something is that sustainable!
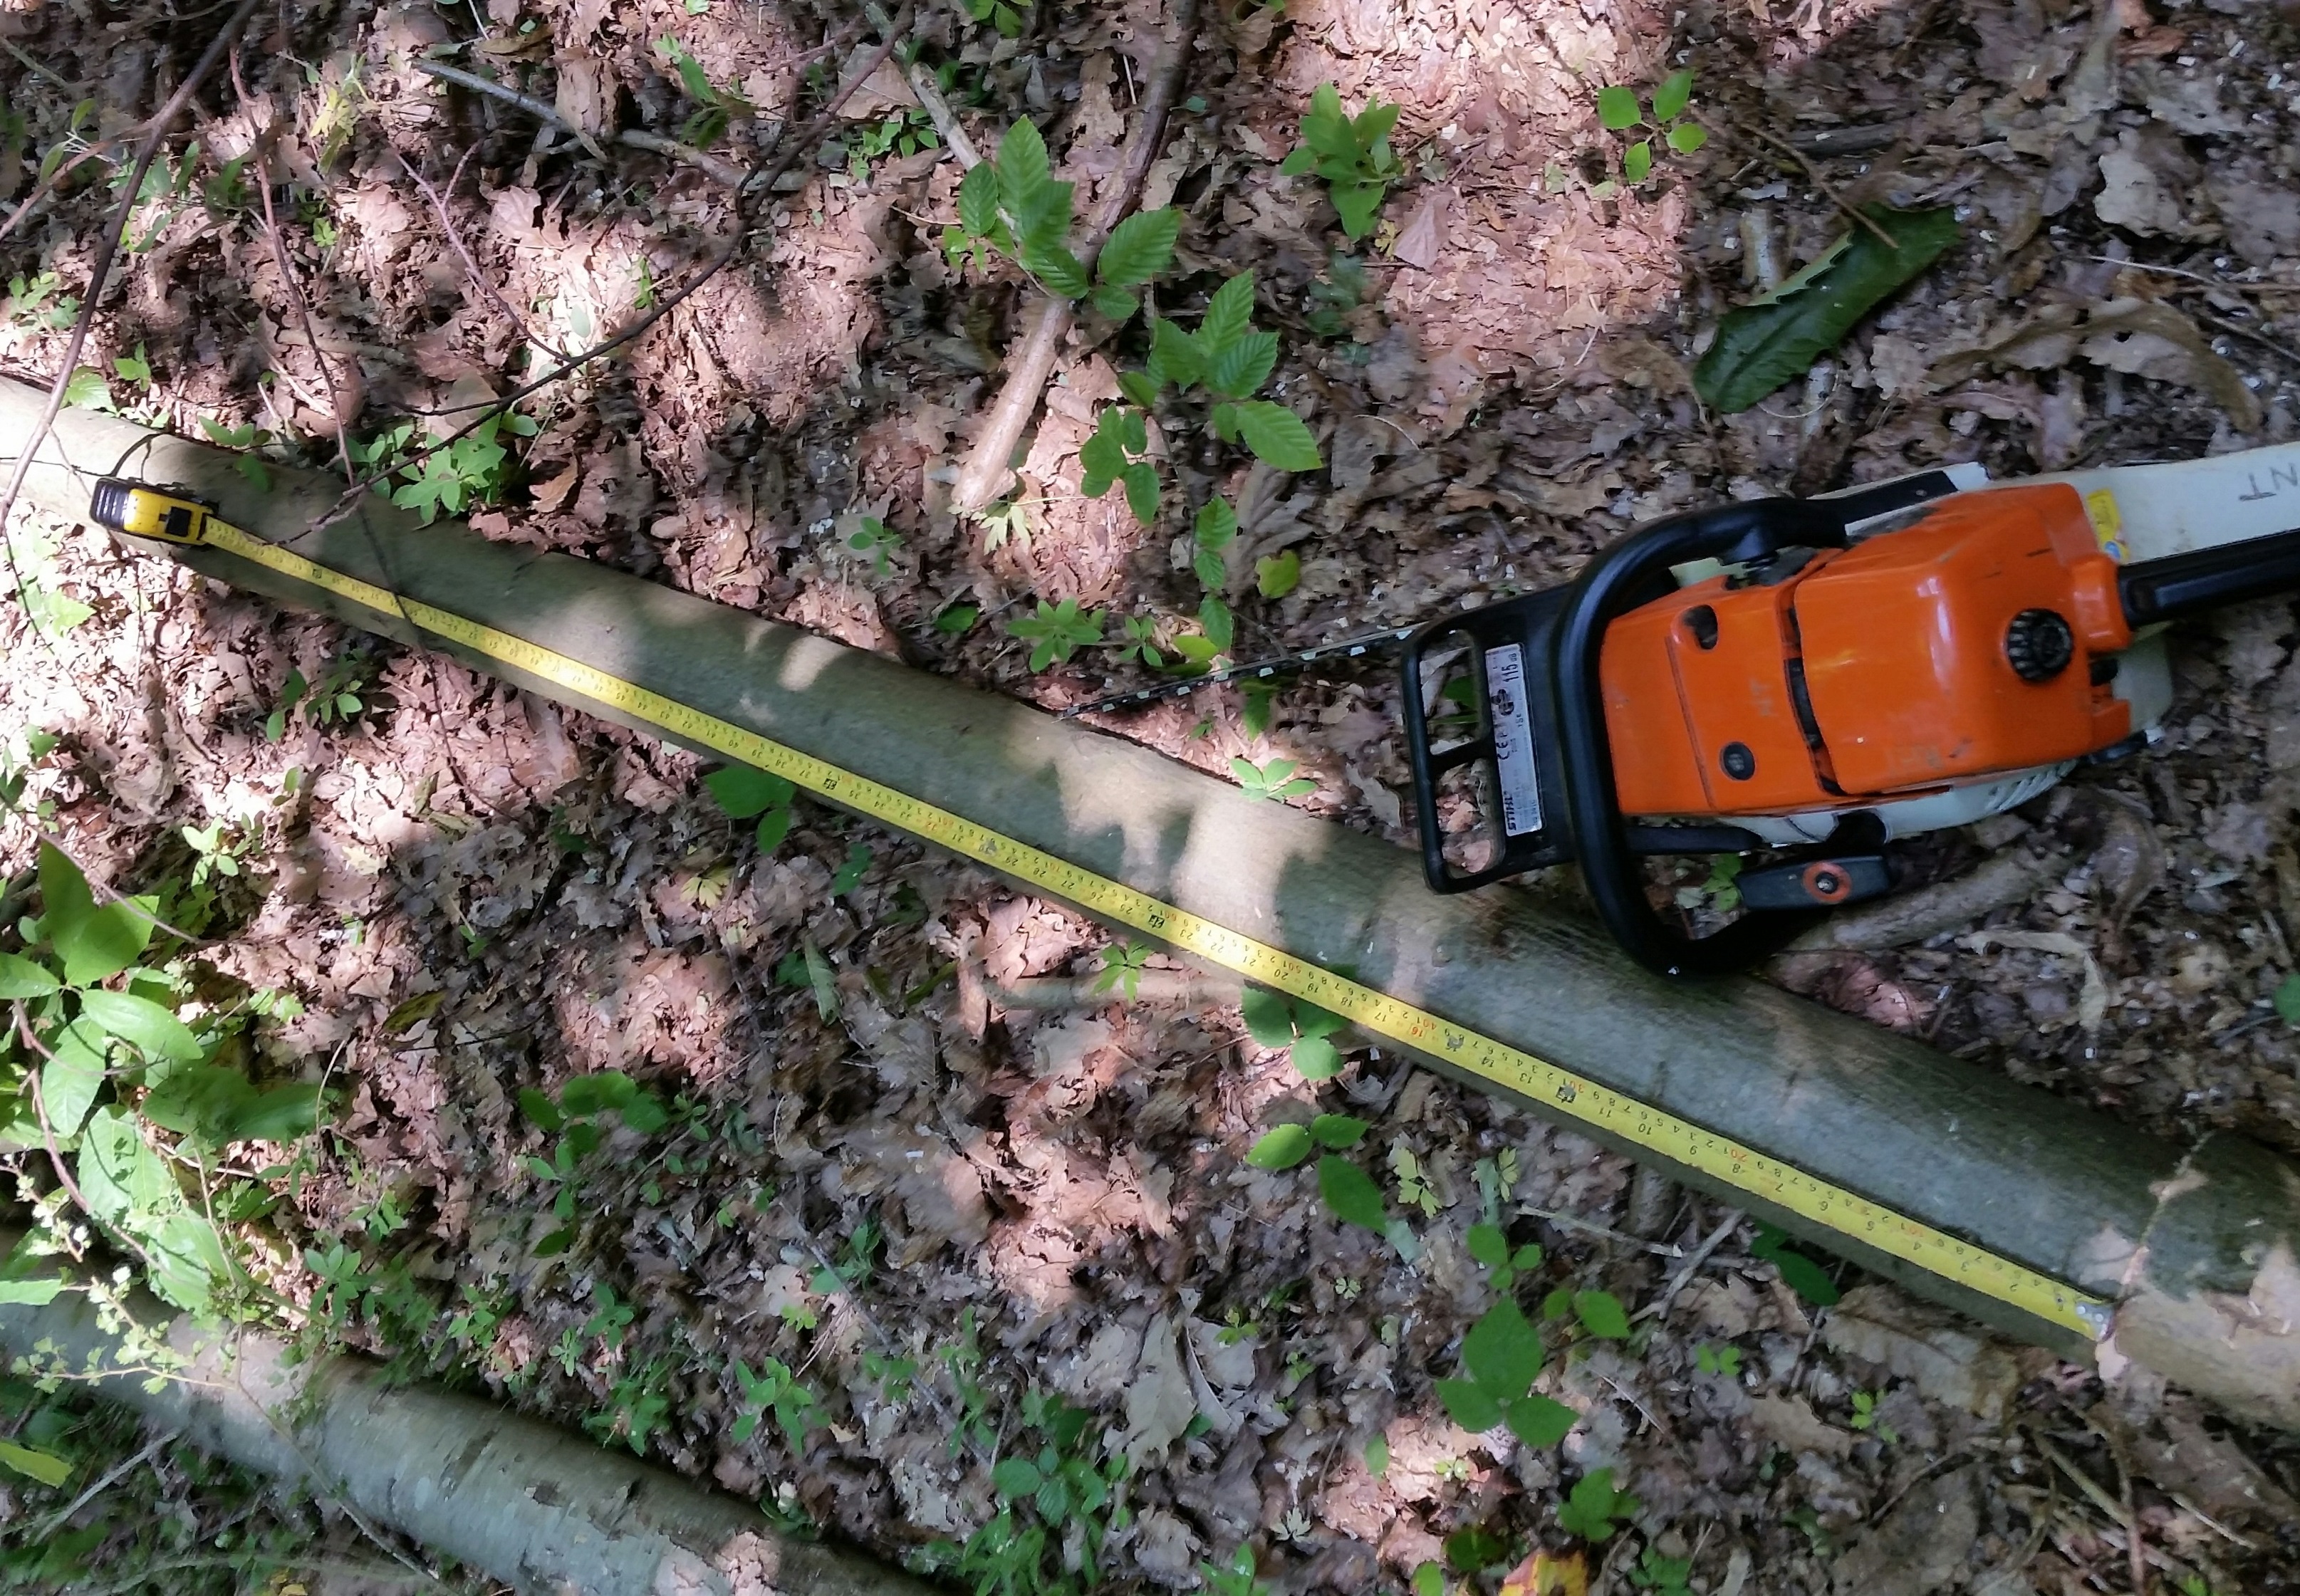
Ideally you want your wood reasonably straight, but a bit of a bend can add some character. Your clefting logs should be roughly 8cm to 12cm diameter. Measure your lengths on site as you fell it to reduce wastage and maximize efficiency. I’m cutting my lengths to five feet, but you can make your hurdle whatever size you like. Six food was the traditional size. Cut around any terrible bends and knots. Knots make the grain of the wood swirl around them and your clefting can go all over the place.
Bring home more wood than you think you’ll need as clefting doesn’t always go to plan!
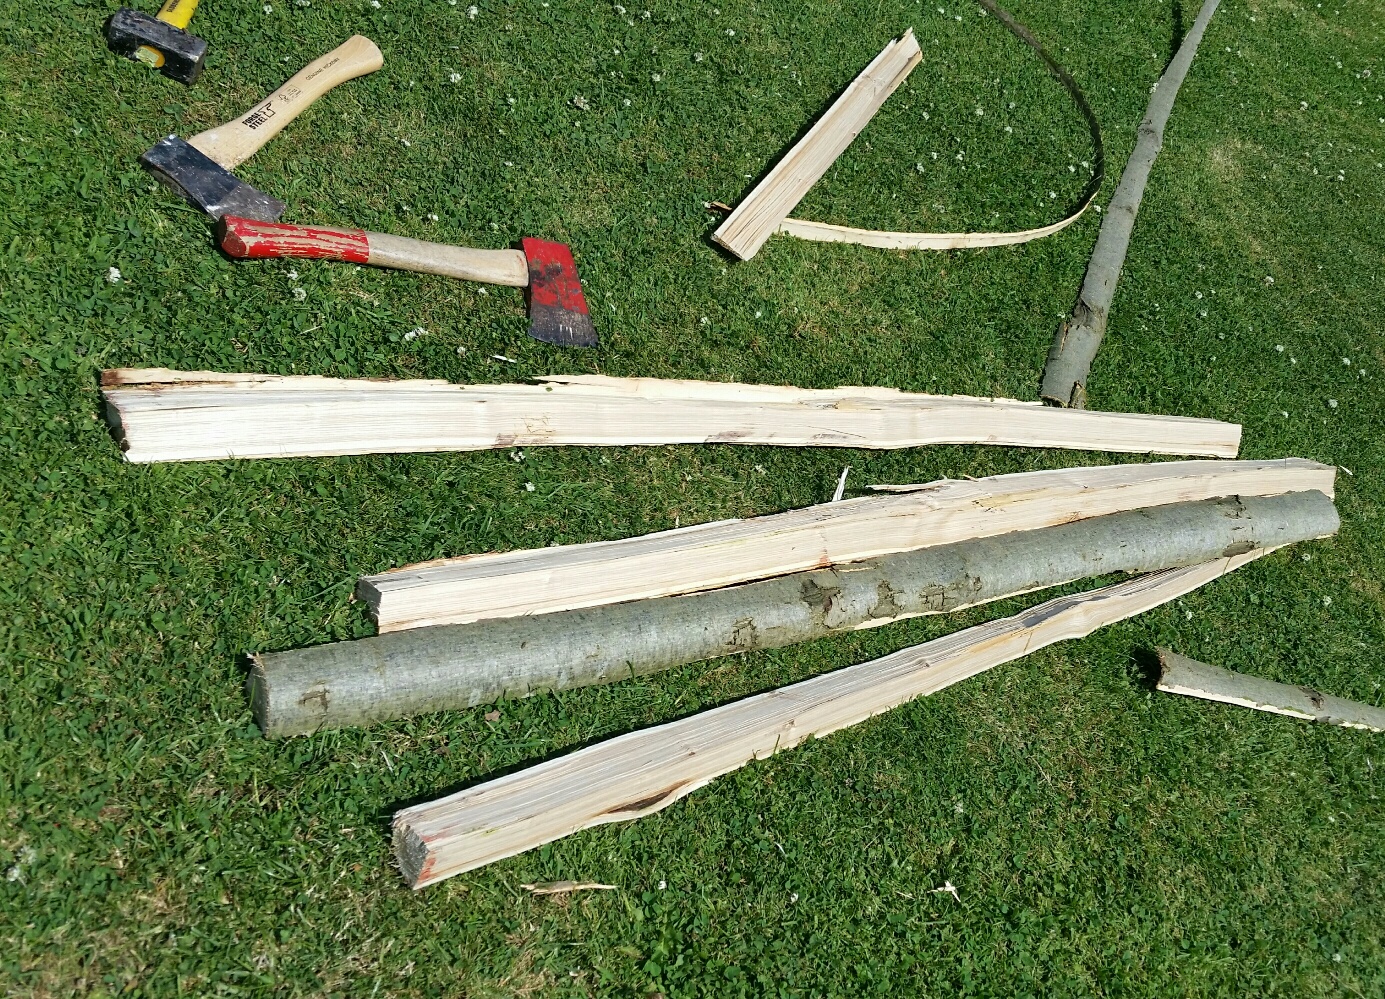
Clefting your wood
Make sure you cleft your wood as soon as possible after cutting it. As it dries out it gets harder and harder to split. If green, you’ll find your wood clefts surprisingly easily.
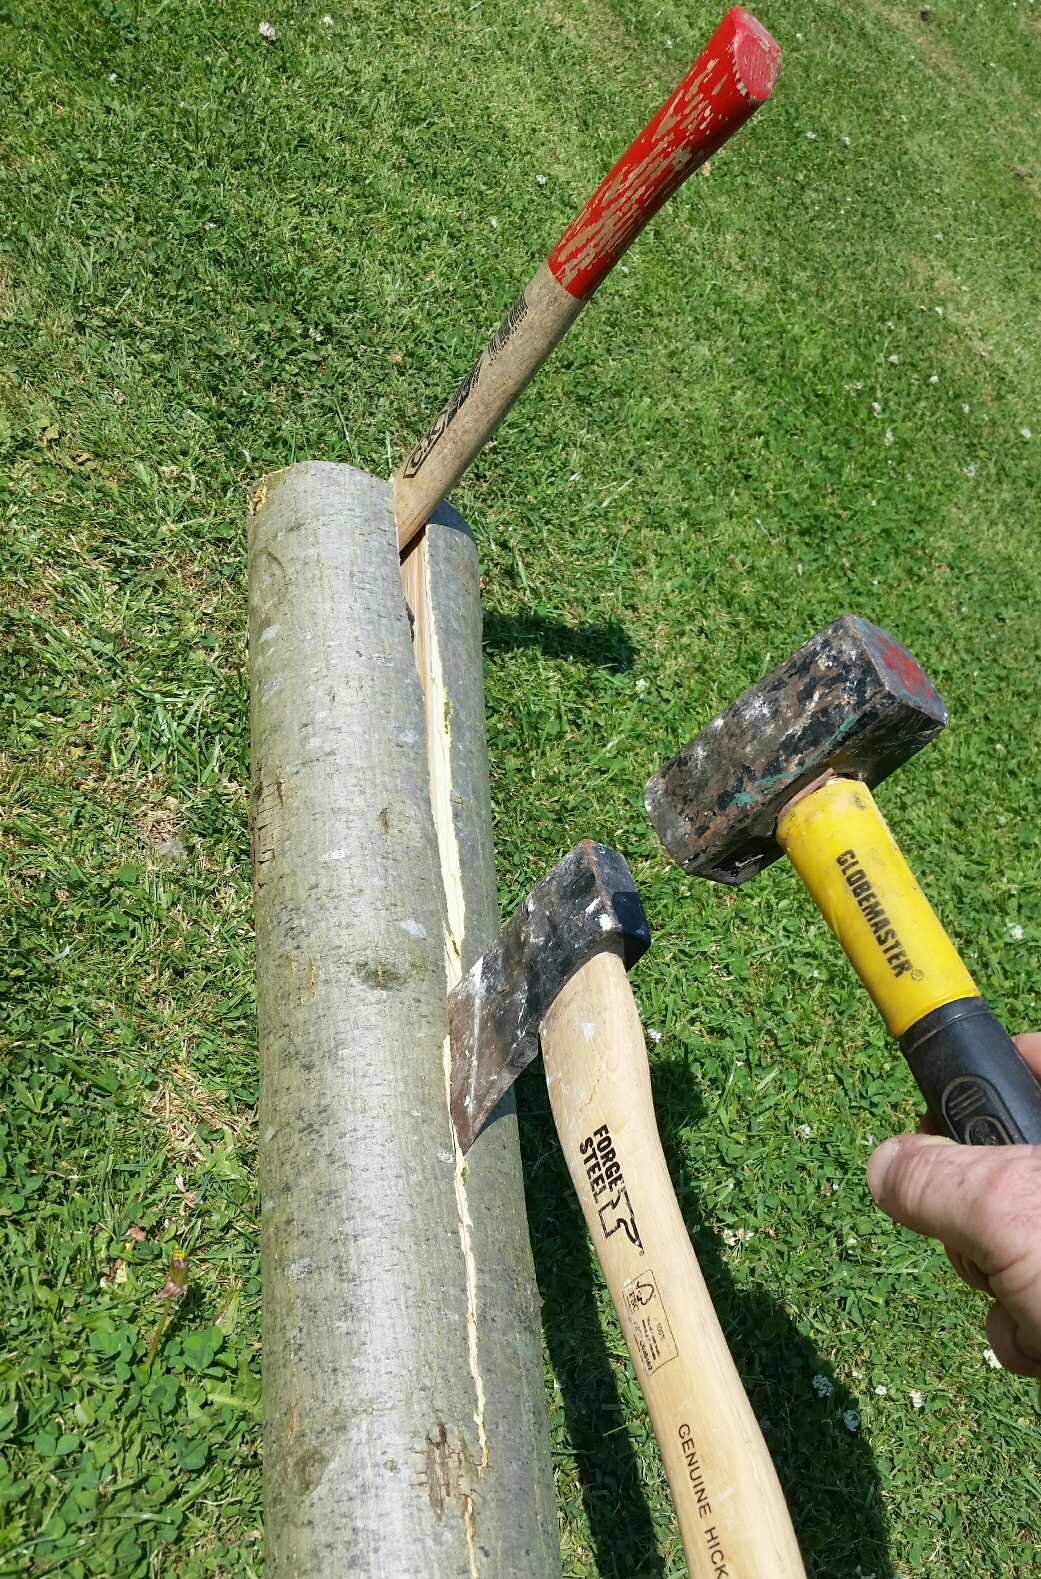
There are all sorts of fancy tools and vices out there to help you cleft your wood. If you’re doing loads of clefting then it’s worth looking into. But if you’re just making a few hurdles for your own garden, you can do it with tools most of us already have to hand. I’m just using a couple of hand axes and a lump hammer.
For the horizontal bars we are going to split our round pieces of wood into quarters. Hammer a hand axe into the end grain to start splitting it down the middle. A few sharp hammers and the wood will begin to split.
Hammer the second axe into the split further along and the split will grow. Repeat this until the log is cleft in half and repeat the process to quarter it. With any luck the wood will have split perfectly, but don’t worry if it hasn’t.
The grain sometimes means the split will run-out, leaving you with one perfect end and the other not so good. My advice is to just cleft another bit and hope for better luck. It’s not hard to do and quite satisfying when it goes right. You’ll need some shorter bits for the diagonals later so they might not be wasted.
Once you’ve got five bars that you’re happy with, cleft another piece in half for the ends of your hurdle and put a point on the fat end with an axe or saw. This’ll be the bottom that will be driven into the ground. Now is a good time to peel the bark from your wood. It should come off pretty easily with the axe, a knife or a sharp spade.
Building your hurdle
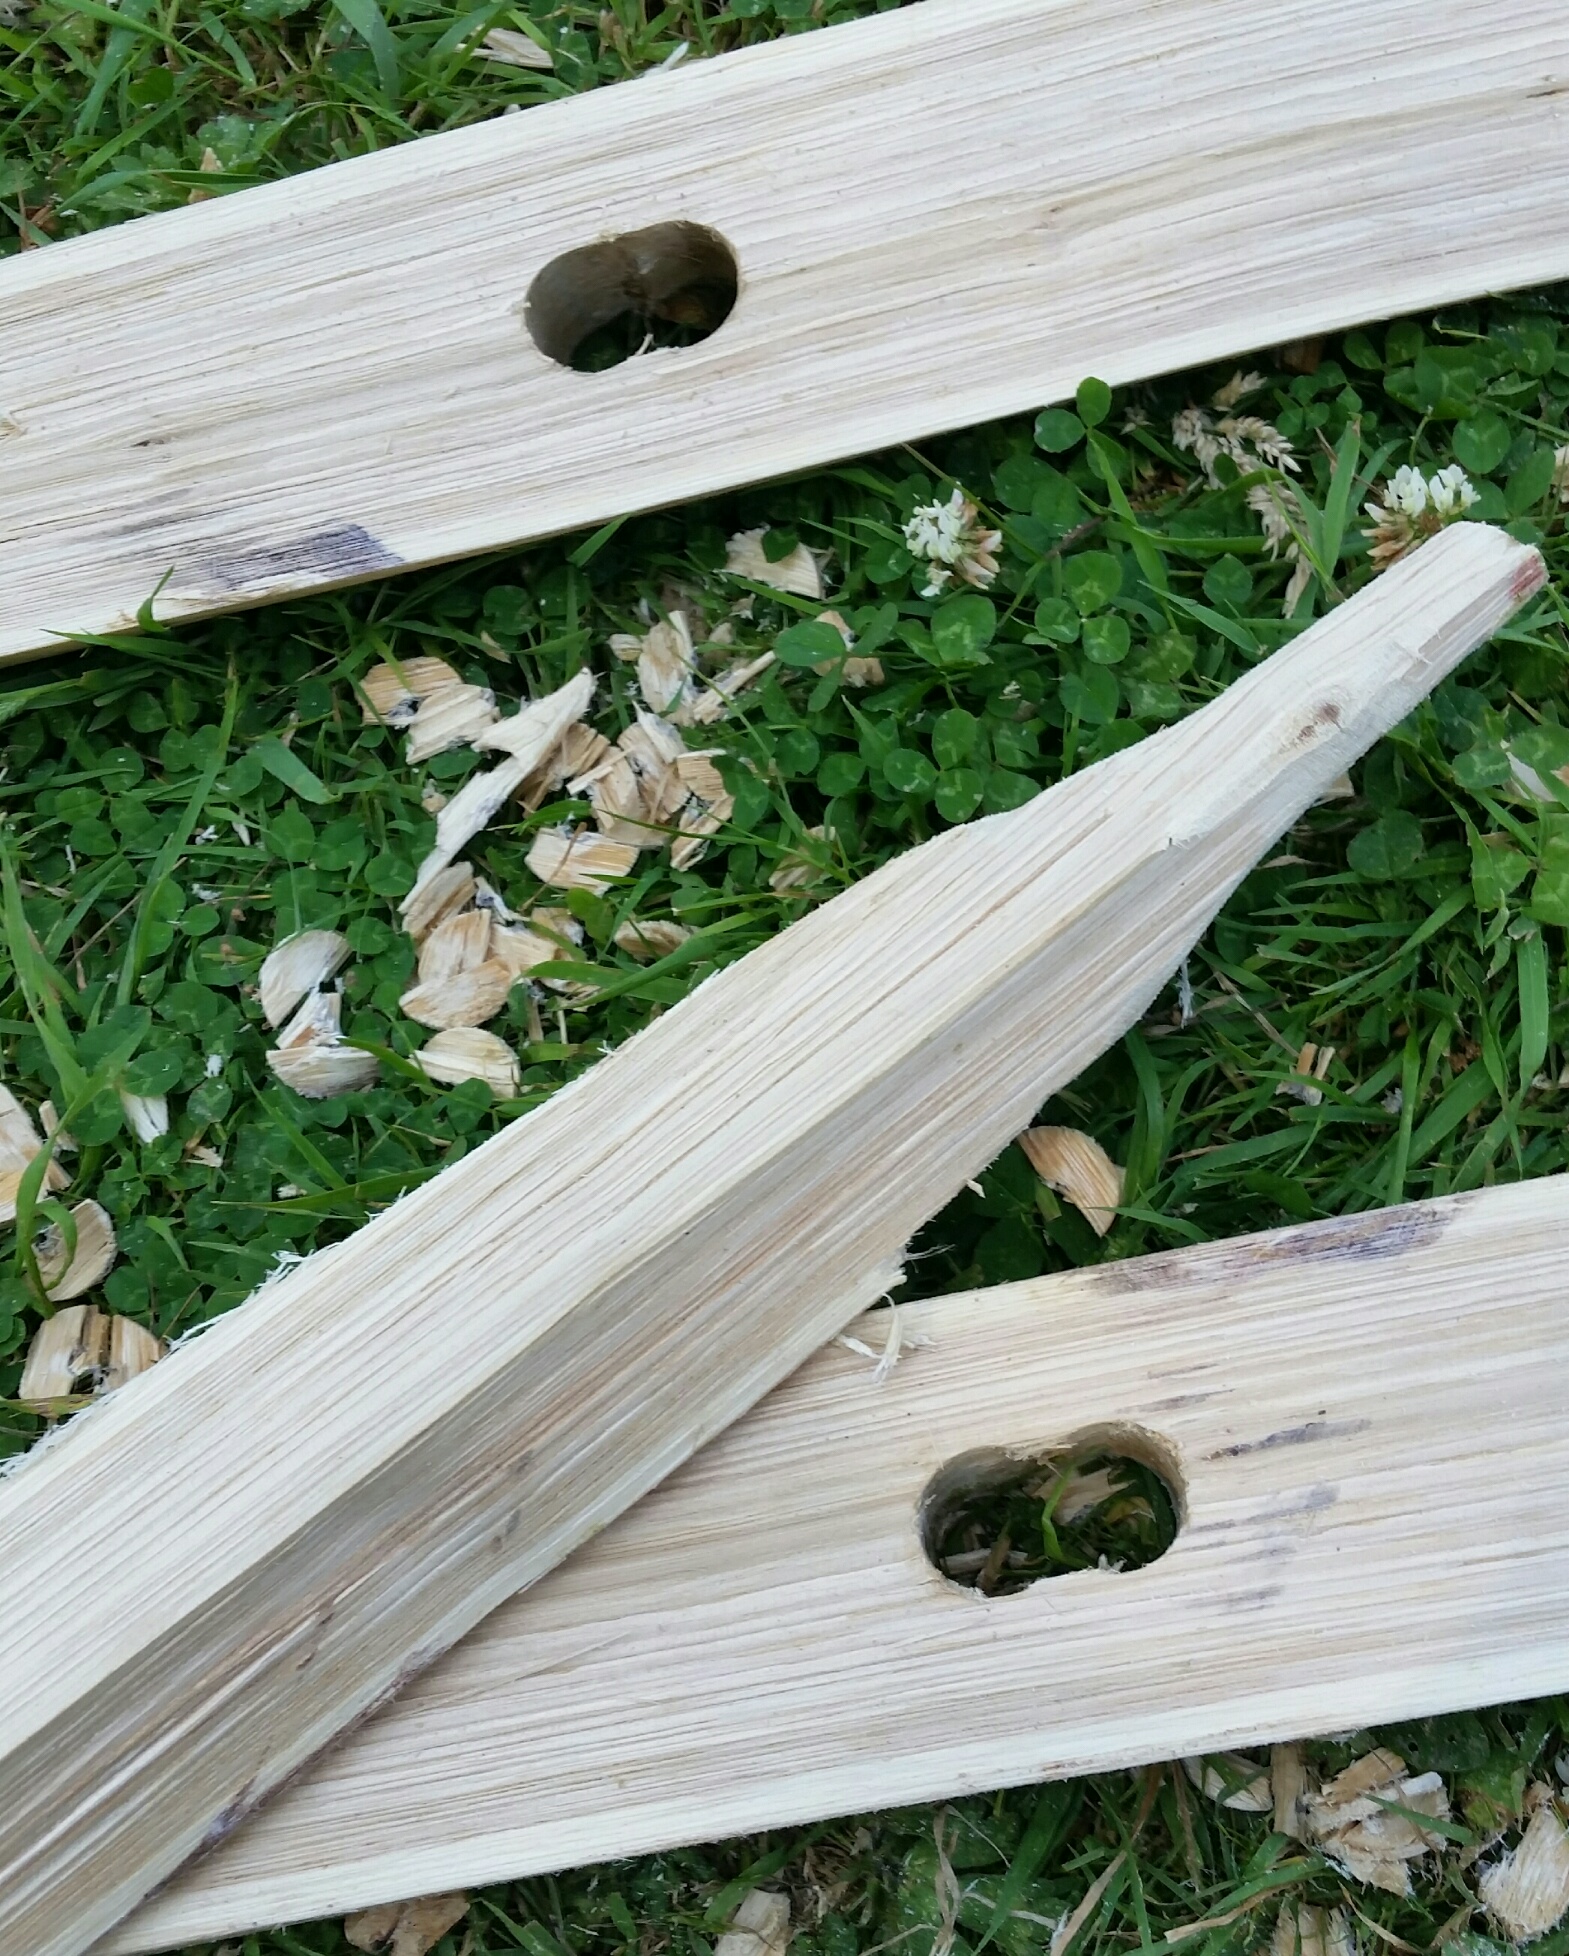
Drill a couple of holes into your end piece about 25cm up from your point. I’m using a 22mm drill. Chisel out the bit between the holes to leave you a nice long oval.
Then shape the end of your clefted bar to match the oval. This bit is easier said than done. You can use a saw, a billhook, a draw-knife or your hand axe. It doesn’t really matter how you do it as only as your bar fits into the oval you’ve just made. I used a saw and then sanded it to shape with a cordless grinder and a sanding disc. You don’t want the bars to be too tighter fit. Remember how easily this wood splits!
Repeat the process of drilling holes for bars about 20cm apart and shape your bars accordingly. Then bring your hurdle together by pushing all the bars into their respective holes and hammer them in – again, not too hard as you don’t want to split the ends in half.
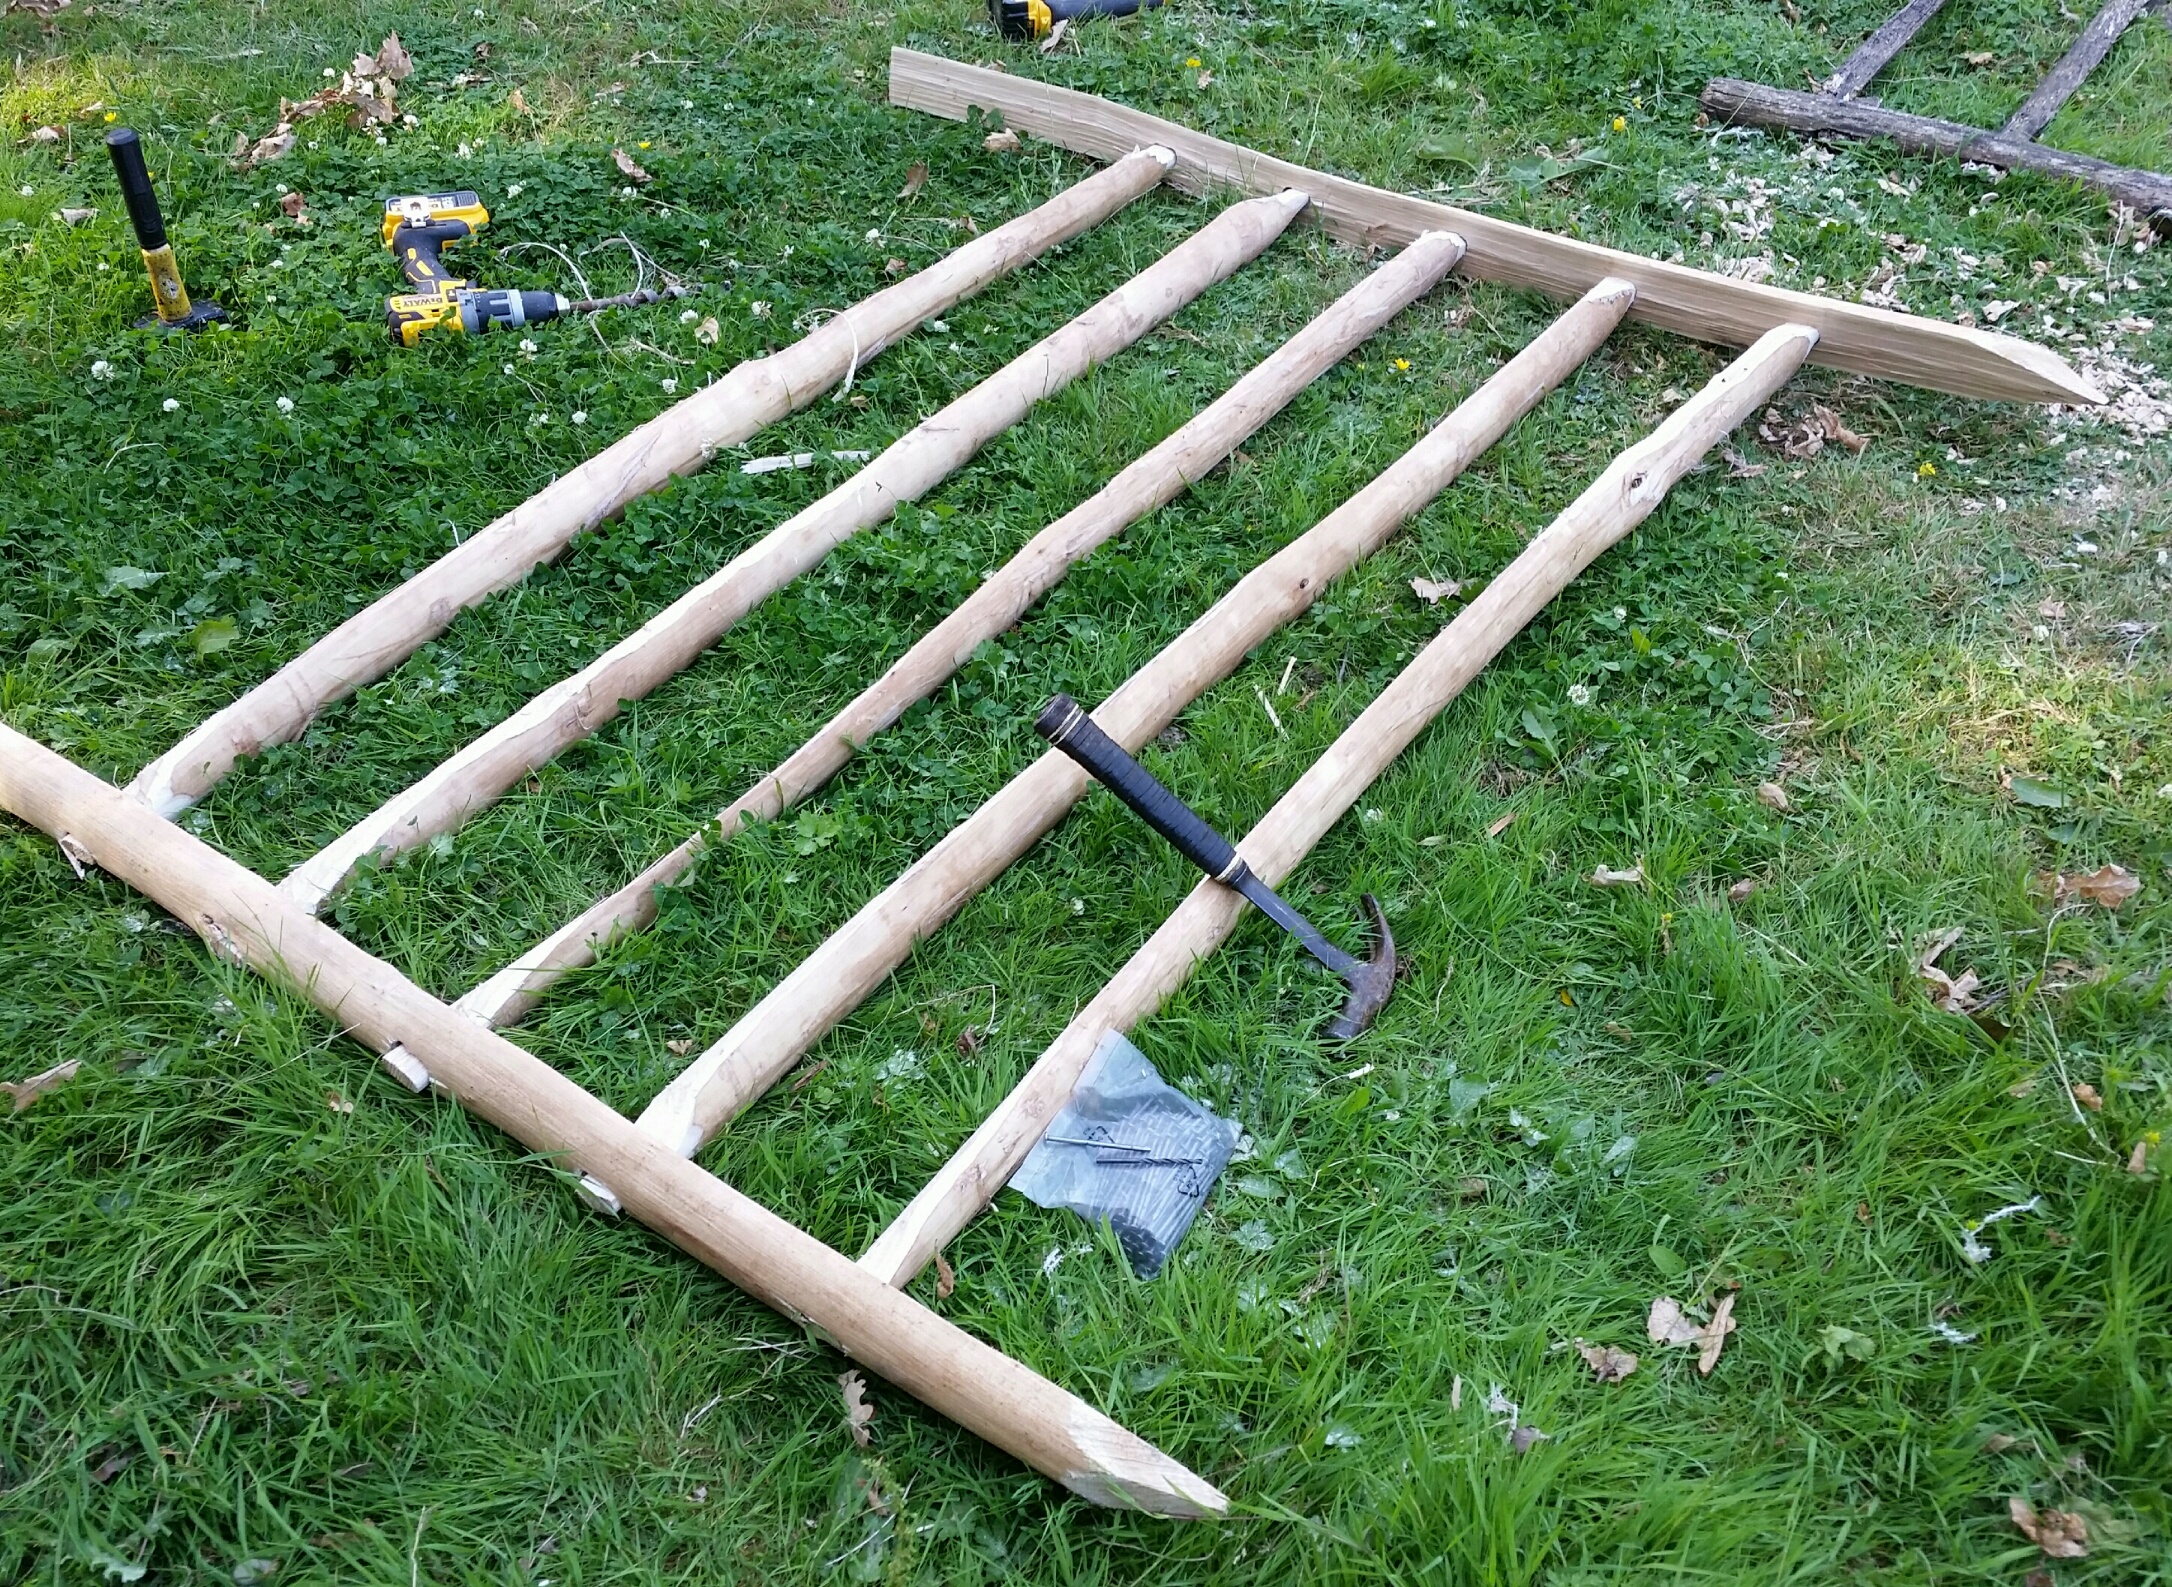
Drill a pilot hole and knock a nail through your ends to secure everything in place. The pilot hole is to prevent the wood from splitting around your nail.
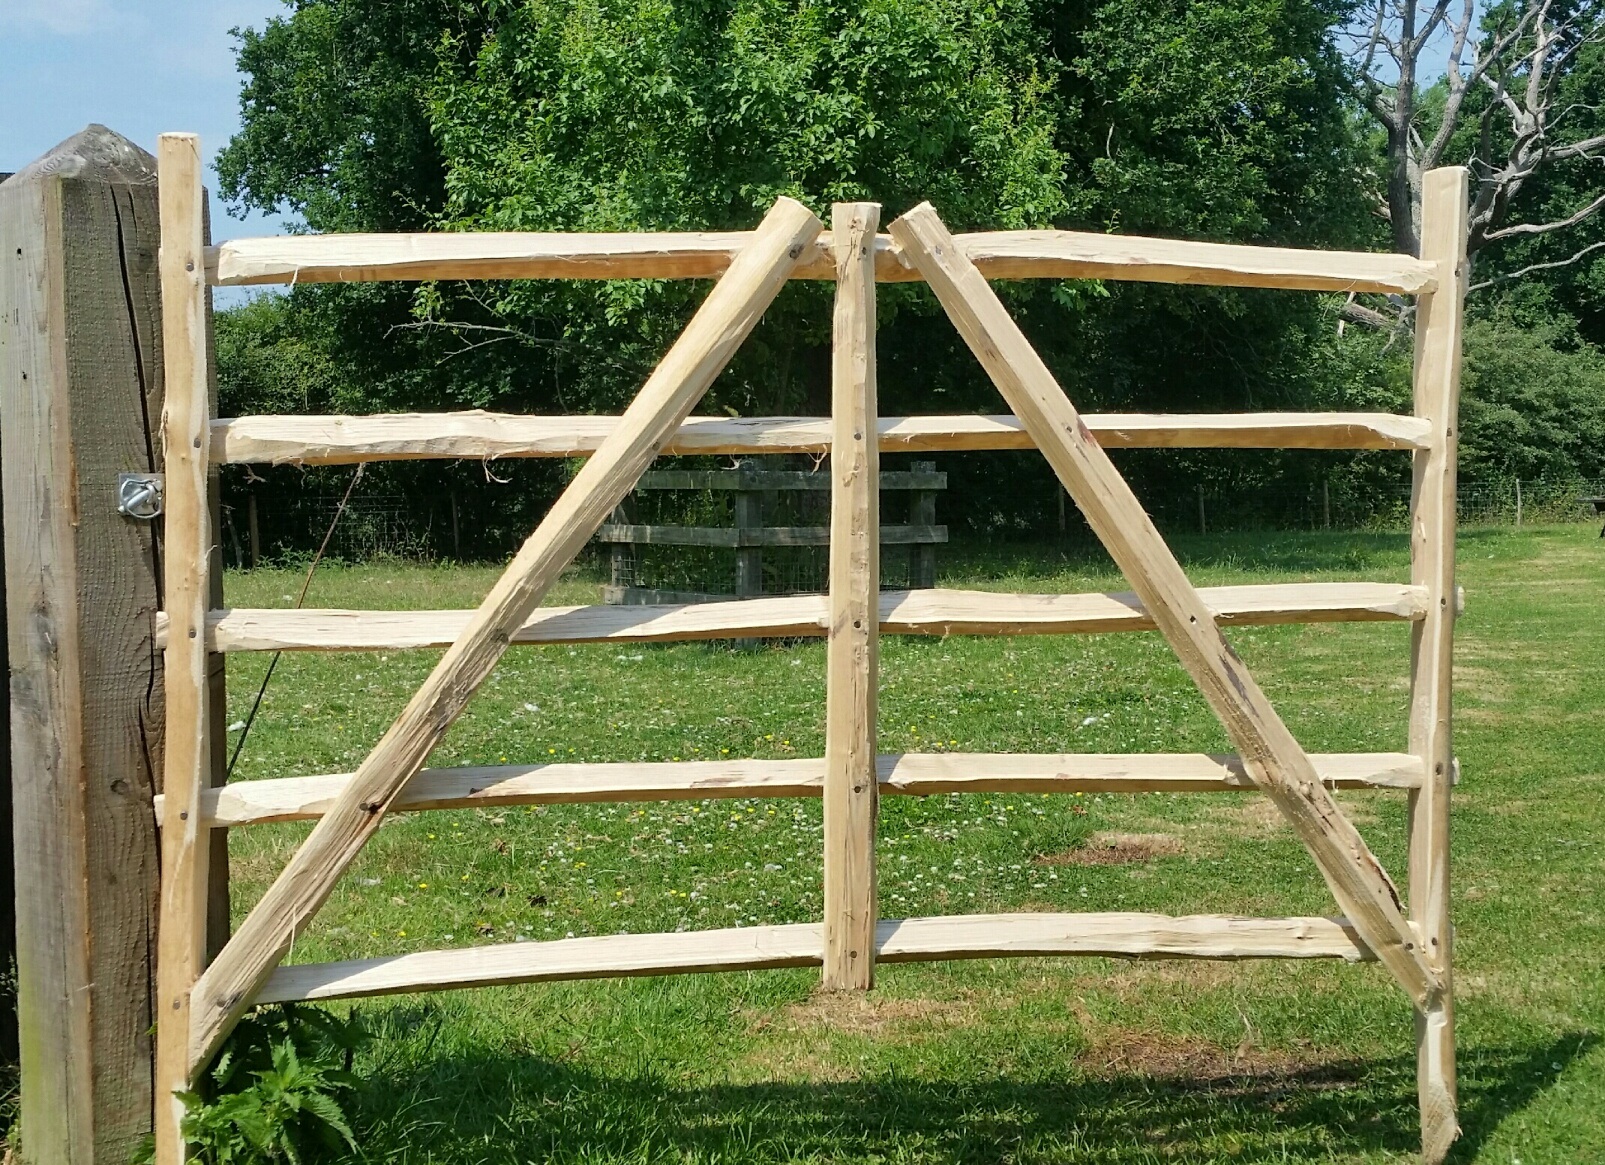
Go back to your failed cleftings and see if any will make diagonal braces or the central upright. If not, cleft some for the purpose. Cut to size and nail them on. You may have to sand/cut your bars a little to accommodate the diagonal braces and upright. Again, pilot drill your nail holes first.
Trim the tops of the ends so they stand proud of the top bar by about 10cm and hey-presto, you’ve made a hurdle!!
If that sounds like more trouble than it’s worth, I’ll make you some hurdles for £70 each. I could also make you a bespoke cleft gate to your specification if you fancied that. Drop me a line at info@conservationandaccess.co.uk
4 comments on Making a Cleft Sheep Hurdle

My Father Aaron Ginn was a six generation of sheep hurdle making, as a young boy i would visit him in a tarpaulin tent in a wood working side by side with his father Richard. They had a kind of jig on the floor
Wow!! Six generations is so impressive. You should definitely have a go at making some. The knowledge must be coursing though you veins!
There some lovely footage of a hurdle maker in old country with Jack Hargreaves, see https://youtu.be/Uhr-X9-f8aM
Your blog and Jack’s episode have inspired me to make some! Thank you!!
Hi, Thank you for the very informative post! I’m trying to make gate hurdles for sheep out of Hazel from a coppice we have on site (these will be attached to sweet chestnut stakes in the ground). I’m finding that the lengths of Hazel are twisting after I have split them. I’ve been splitting them straight after harvesting them so they’re very fresh – am I supposed to season the Hazel first? Thank you!