What’s a bug Hotel?
A bug hotel is a really cool little home full of nooks and crannies for insects to burrow into. Things like wood boring beetles, solitary bees, ladybirds, earwigs and all sorts of spectacular fiendish predatory insects like ichneumon wasps.
Lots of these minibeasts are good for controlling garden pests, but over and above that, insects are on the bottom rungs of a massive ecosystem. A healthy population of insects supports so many animals up the food chain. Some insects will use your hotel as a home; others will lay eggs in it and rear their young; some will prey on others; some will hibernate in it. And as an added bonus, they can be a fabulous piece of textural garden art – a real talking point.
The one I’m showing how to build is the daddy of bug hotels and would cost £1,200 if you wanted to buy it. However, you can scale it down and make a much more modest sized hotel/apartment. They look cool and they’re good for the environment so what’s not to like? If you wanted us to make you one, prices start from £50 for a modest version. Feel free to ping me an e-mail with your ideas for a bug hotel and I’ll call you back info@conservationandaccess.co.uk If you fancy having a bash at making your own, read on…..
What do I make my Bug Hotel out of?
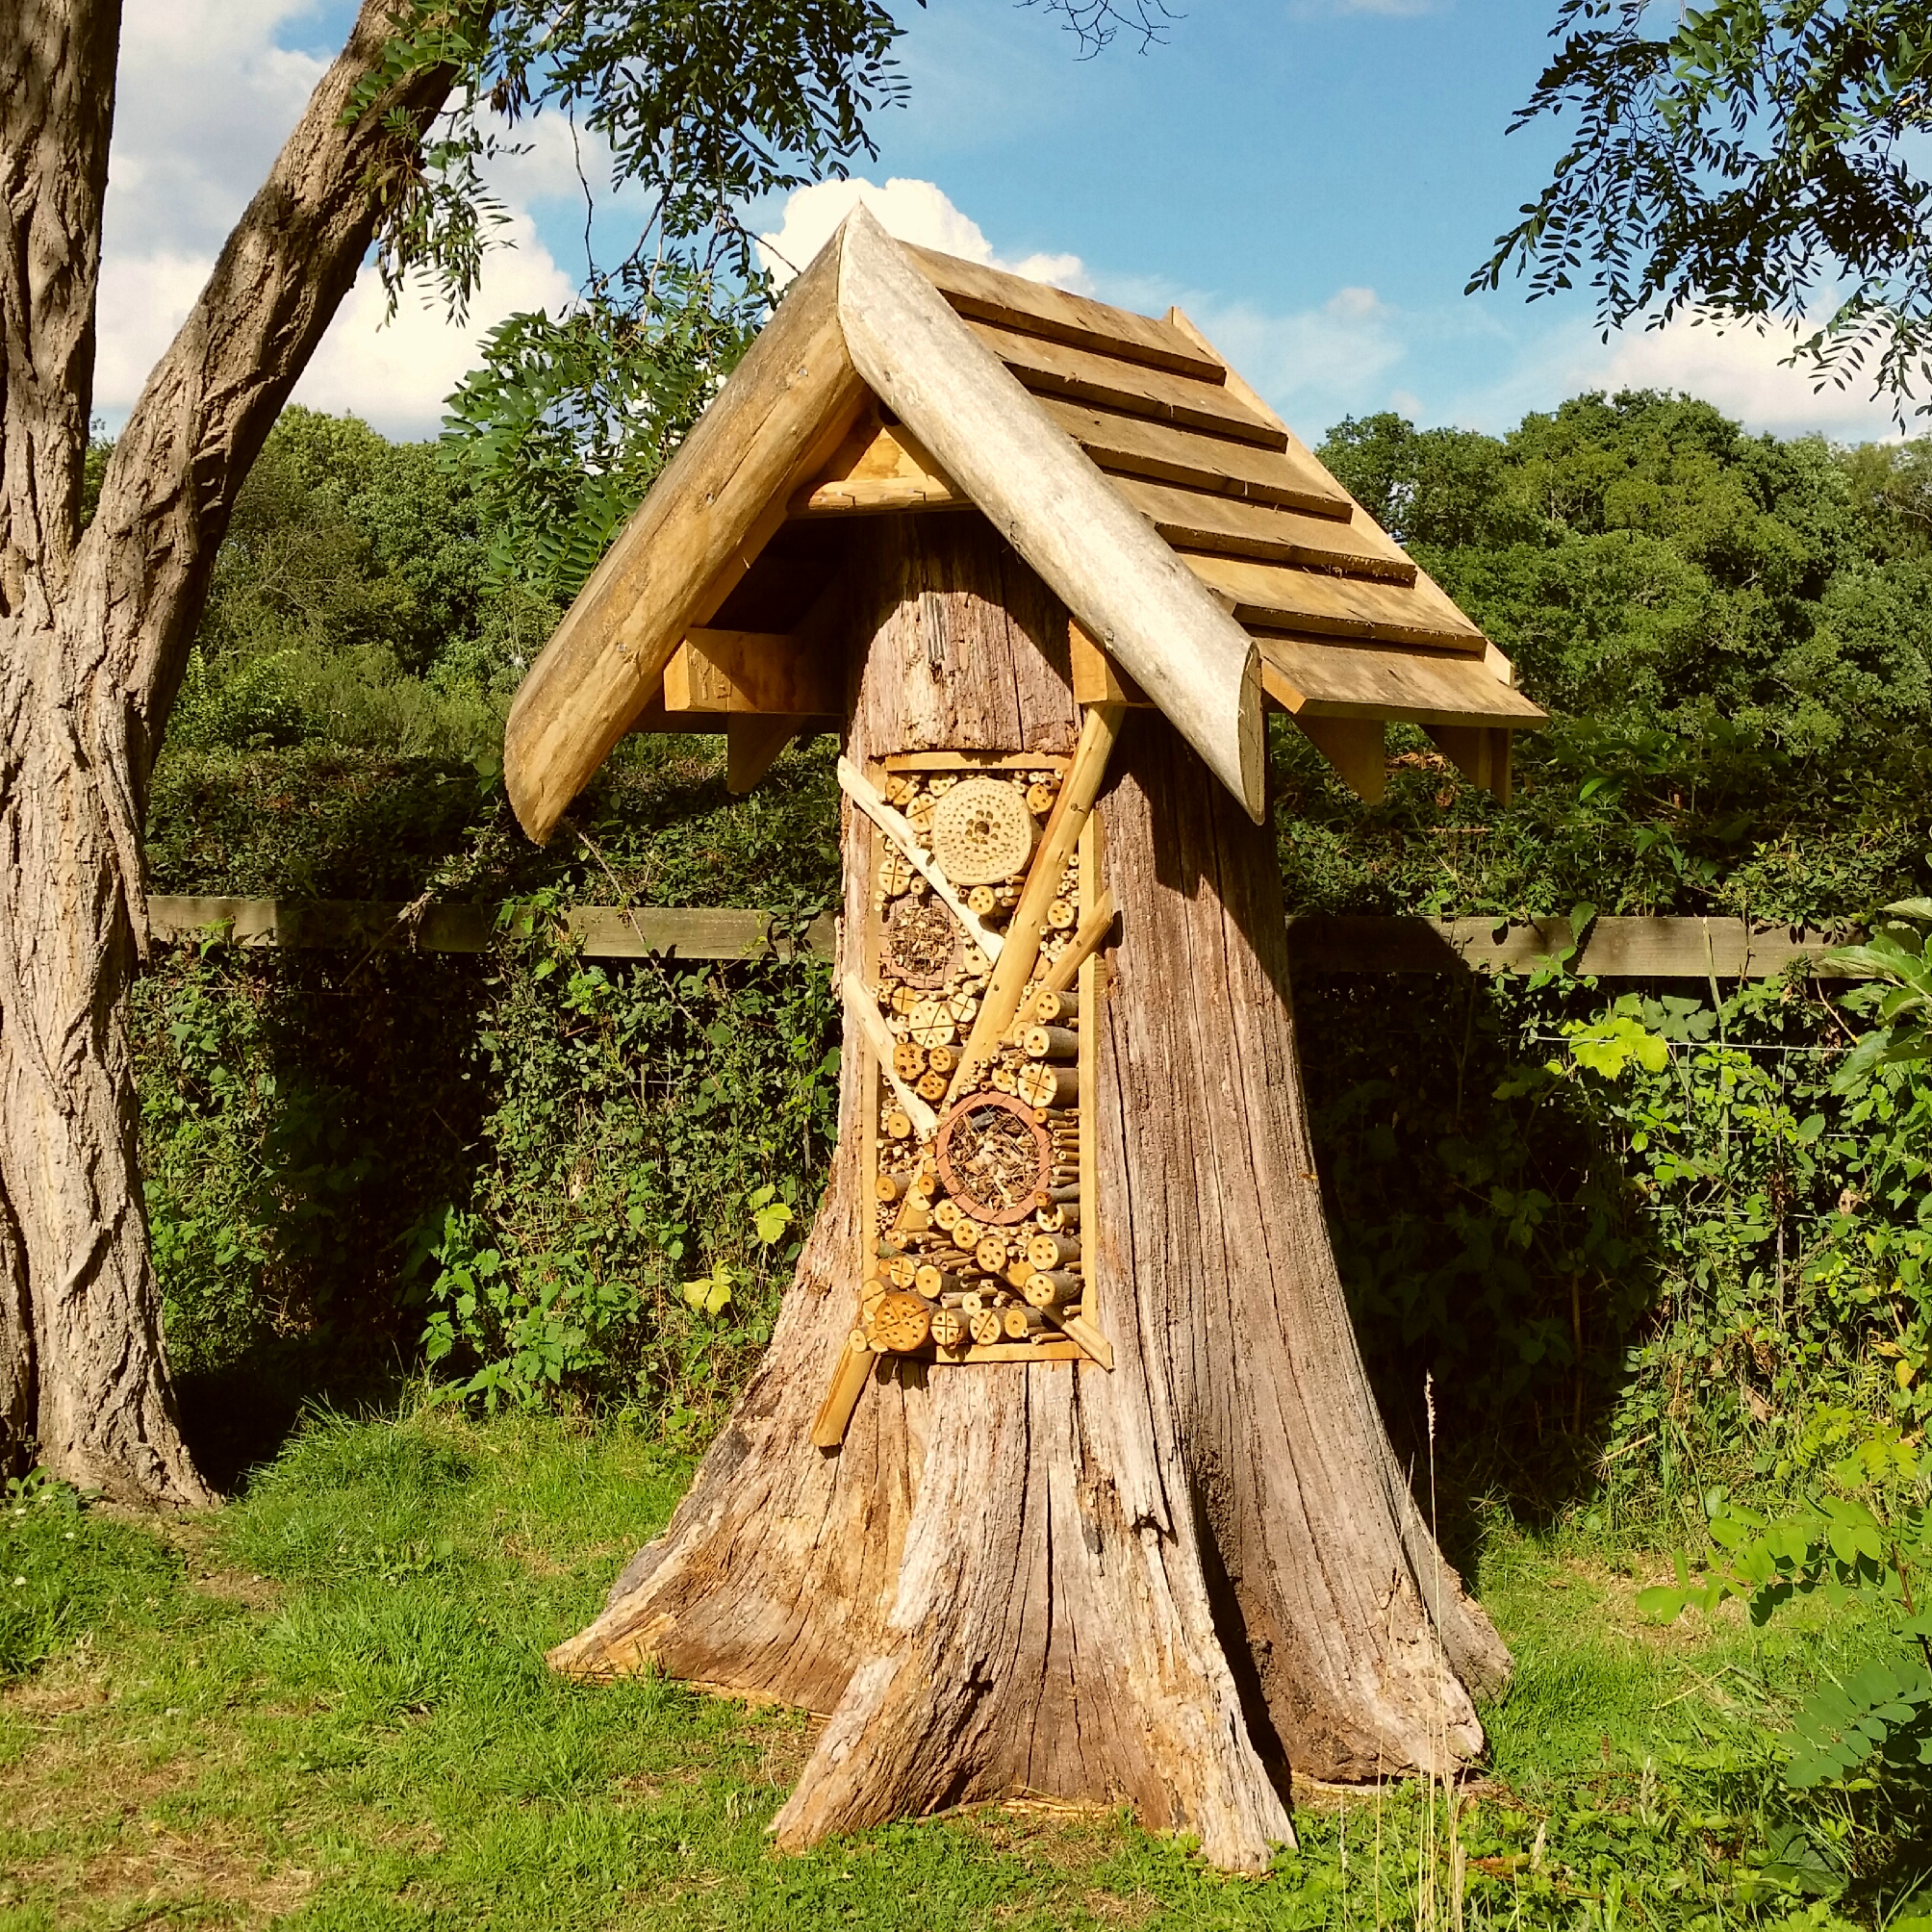
Basically you need to create lots of little compartments and stuff them full of natural materials that allow insects to burrow in and feel safe. You can nail bits of wood together to make a box full of cubby-holes, but the one I’ve made is from an old oak tree stump, which I think looks really cool, (even if I do say so myself). I’d love to make one in a standing tree stump from a tree that had to be felled. So if you’ve got a tree that needs felling, don’t cut it off at the ground. Leave a good six foot standing and give me a call or make your own insect tower.
If you don’t have a tree and want to make one like mine, find your gnarly old tree stump with lots of character. Windblown trees are idea as there are likely to be some nice rooty buttresses that look great. Unlike my advice for the Hedgehog House (check that blog out too please), a bit of sapwood still on the trunk is good as insects will burrow into it. Oak is great for this, and it’s durable so it’ll last.

When you cut your stump from the rest of the tree, keep as much buttress as possible. You can always trim it again when you get home if necessary. Remember you need to strike a deal with the landowner before you crack on and help yourself! These things are heavy!! You’ll need kit to move it, but assuming you’ve got it home, you’ve made a great start.
You need to keep your bug hotel dry…so some sort of roof is needed
Stand your stump up and ensure you are happy it roughly stands upright. Trim the bottom as necessary to achieve this. Once you’re happy its upright, have a walk round your tree stump and decide which is the most attractive side in terms of roots buttresses and character. You want the best features to be on display at the front.
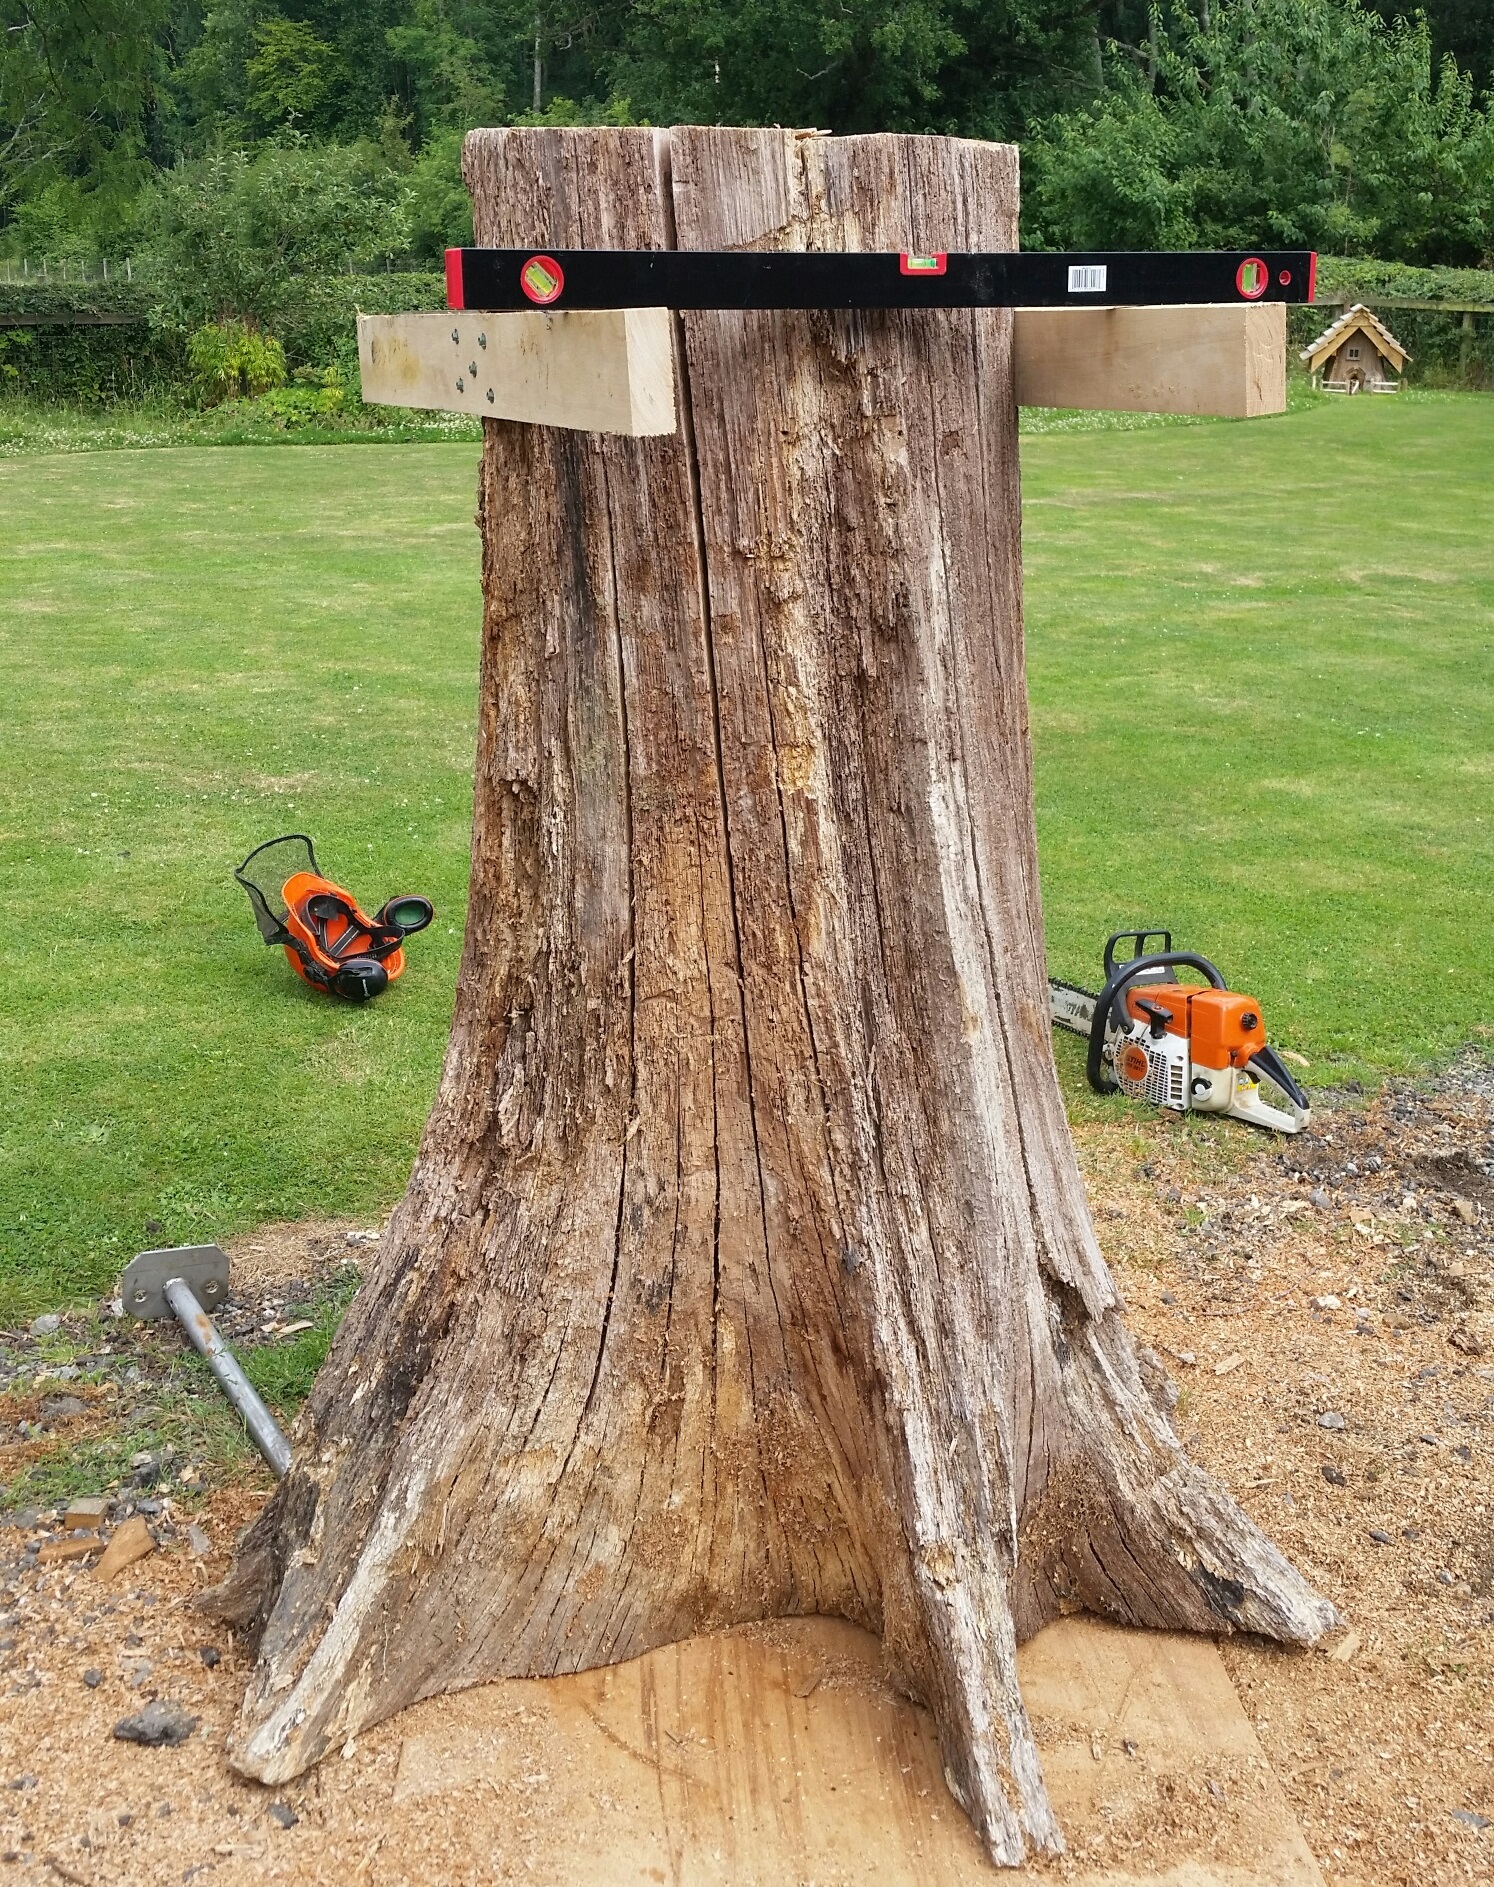
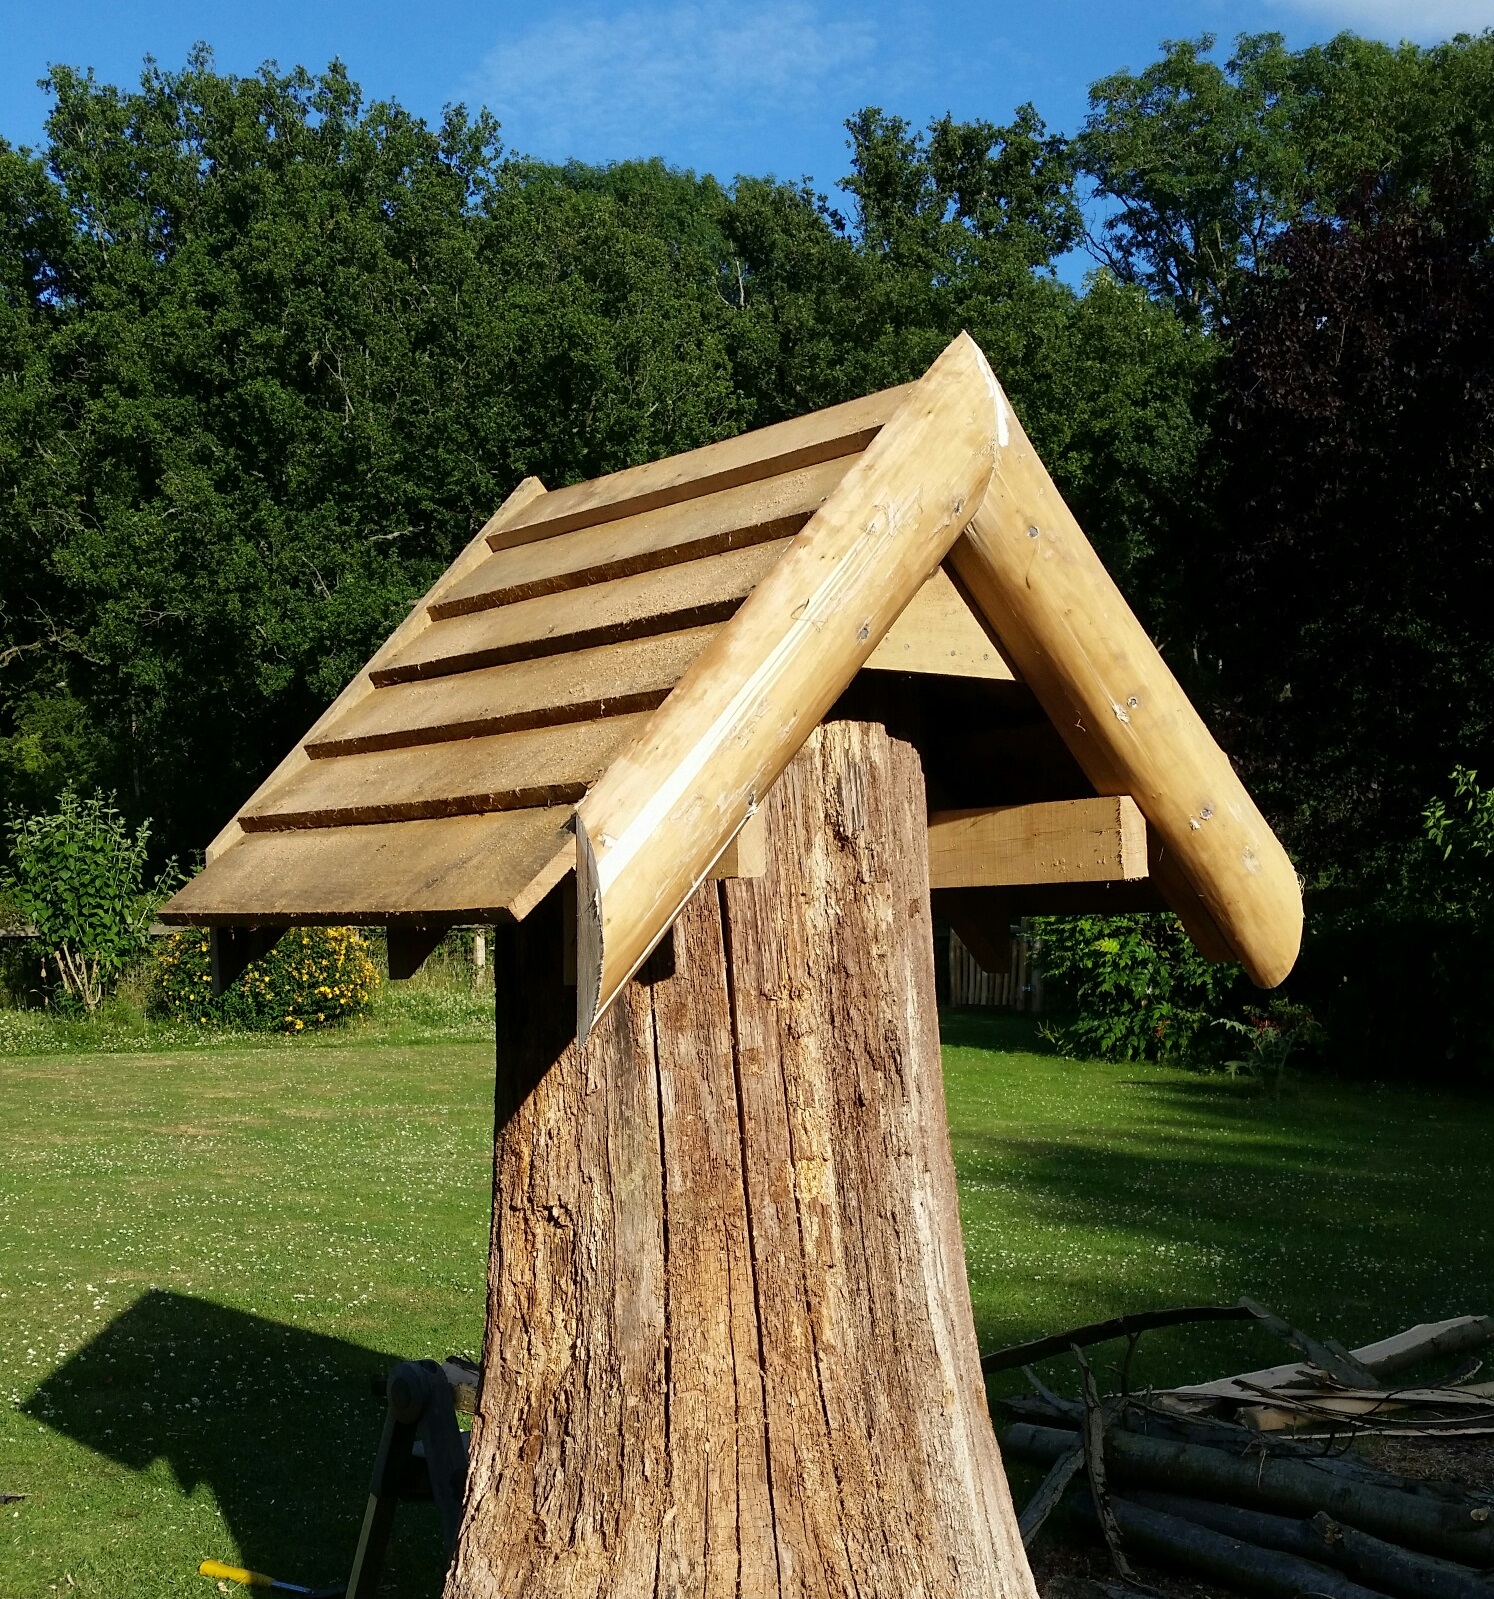
Having decided which is the front and back, chainsaw some stots into the sides and attach your roof plates. Make sure you get these horizontal and parallel with each other. This can be a bit fiddly, but important to get right or you’ll be all over the place cutting loads of different angles when building your roof. I used 2” x 3” for mine and used landscape/sleeper screws wound in with an impact driver. They really hold hard!
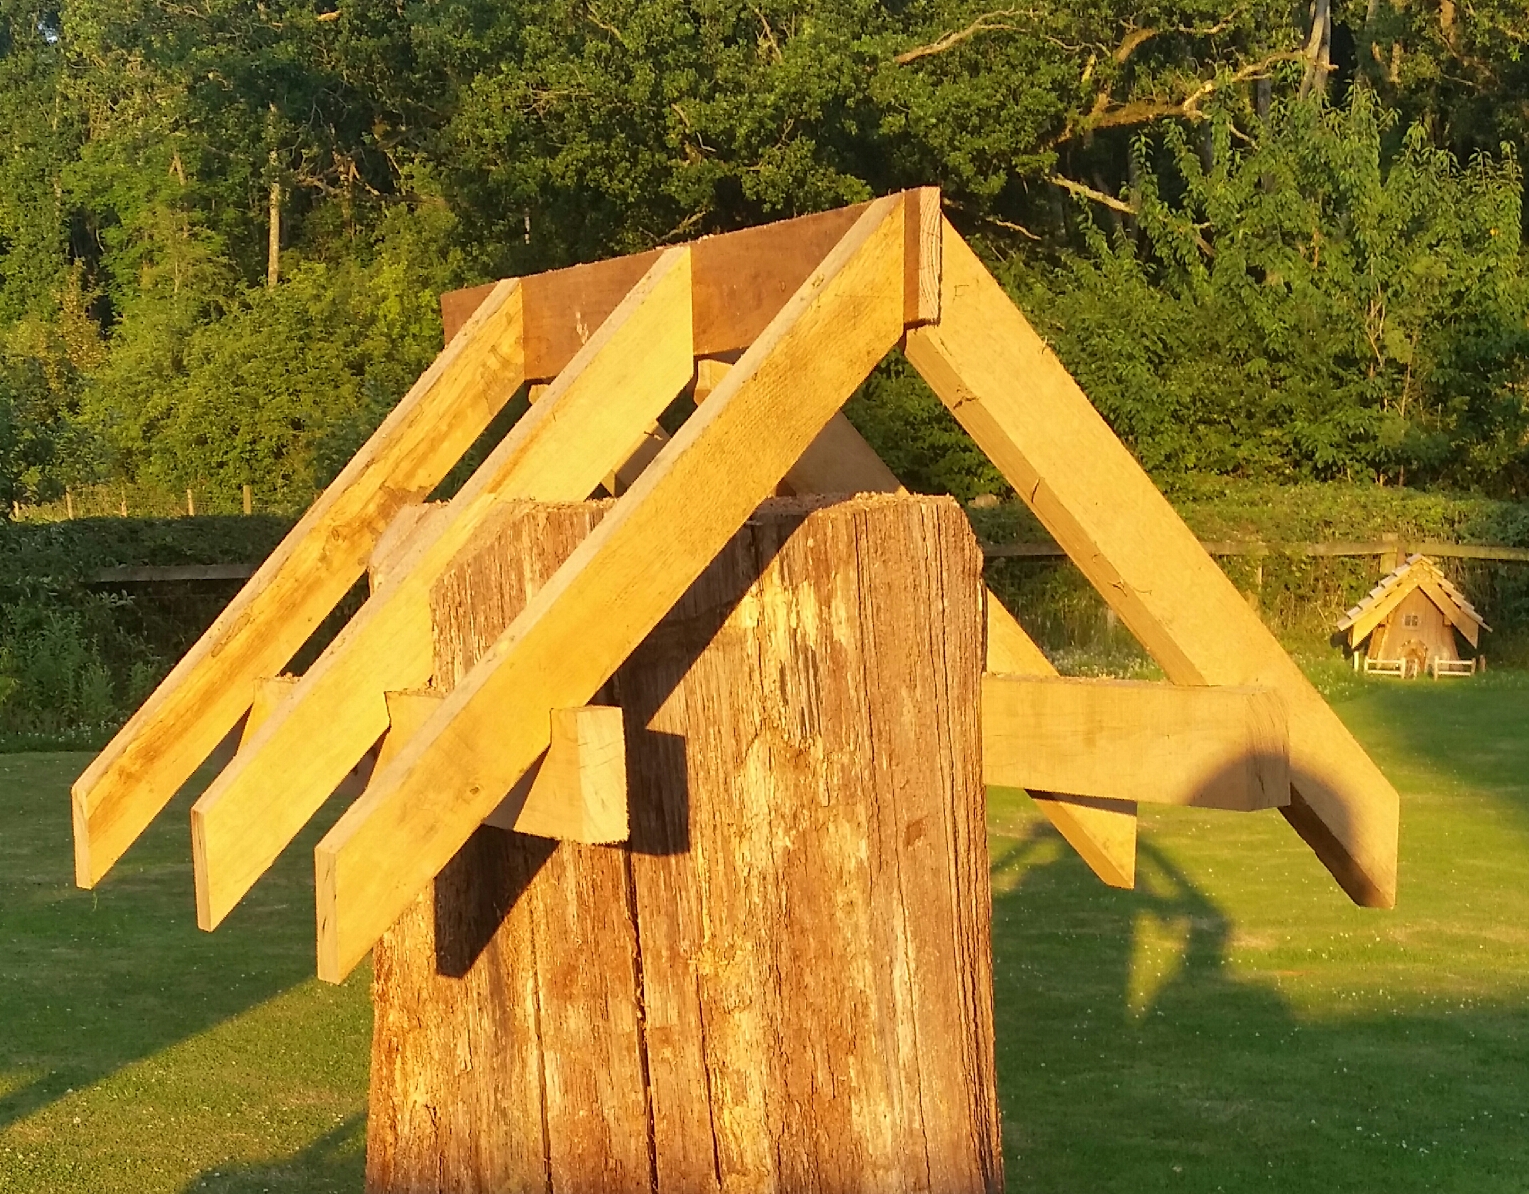
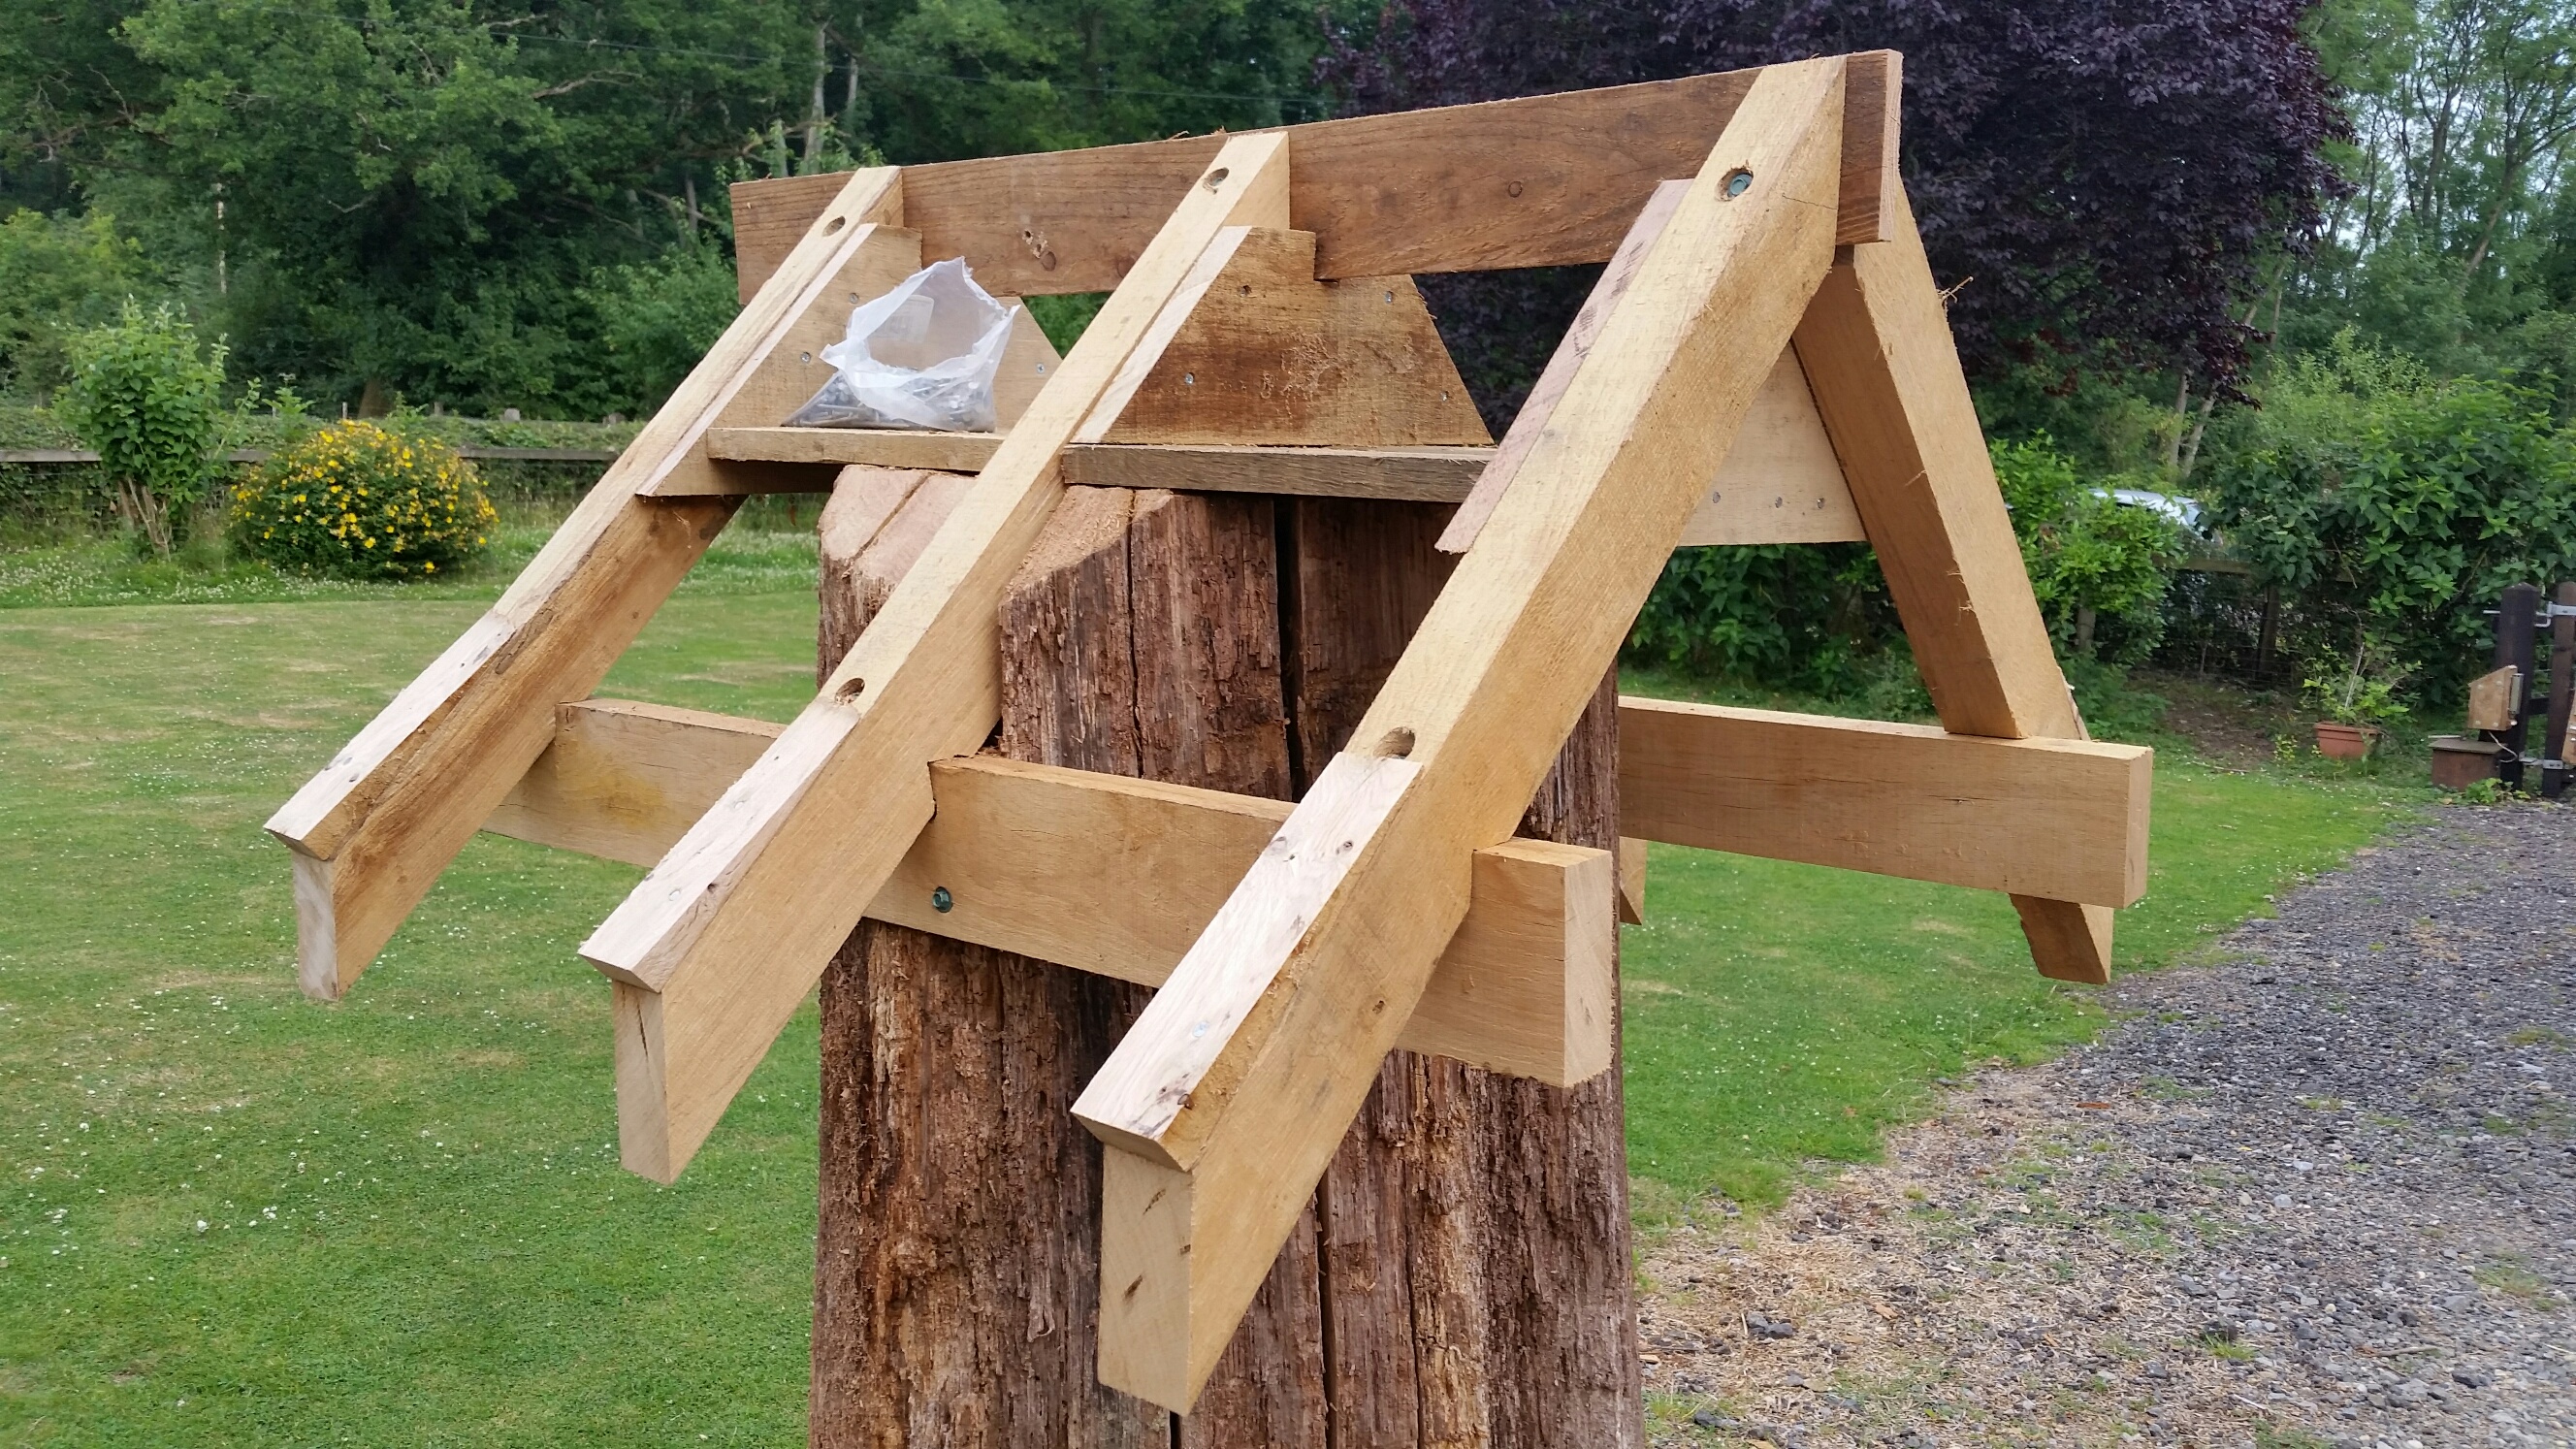
Then attach you’re a-frame to the roof-plates at the desired angle. You can decide your own pitch and overhang, but my roof angle is roughly 45 degrees. I use landscape/sleeper screws again for this. They grip so well!
I had a bit of a gap between my stump and the apex of the roof, so I thought I’d build in a couple of bird boxes. A great use of space if a family of birds decide to use it and a garden can never have too many bird boxes. For this you need to screw some oak to the gable end and some more for the floor of your bird box so the chicks don’t fall out. I did this for the front and rear with a divider in the middle to create two nesting spaces. I’m pleased I put that roof space to good use. The final touch is drilling a hole in the front and rear gable end so little birds can get in. Likely suspects to bring on the pitter-patter of tiny bird feet are blue tits or great tits.
Having finished your a-frame you need to make some little wedges that are nailed beneath your first roofing plank. These wedges need to start a little thicker than your plank and taper down to nothing. If you didn’t make the wedges, your bottom plank would be a different angle to rest and would look odd. (Hopefully the pictures explain this better than my rambling text!)
Then nail on your roofing planks overlapping them as go up the roof. It’s a good idea to drill pilot holes so you don’t split them, especially if you’re using oak. Sweet chestnut or cedar shingles would also look fabulous. Oak is good as it will last well, especially if you ensure there is no sapwood.
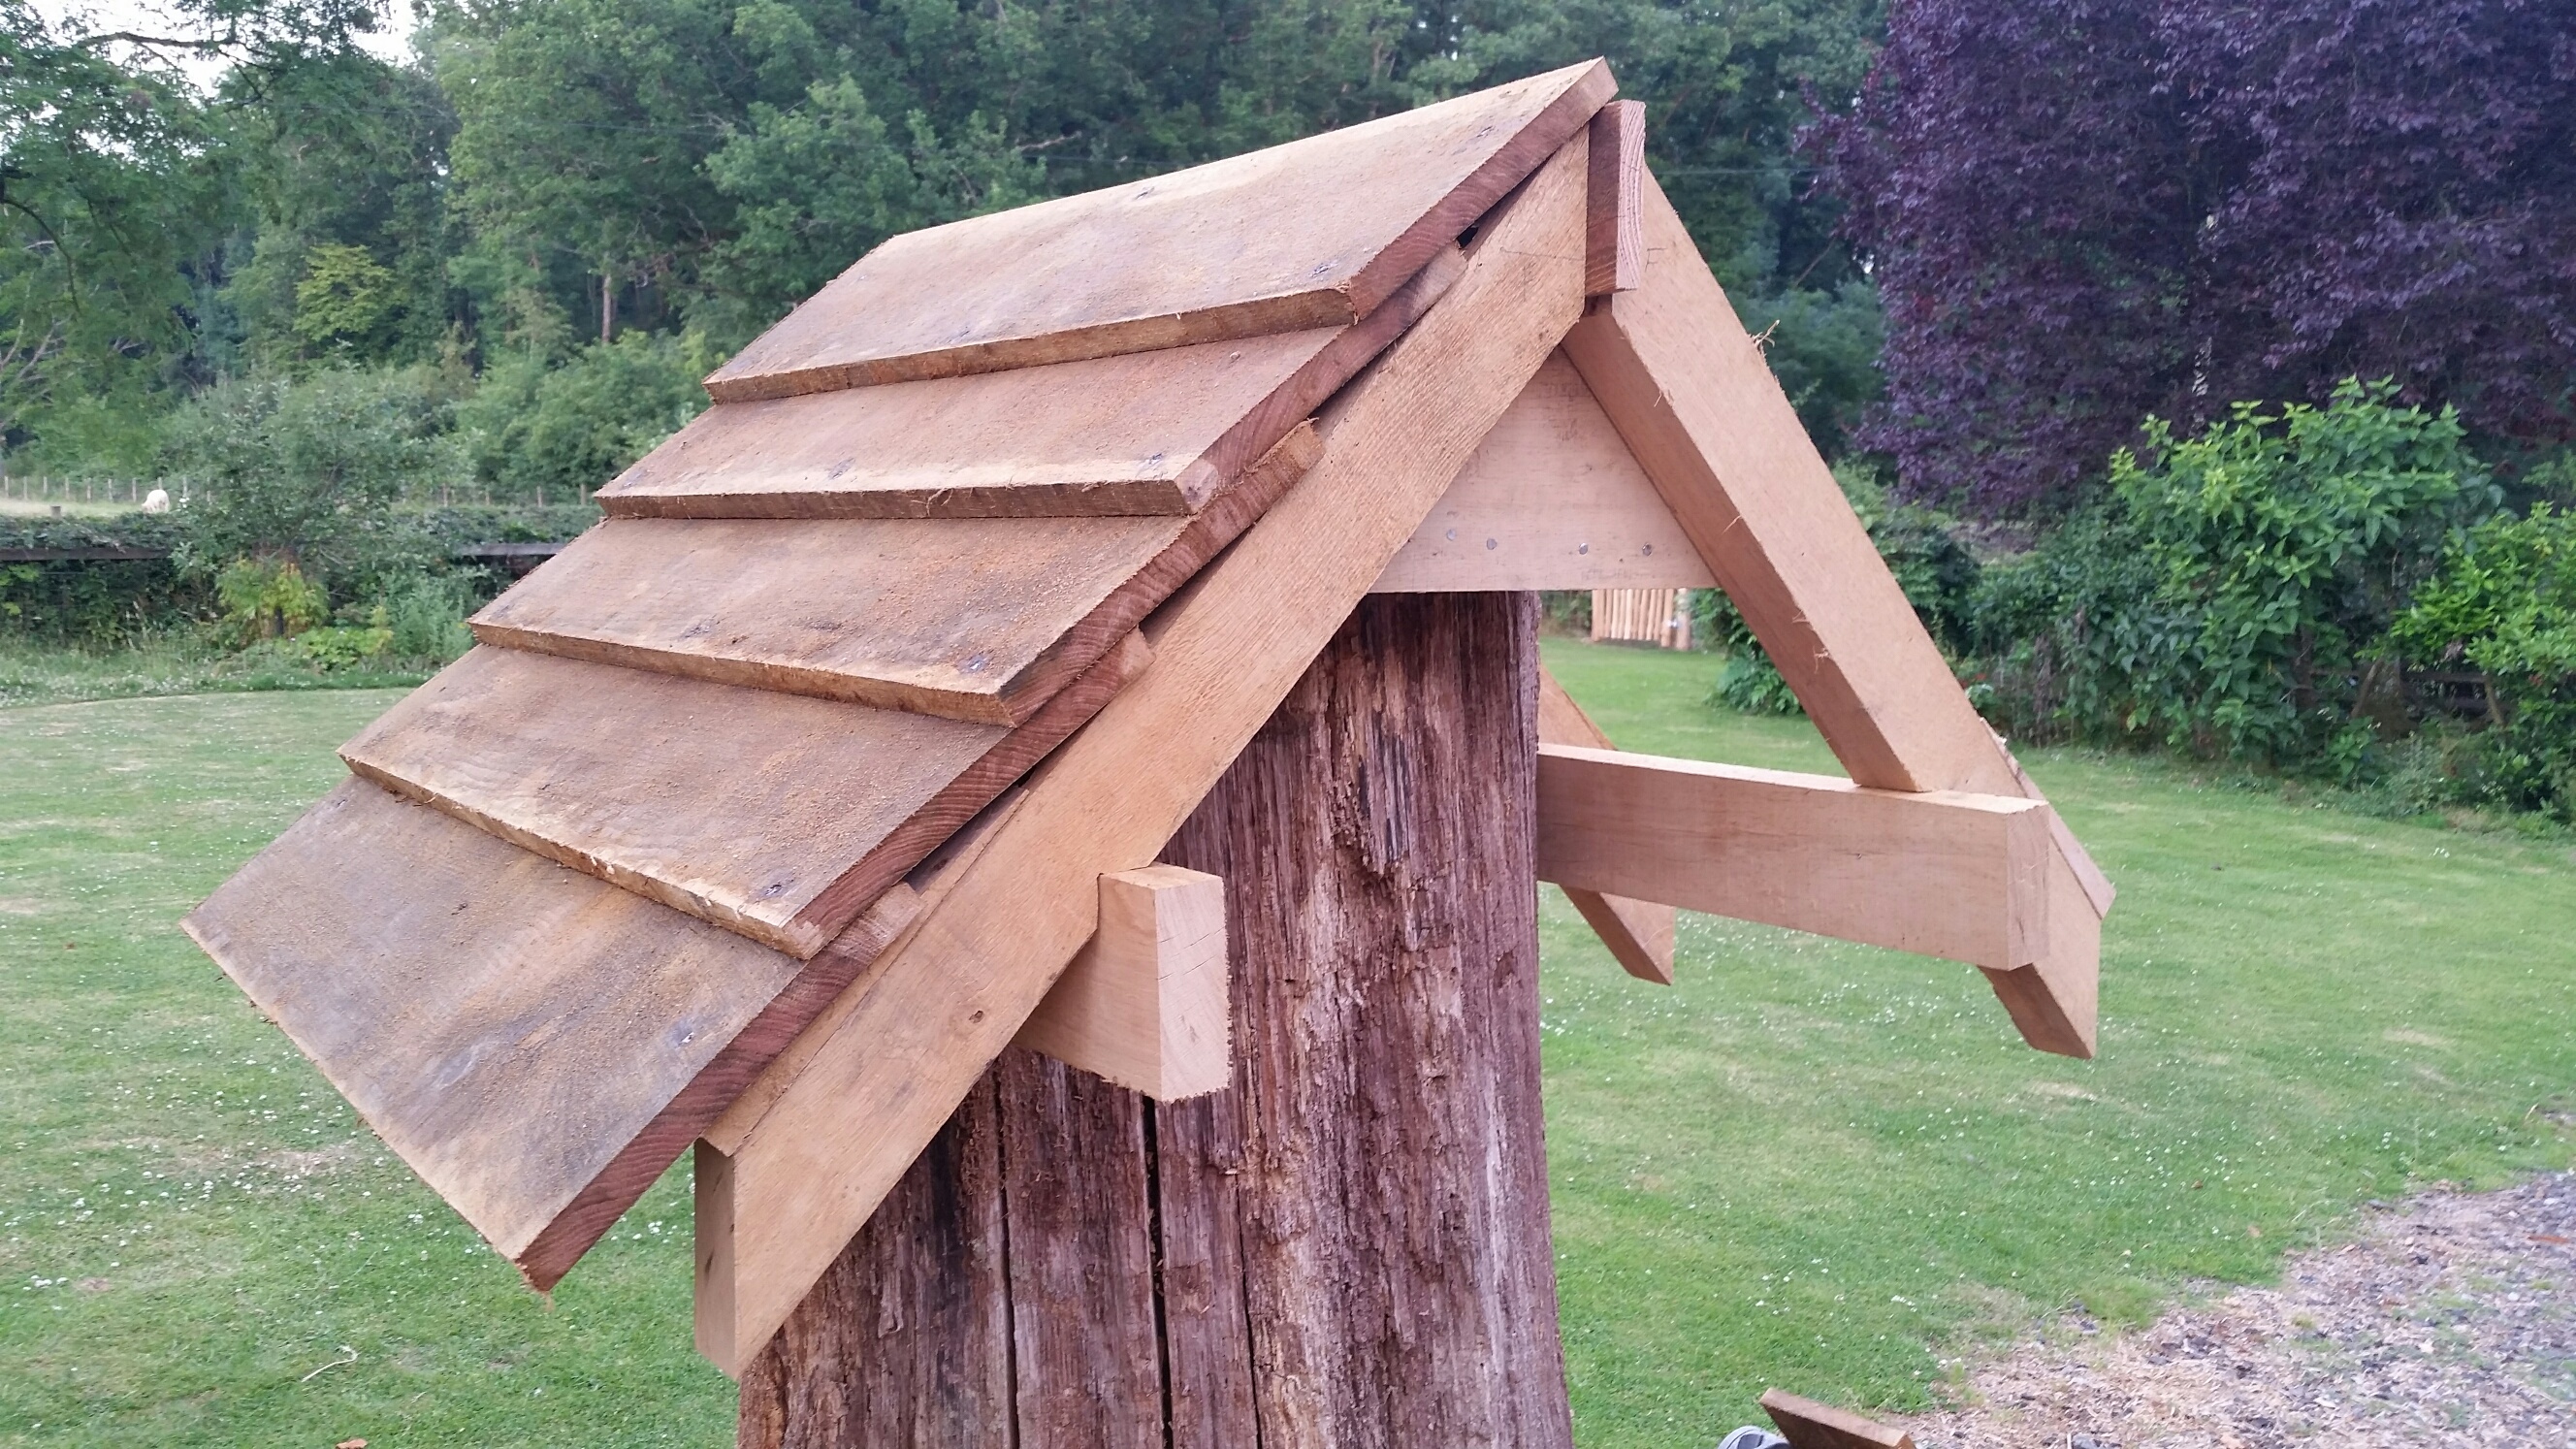
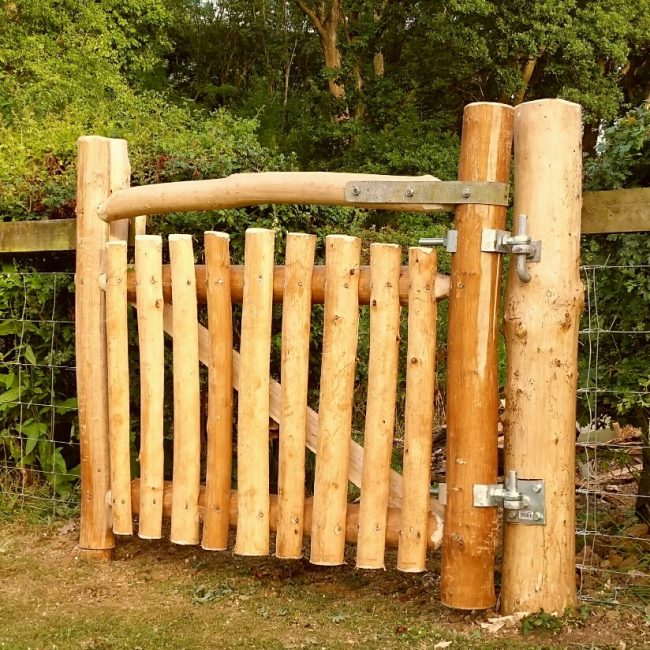
I coppiced, clefted and peeled some sweet chestnut for my facia to cover the roofing planks. I like the natural look of the peeled chestnut. (Check out my sheep hurdle and gate post for coppicing and clefting)
So the roof is made, now for the apartments
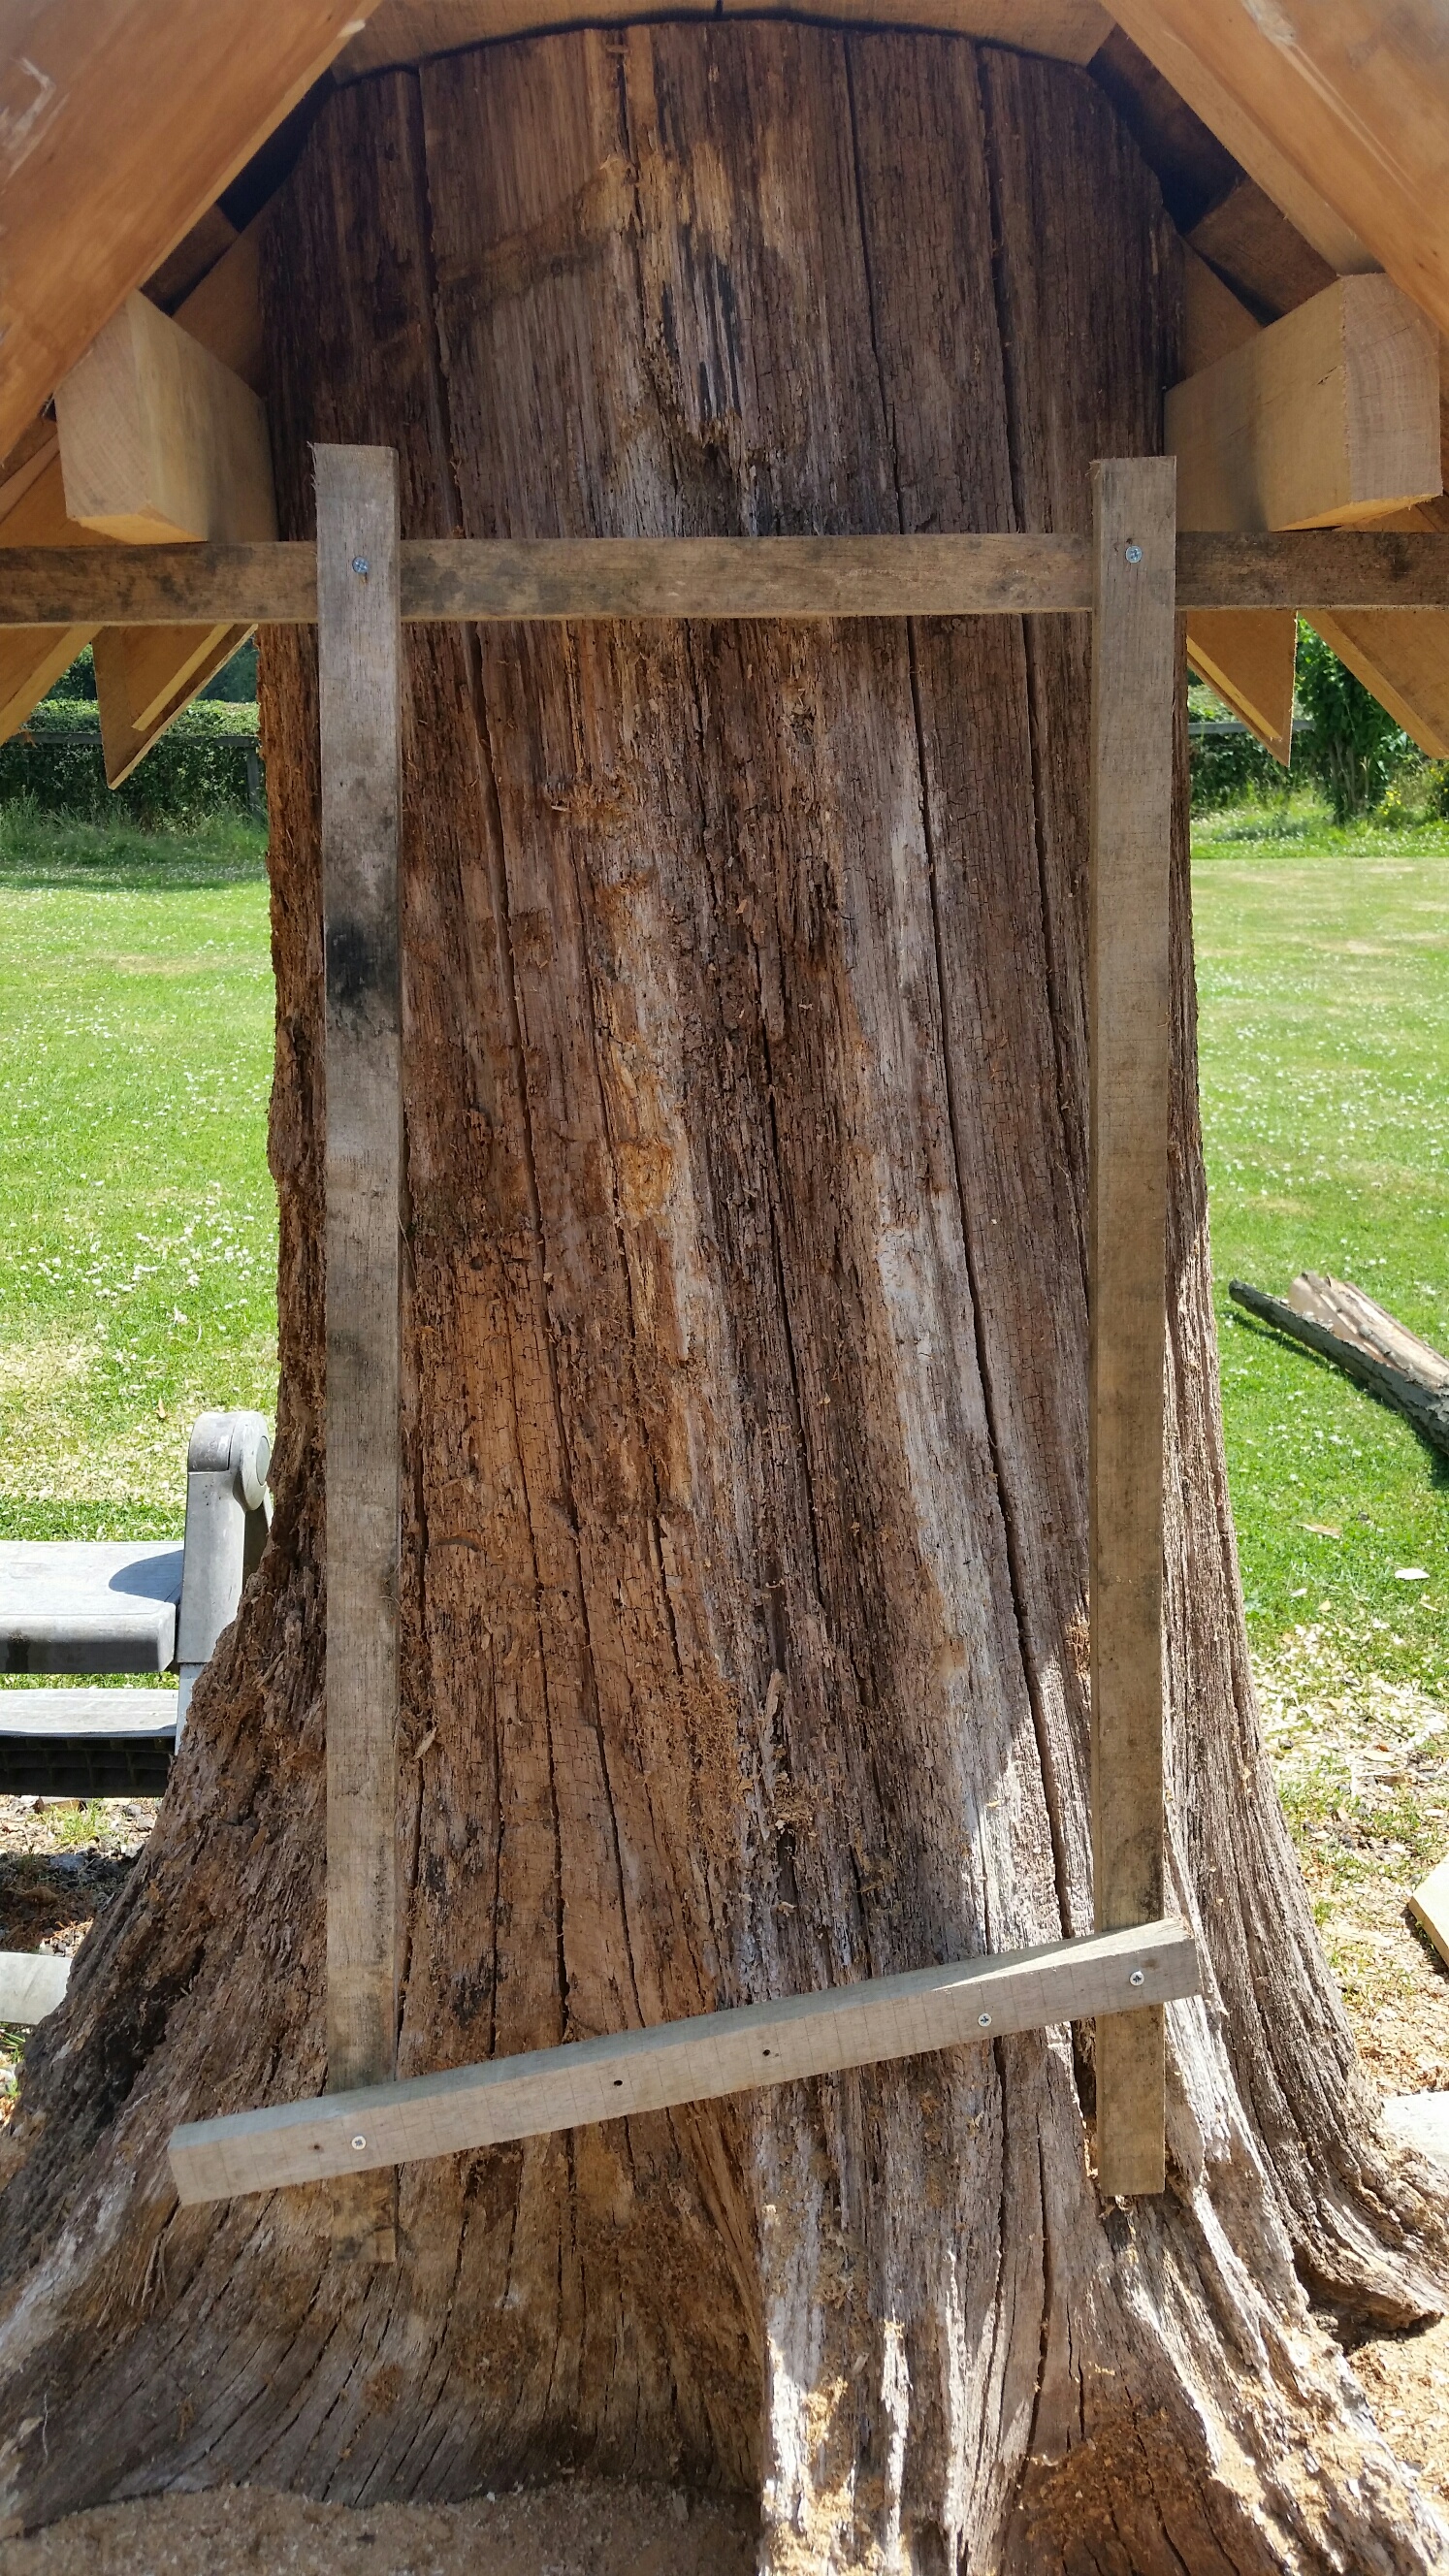
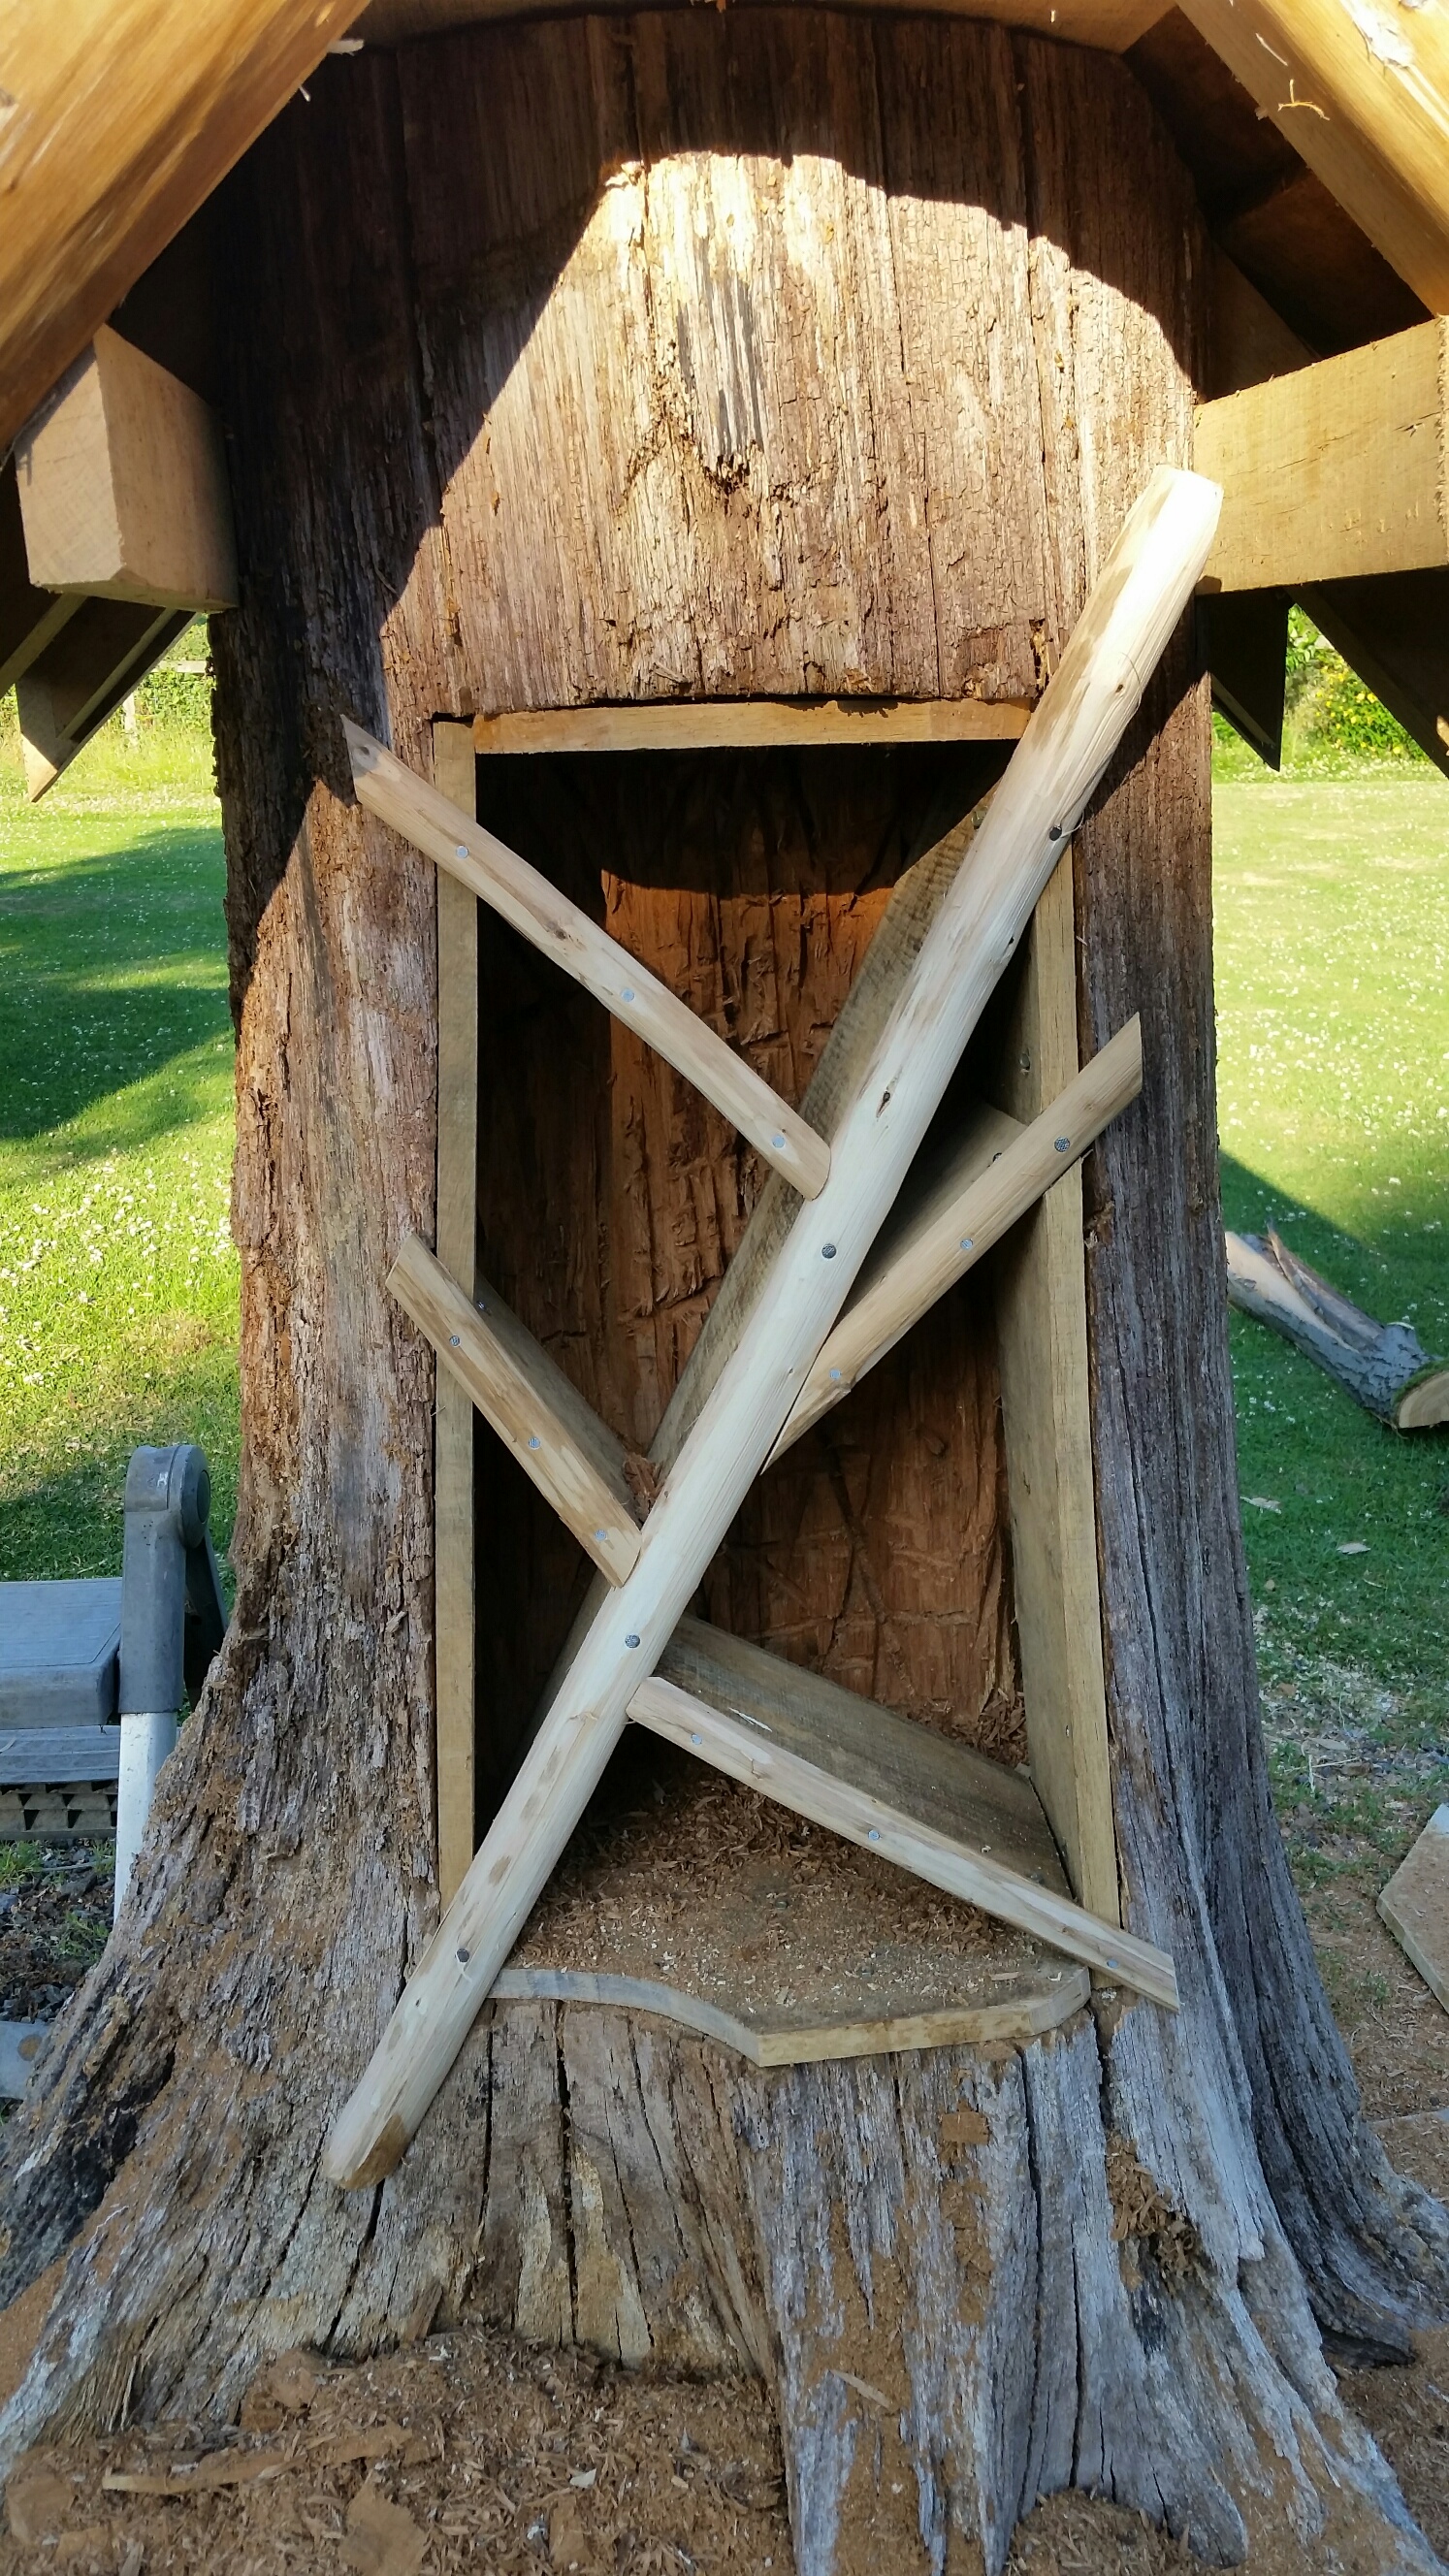
Eye up your stump and decide what shape you want to carve out of it. The shape of the tree might offer you some inspiration for the size and shape of the hotel. I made up a bit of a guide from some batten as it’s sometimes difficult to follow imaginary lines when the chainsaw is buzzing and woodchips are flying everywhere.
 Once you’ve decided the size and shape of your hole, chainsaw it out. That’s easier said than done. You need to keep carving out slots and then come in again on a different angle. Eventually you’ll carve out a nice recess around a foot or so deep. Beware of kick-back when using the nose of the chainsaw on hard oak!
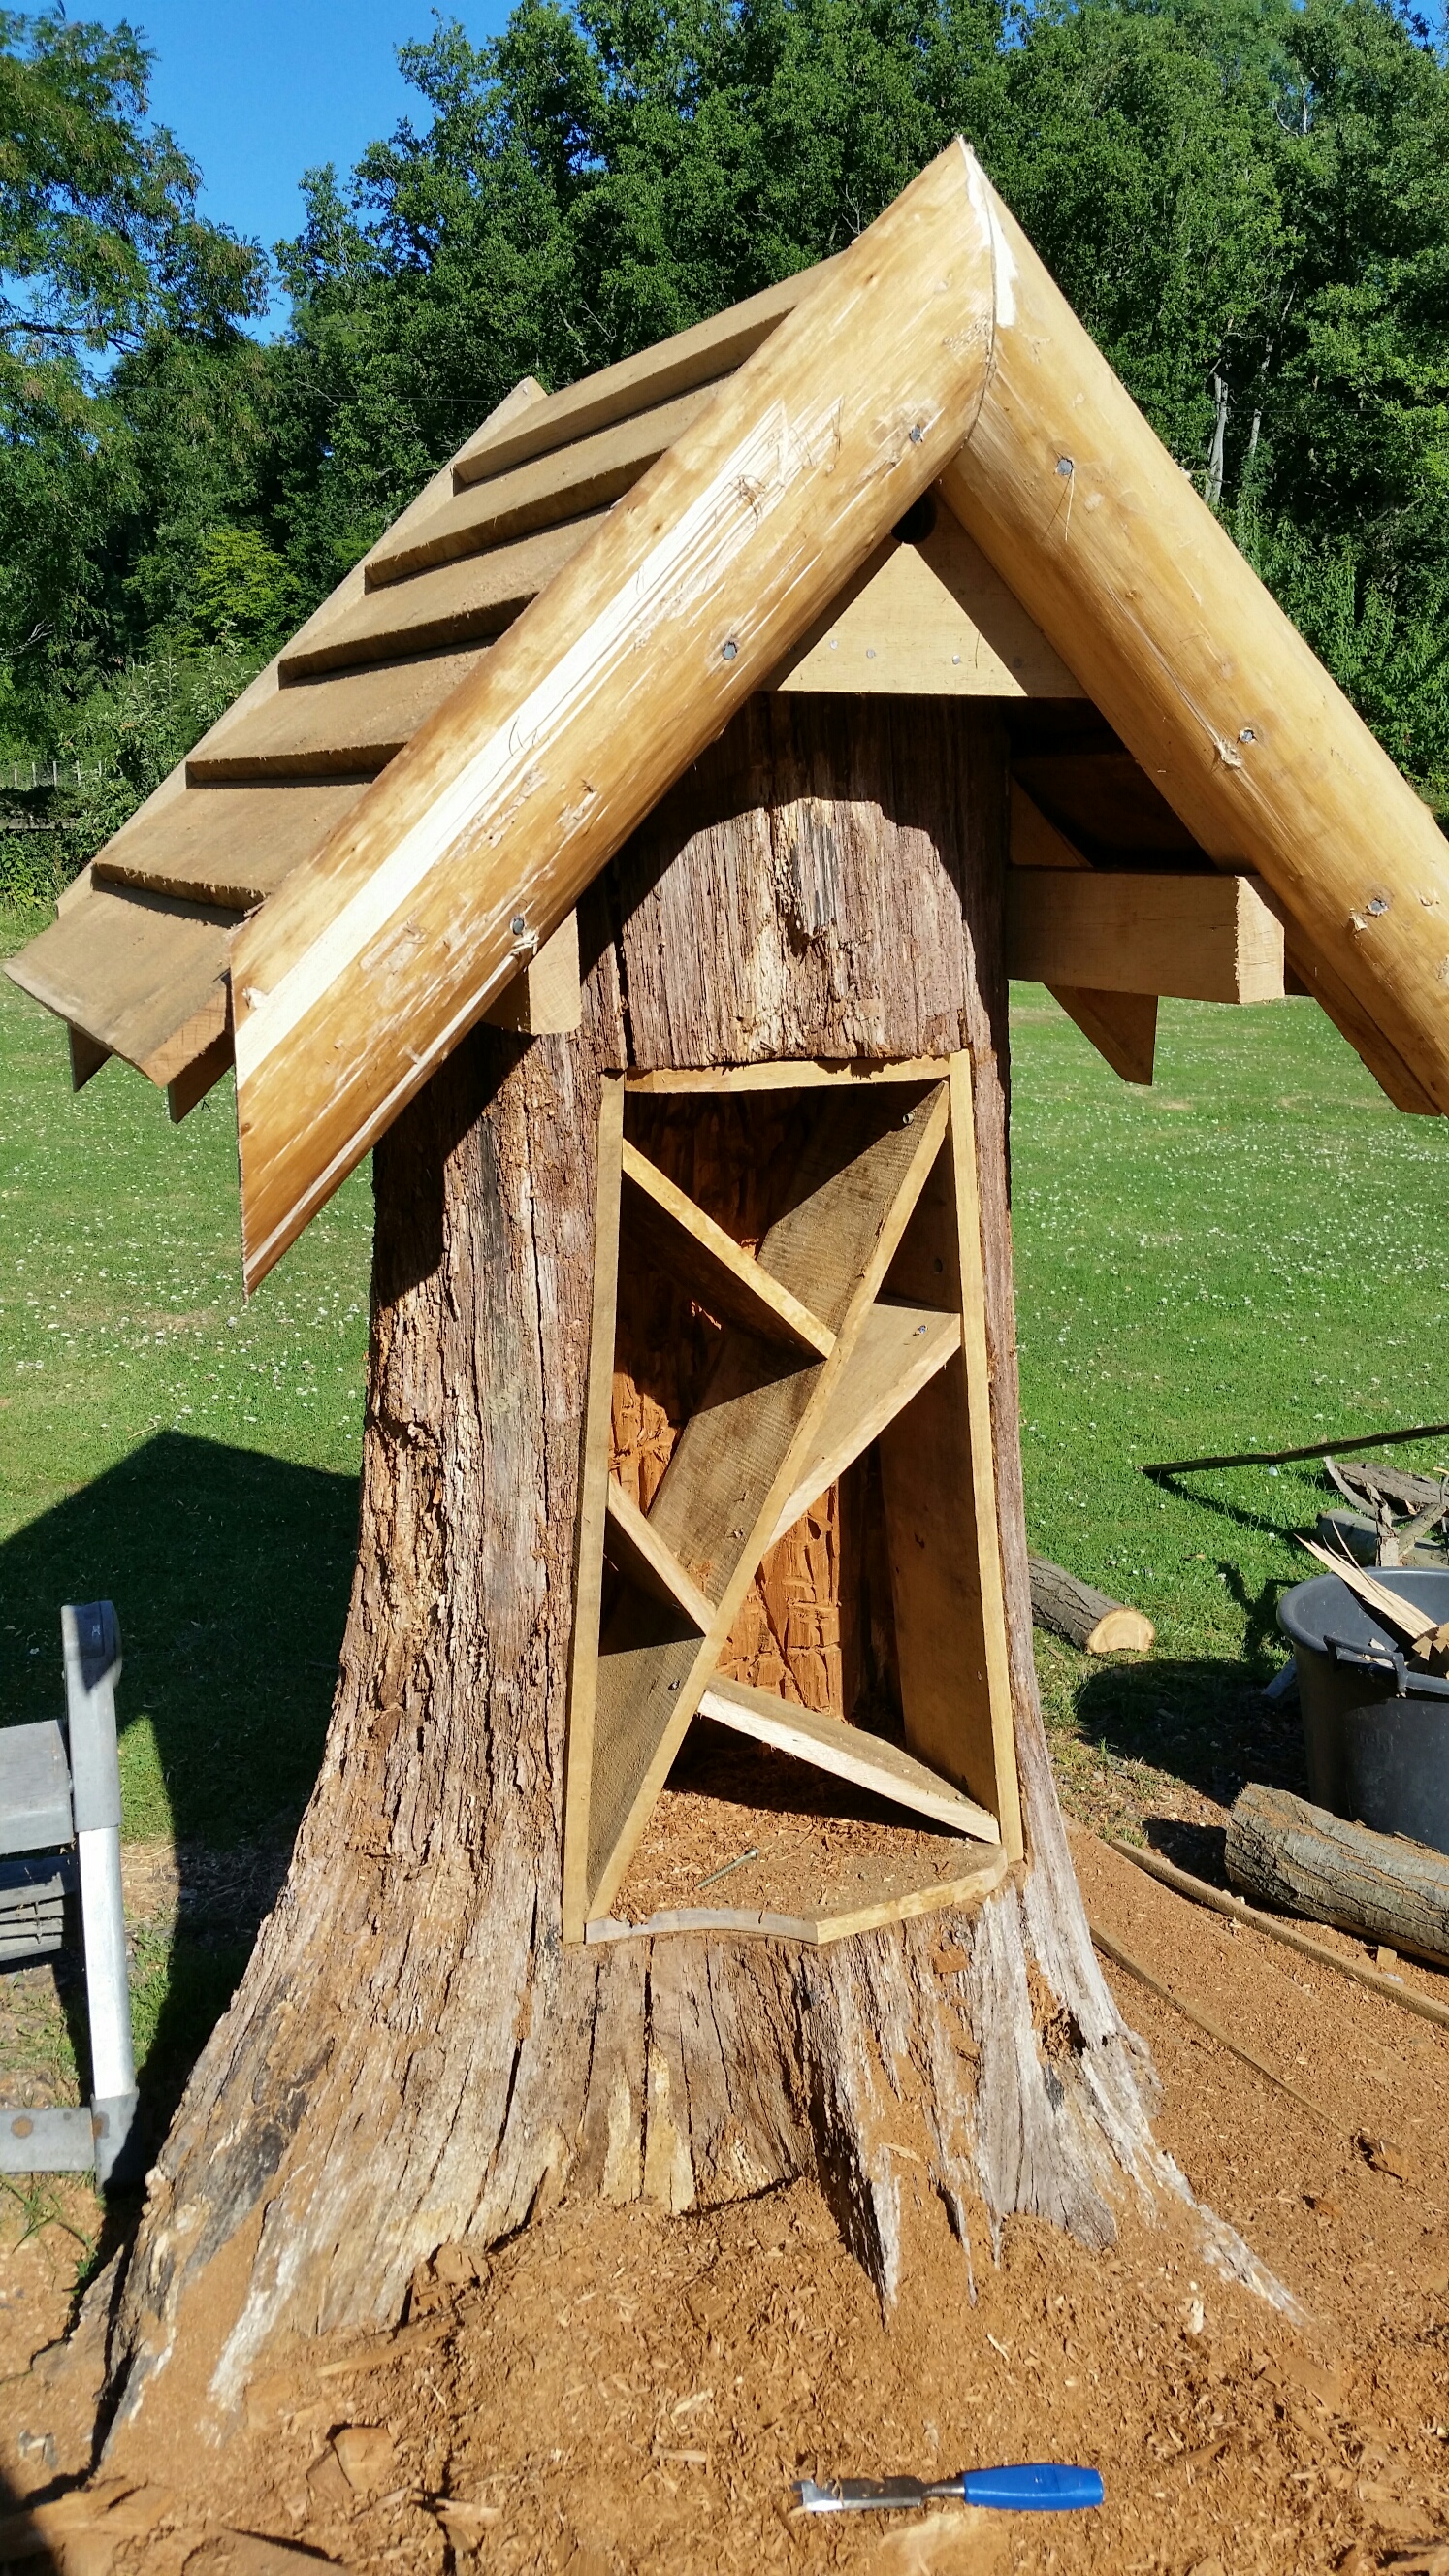 Then line your recess with planks of oak and divide your hole with more planks. I went for an organic leaf shape to divide my compartments up, but you can be more regimental if you like. I then nailed on some more cleft and peeled chestnut to soften the look of the milled planks
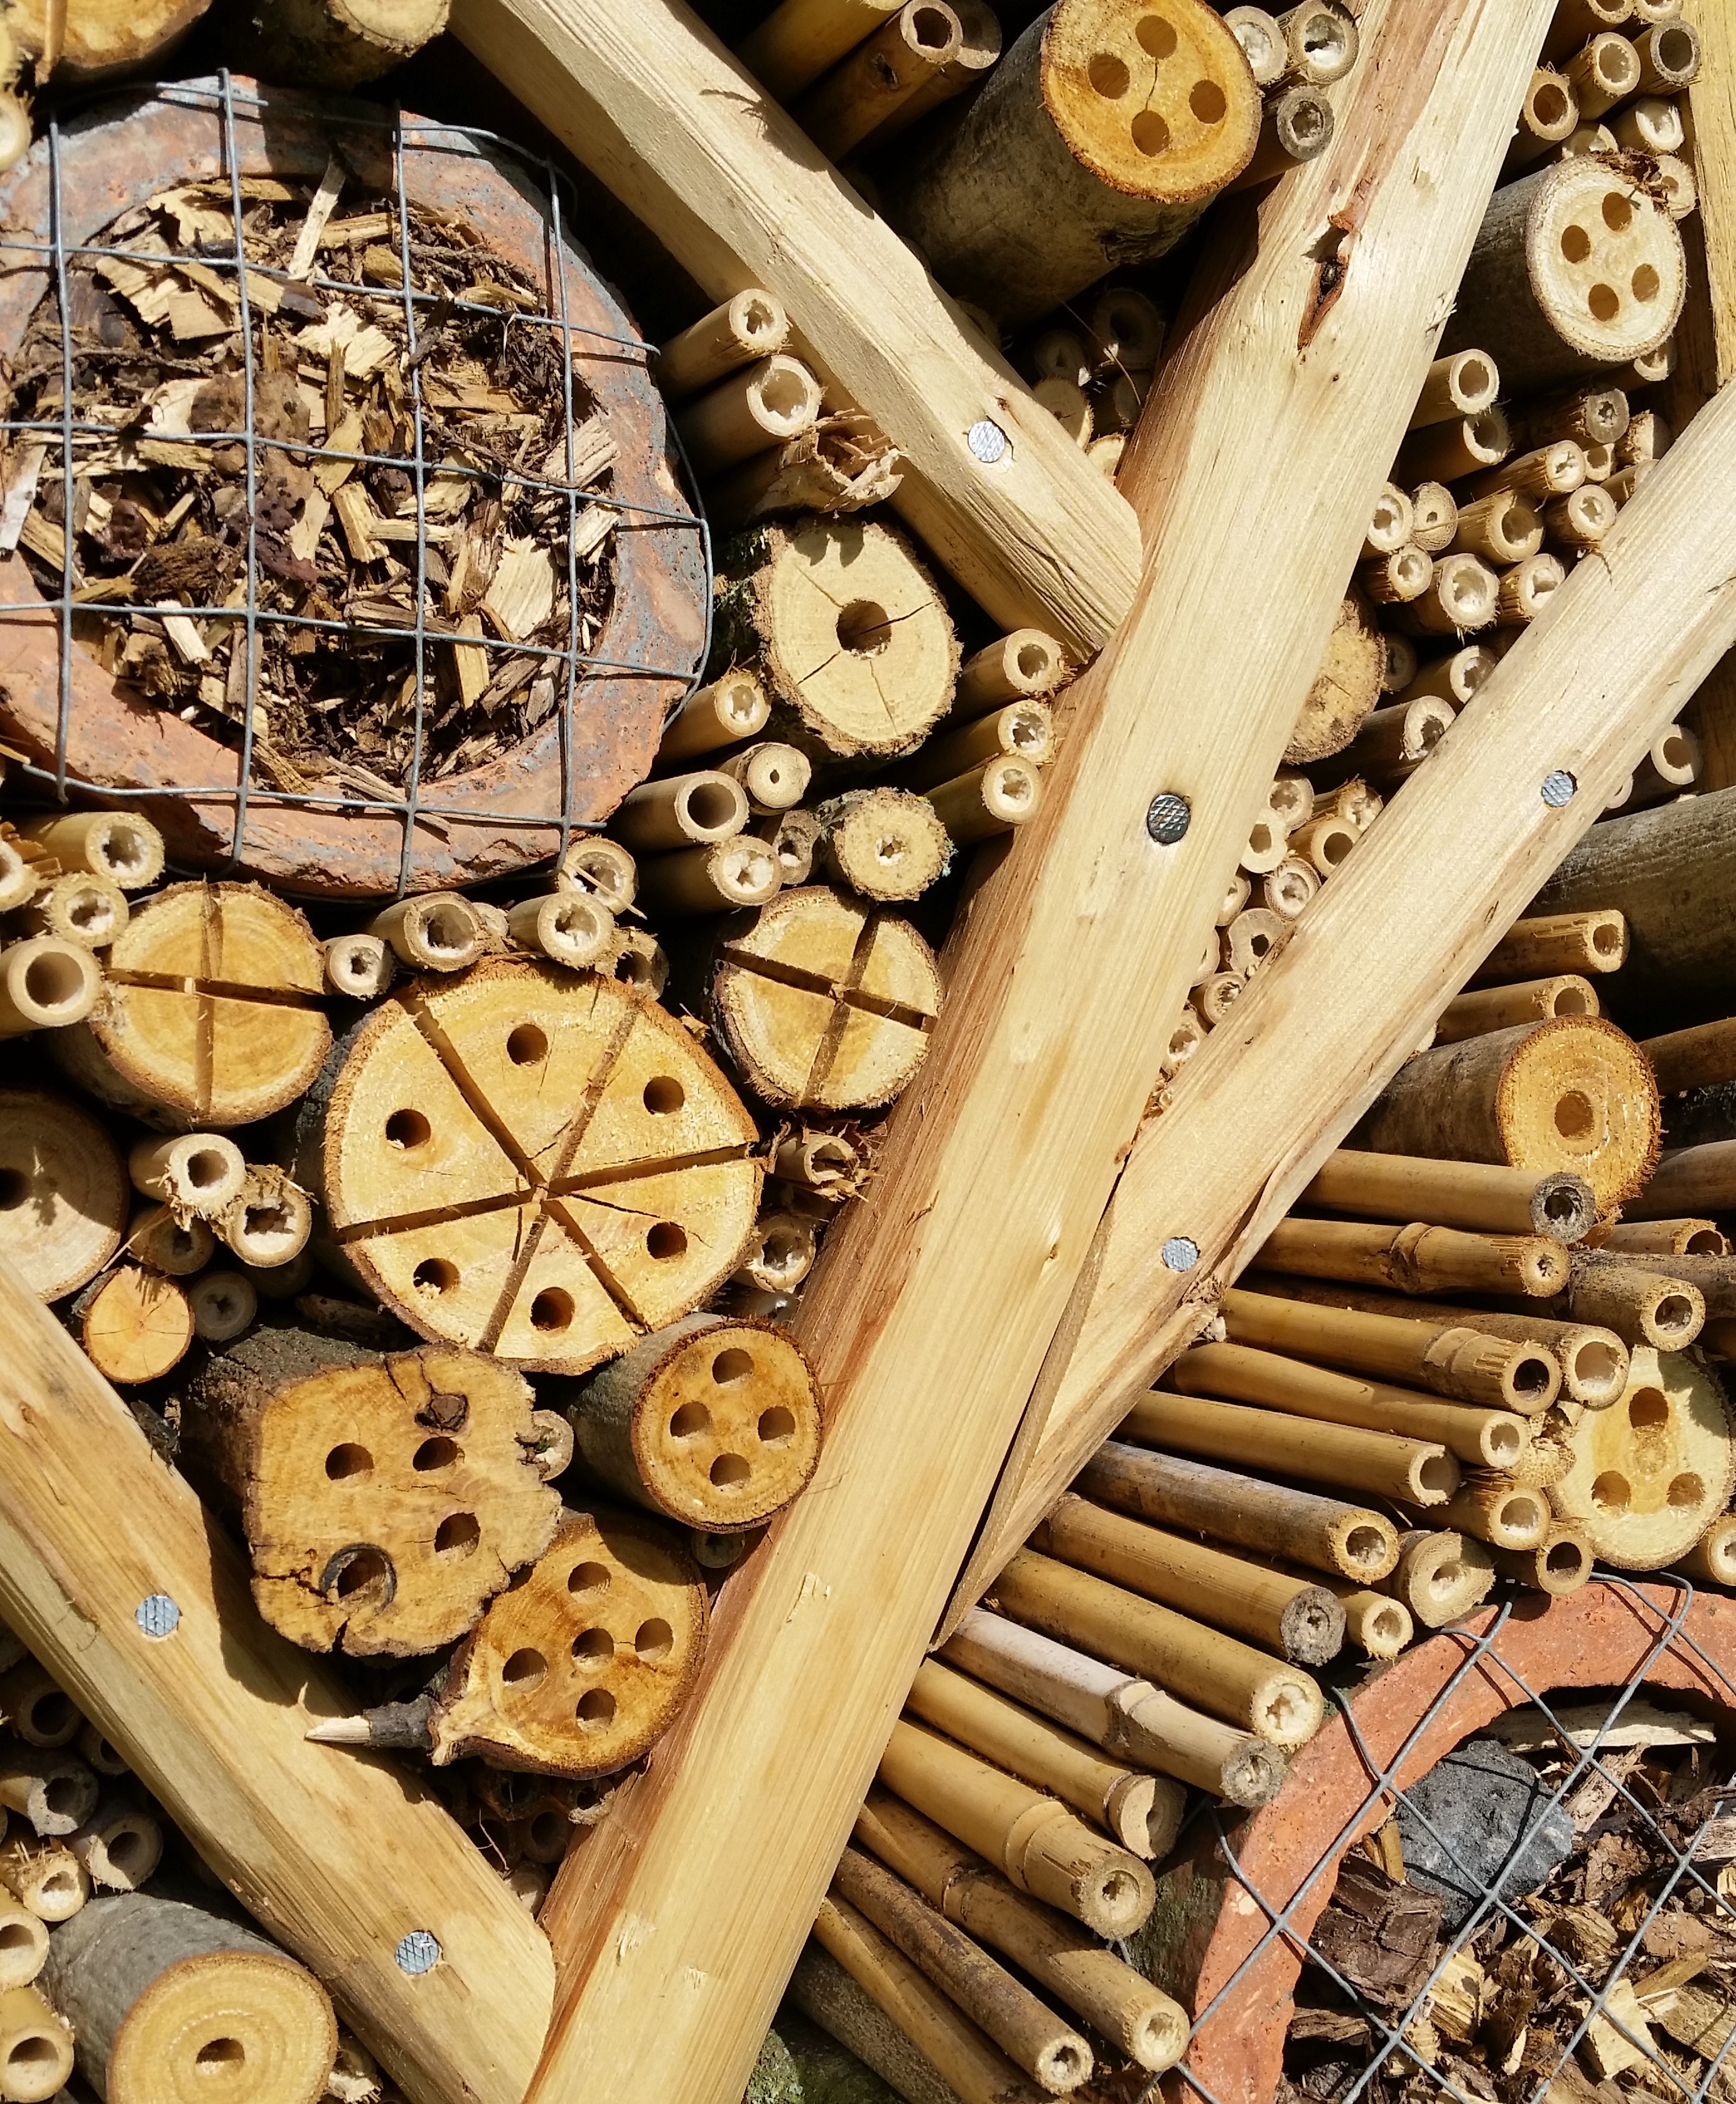
Furnishing the apartments
Collect a load of sticks of various species and diameters and cut them to length. Different insects will like different woods and they will deteriorate at different rates maximising the creepy crawly interest in your hotel. Drill holes of various sizes in the ends of your wood so the insects can get in. I also scored crosses into some of my bigger logs as it looks cool and gives wood munching critters a head-start. Push bamboo canes into any spaces so everything is tightly packed. Bamboo naturally has hollow stems and solitary bees seem to love it.
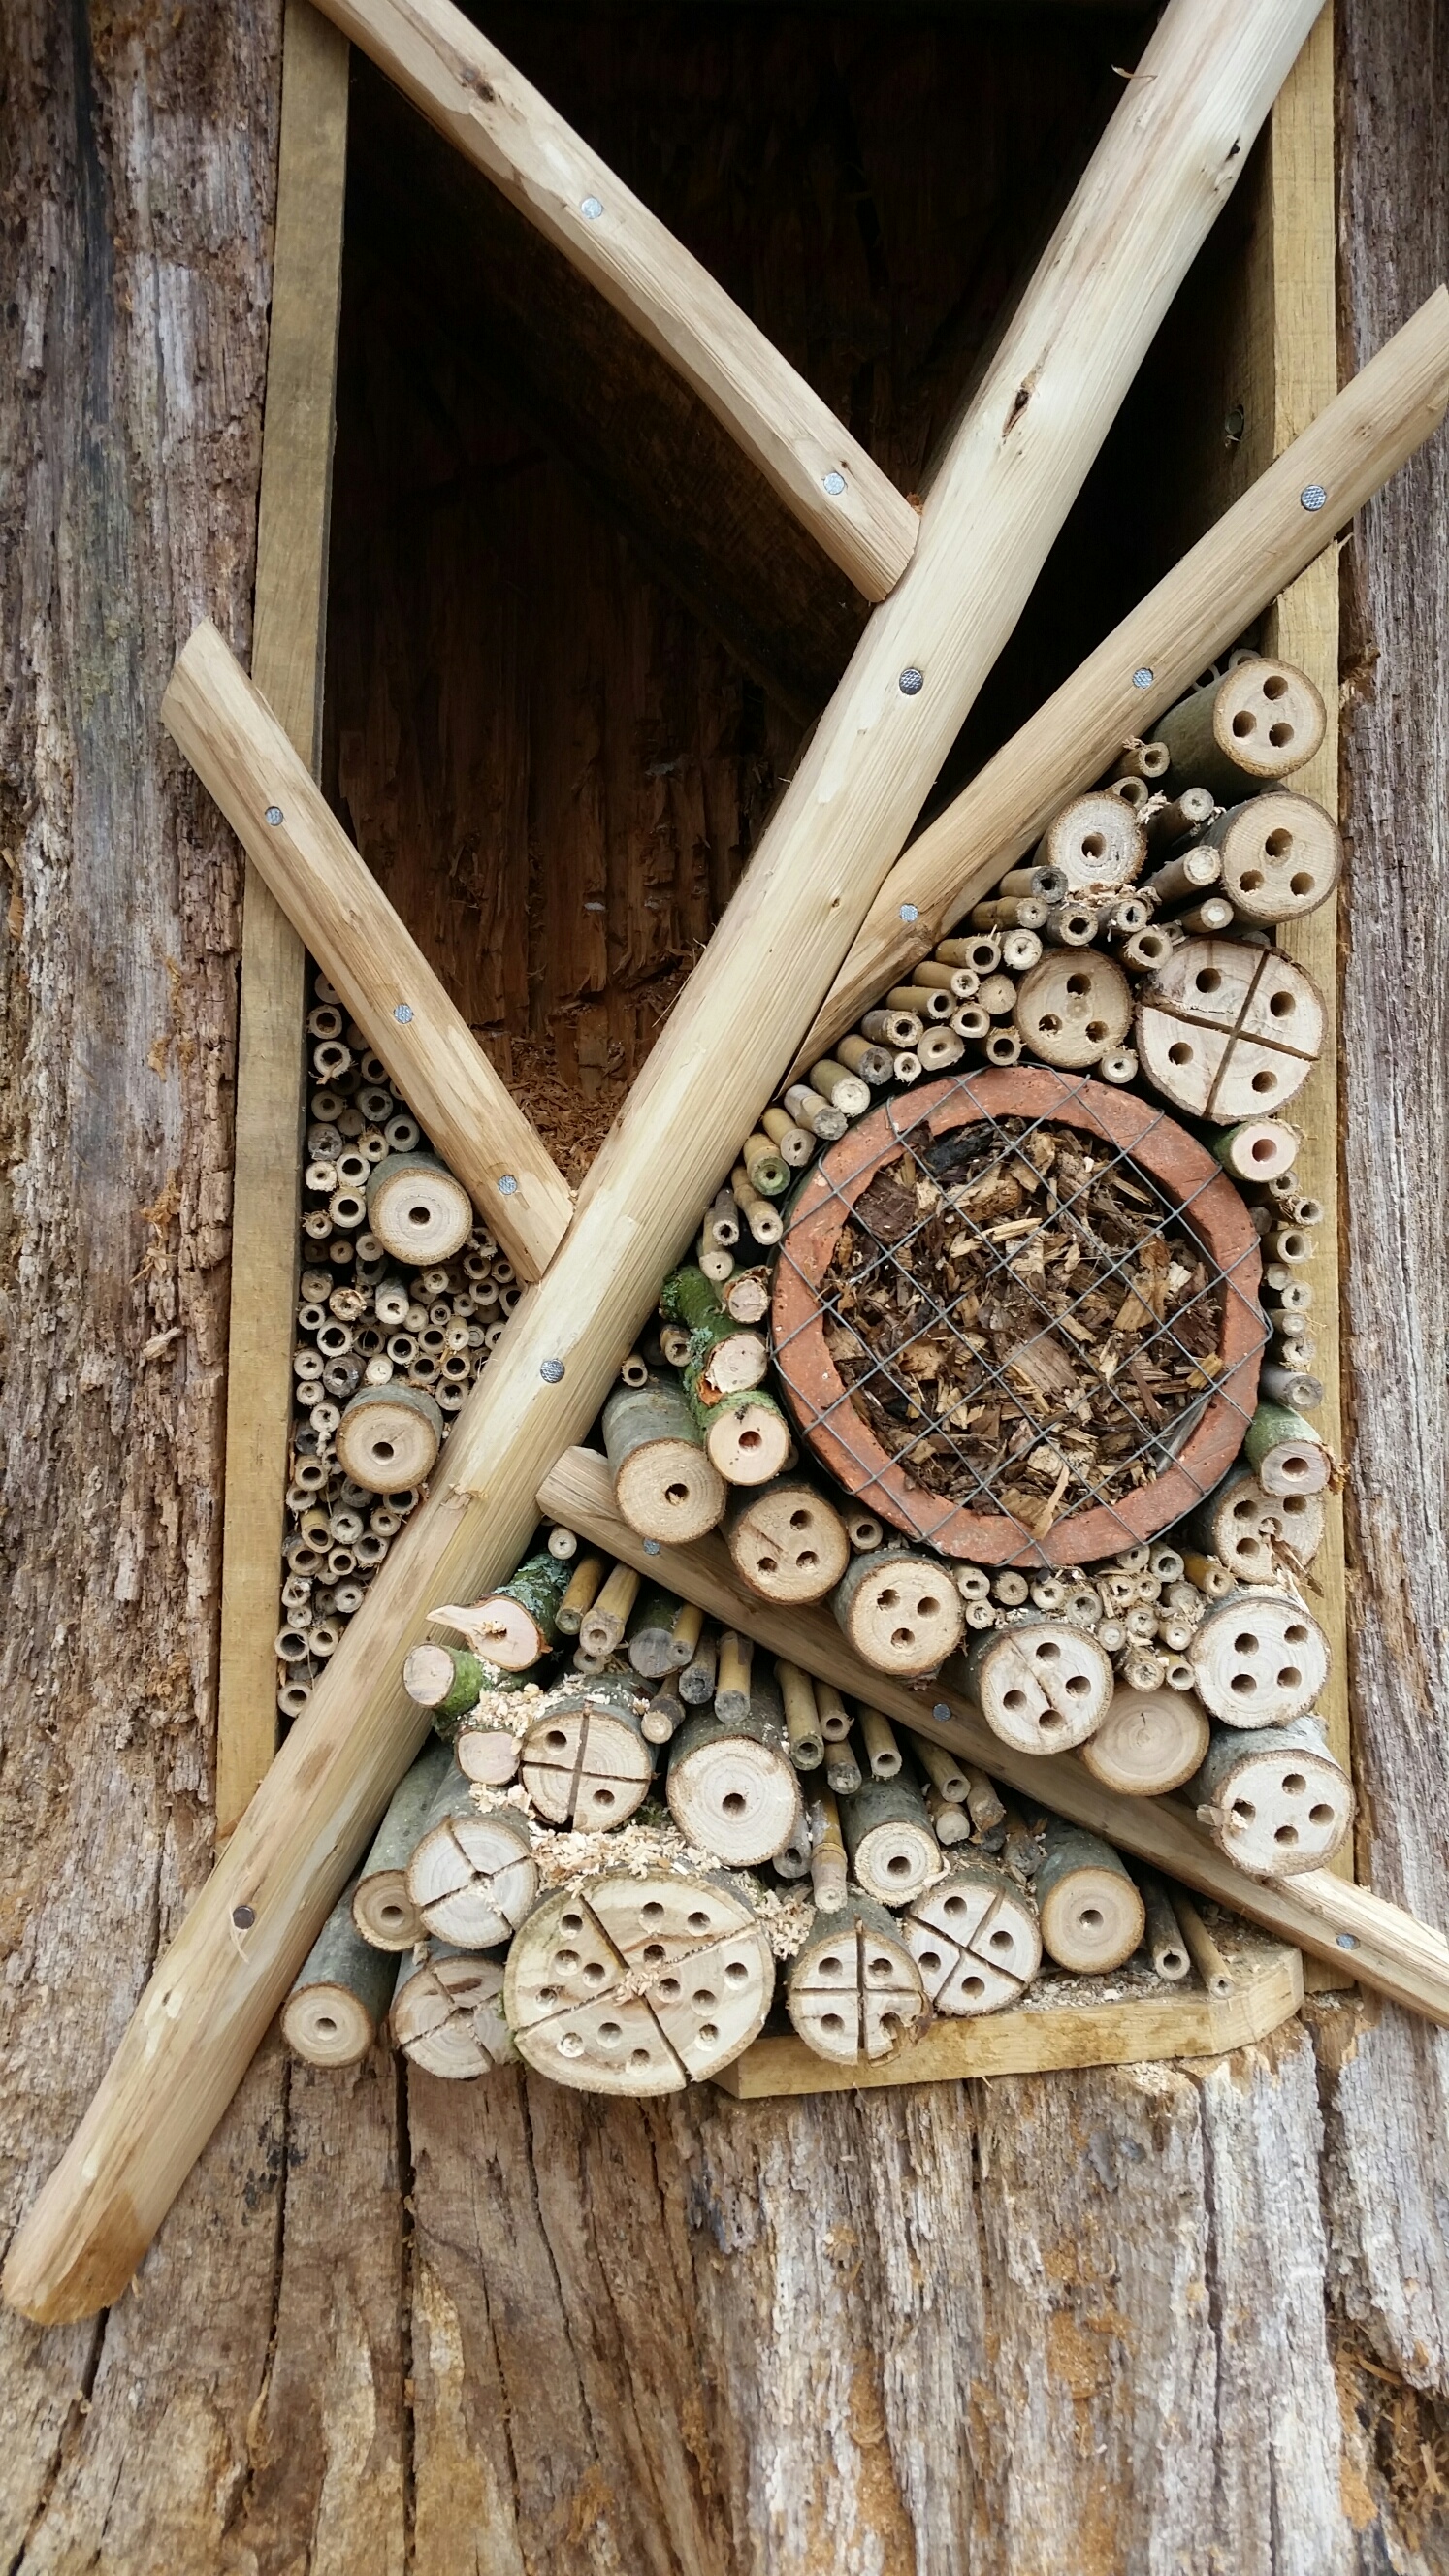 You’ll see some terracotta pipes in mine. These are old land drainage pipes and seem to be kicking about everywhere in the countryside. If you ask a farmer for a couple, I’m sure they will be able to point you in the right direction. I cable tied some wire netting over the ends of my pipe and rammed them full of wood-chips. They look fabulous and will be mulchy heaven for wood chewing beetles.
The last thing I did was to screw some plywood to the base of my tree-stump. I thought it would help it last a bit longer, but the oak is likely to outlast the plywood to be honest so this probably isn’t essential.
And that’s it in a nutshell, (or in a tree-stump in this case…). You’ve built a great looking bug hotel that’ll be home to thousands of really helpful mini-beasts.
If that sounds like more trouble than it’s worth, drop me a line at info@conservationandaccess.co.uk and we can chat through your ideas and I’ll build one for you.
9 comments on Building a Bug Hotel

[…] stumps are also great hideaways for insects, and you can turn your stump into a bug hotel to give critters a safe place to […]
Spot on! love it!!
ferahtia-Very interesting post. This is my first time visit here. I found so many interesting stuff in your blog especially its discussion. Thanks for the post!
Ah, you’re so welcome, and thank you.
Very interesting post. This is my first time visit here. I found so many interesting stuff in your blog especially its discussion. Thanks for the post!
GTU
GTU
Thank you for this!
You’re so welcome. Glad it was helpful. 🙂
Thank you for the valuable information you’ve shared throughout your blog.
GTU
GTU
.Thanks for sharing the info, keep up the good work going…