Building with Wattle and Daub
A dear friend challenged me with building her a summerhouse/rain-seat. It had to seat two or three people, look organic and have a tin roof so the rain would sound amazing in a downpour.
An early suggestion to this challenge was to build a hollow tree stump covered with a tin roof. I suggested creating wooden ribs to attach oak slab-wood to. Whilst a giant hollow tree would’ve looked and felt pretty cool, it wouldn’t have been as fabulous as the creation we ended up making.
As we were mulling over ideas I was asked if I’d ever dabbled in ancient building practices like cobb or wattle and daub. Being a Lincolnshire lad where wattle and daub, (or mud and stud as it’s known up there), was pretty common, I jumped at the idea of giving it a try. How hard could it be??
I’ve made wattle hurdles before, and built sheds with tin rooves, so this should be a doddle right? The vision soon formed in my mind. It was going to be a curved structure with two knobbly characterful pillars either side of the entrance.
First things first
I bought some chunky oak for the ground plate and set about looking for my knobbly pillars. They have to be durable as they will stand at the entrance and will get a little weather. Yew is perfect as it’s full of character and very durable.
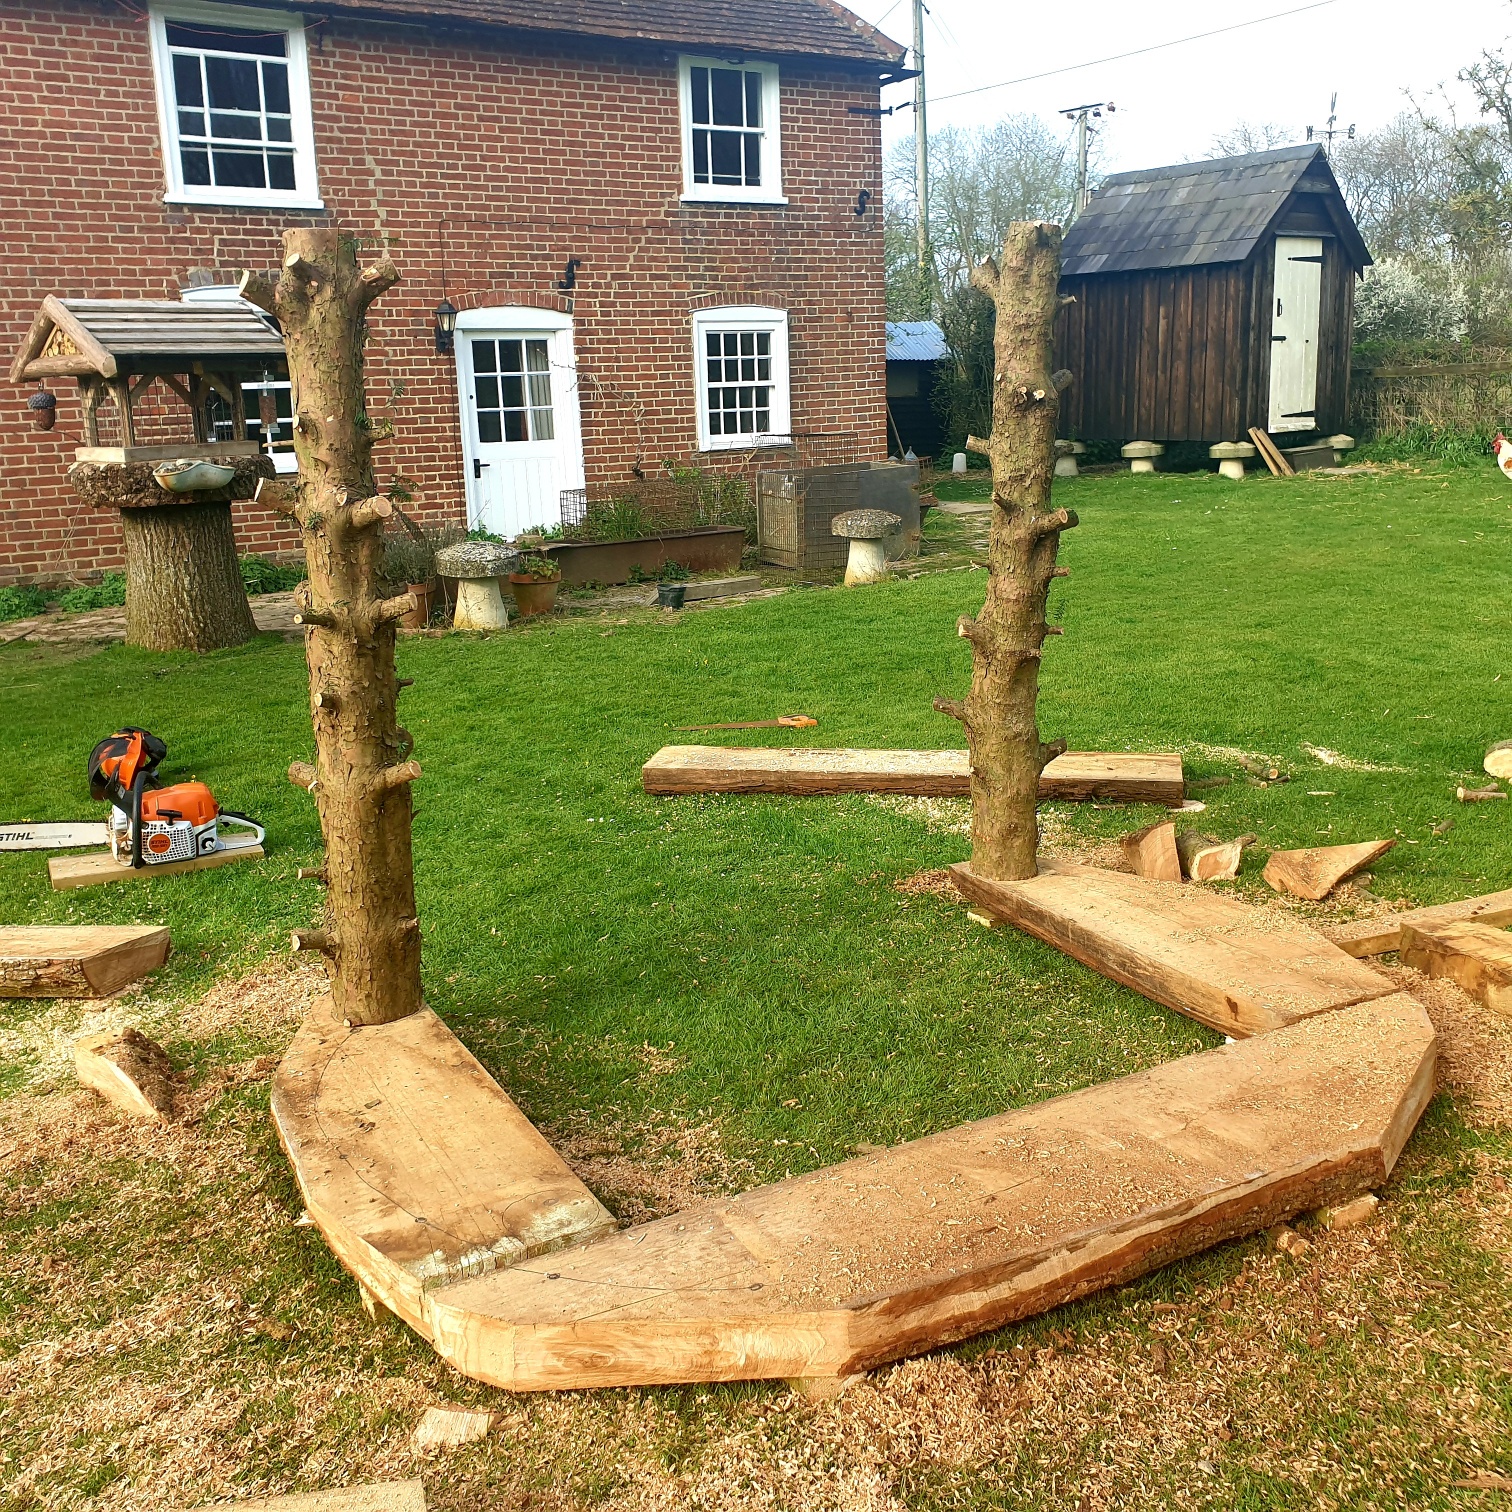
I also like all the folklore and history associated with yew. Groves of yew were considered sacred places by pagans who often used its branches in ceremonies. The spiritual association was adopted by early Christians with many churchyards being home to huge veteran yew trees. My friend and her close friends are in touch with their spiritual side so that was another reason why it was nice to use yew trees as the entrance pillars.
Construction begins
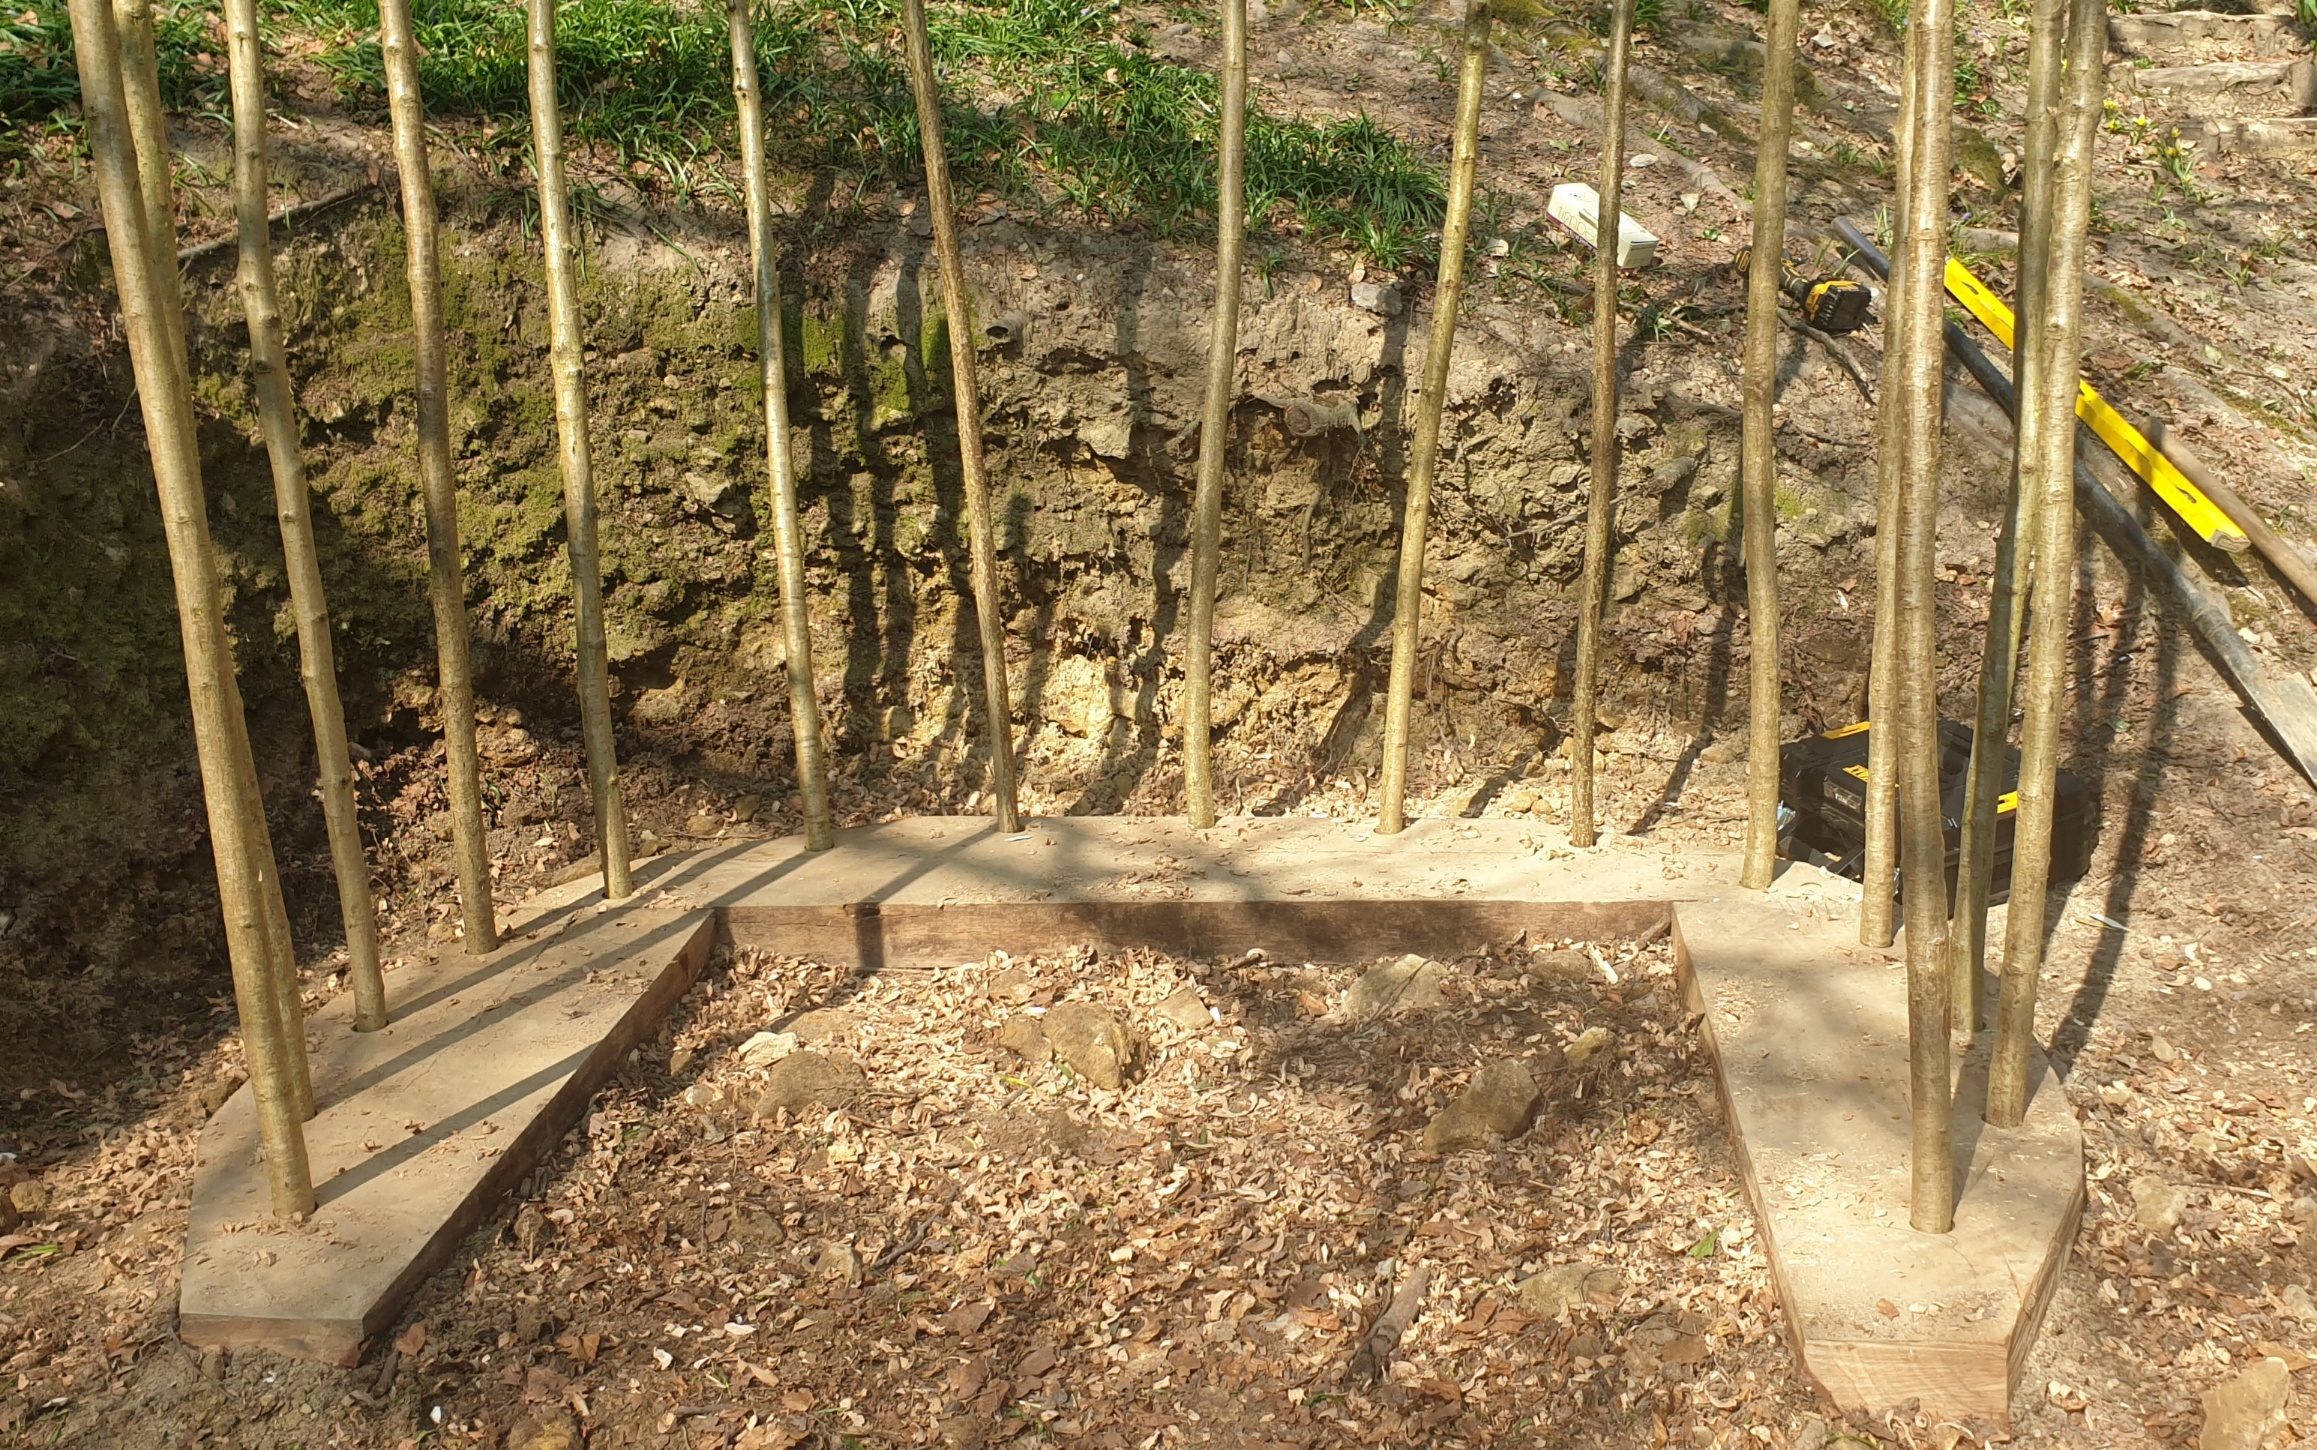
The oak ground plates were screwed together on site and the upright pillars fixed in place. I marked out the curve and drilled a series of holes around 40cm apart. These housed the hazel uprights which were around 4cm or 5cm in diameter, sometimes known as staves.
Weaving in the Hazel
Hazel is great stuff as it coppices so well. This means if you cut it down it grows again, often into vigorous straight shafts that are strong yet flexible – perfect for our needs. I was after long straight rods of 2cm to 3cm diameter tapering down to around 1cm. These ranged from two to three metres long and are sometimes known as withies. Even in well worked coppice, the quantity required took some finding. I must’ve spent a day and a half coppicing, not that I’m complaining! There’s worse things to do than sustainably harvesting whilst wandering around sunny woodland.
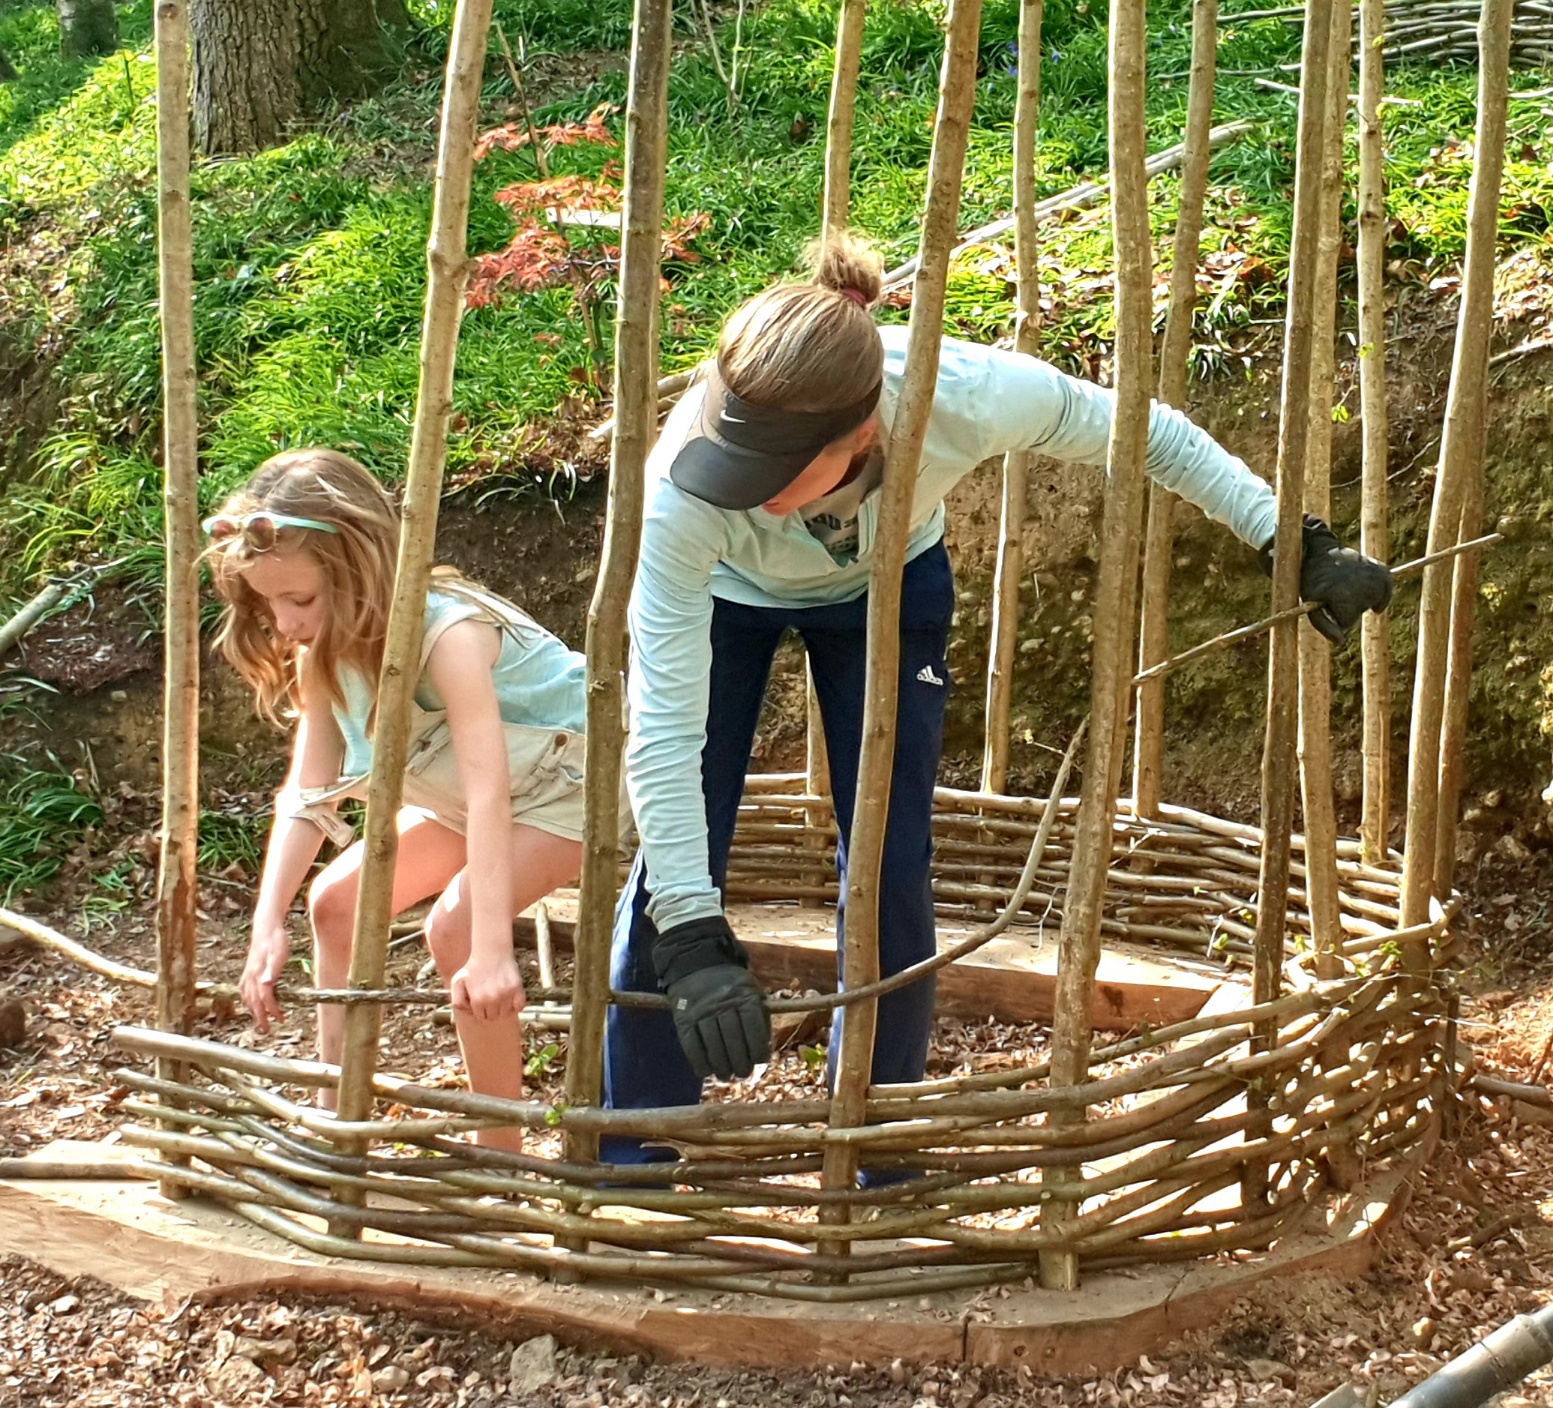
When it’s freshly cut hazel is nice and flexible. Don’t cut it too far in advance or it’ll get too brittle and difficult to work with. Weaving the hazel withies in and out the staves is a satisfying and creative job that everyone can get involved with. Just make sure each withie is tapped down tightly and try and keep the courses level.
I was astonished how quickly this part of the process came together. I was also amazed how quickly the walls became strong and ridged.
Roofing and Daubing
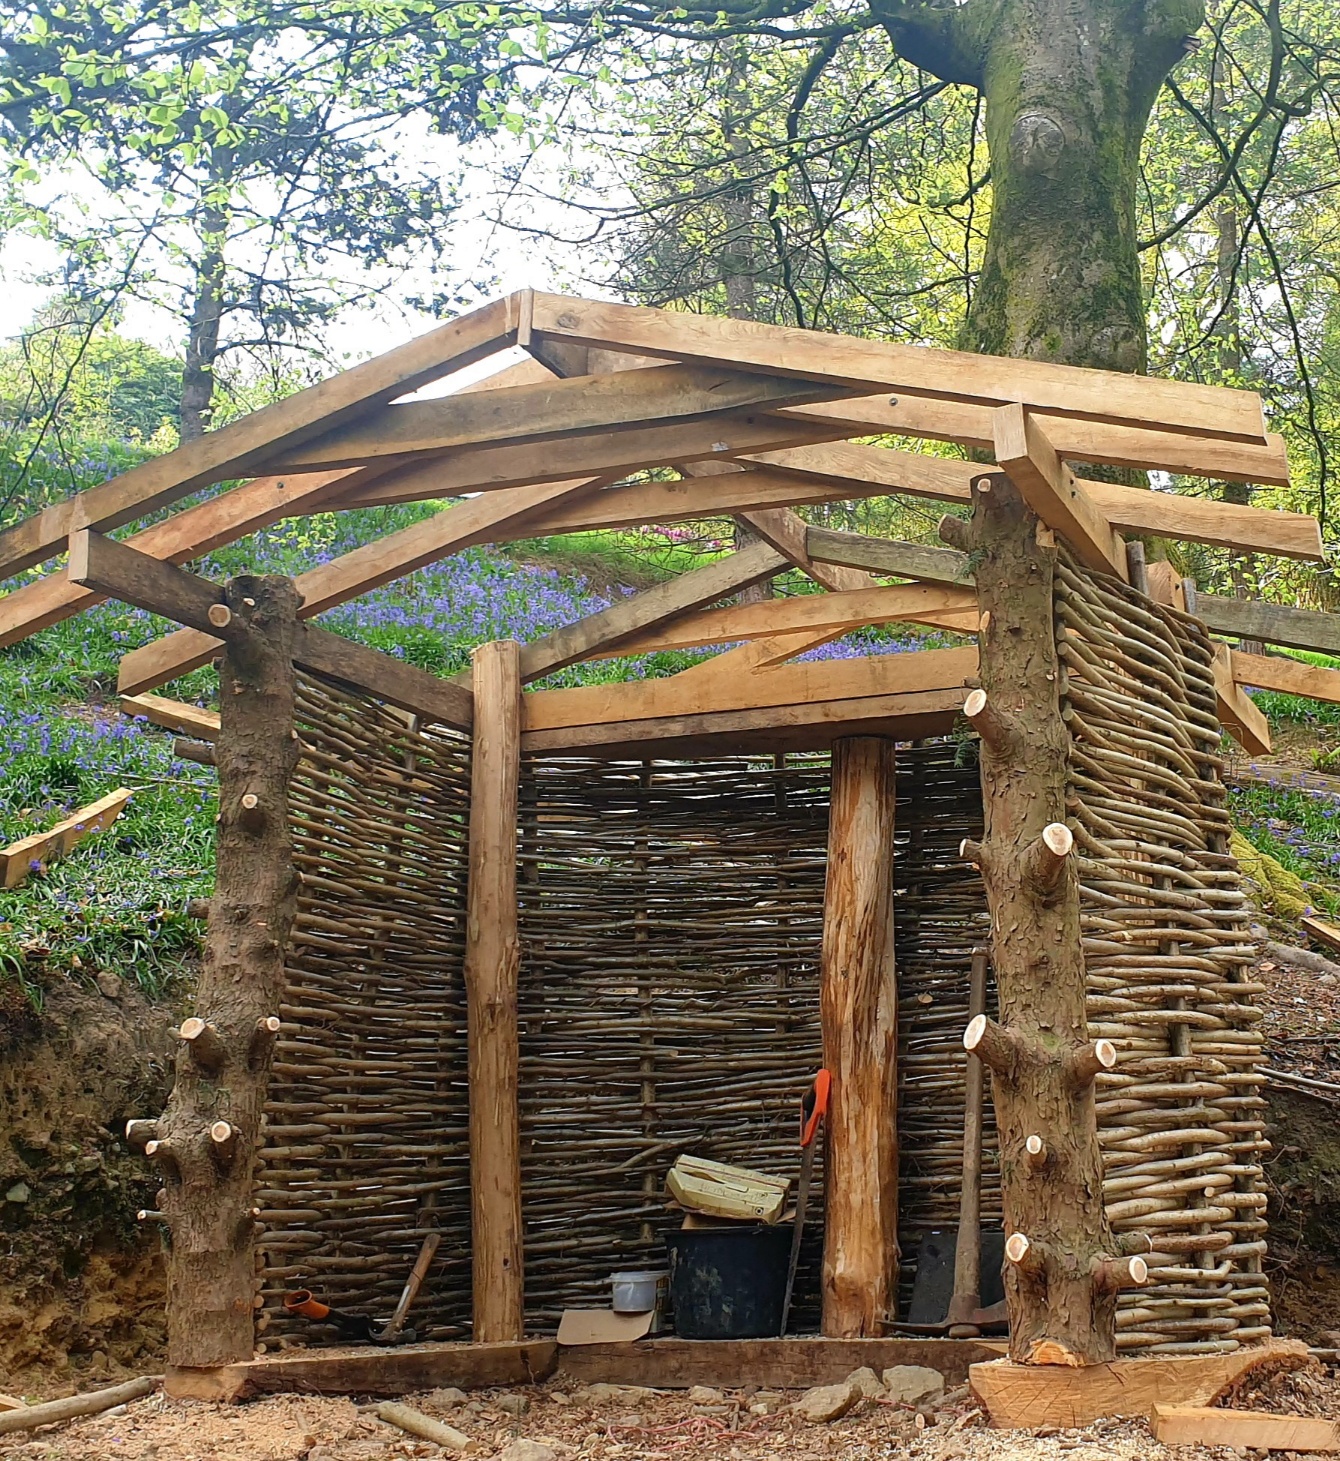
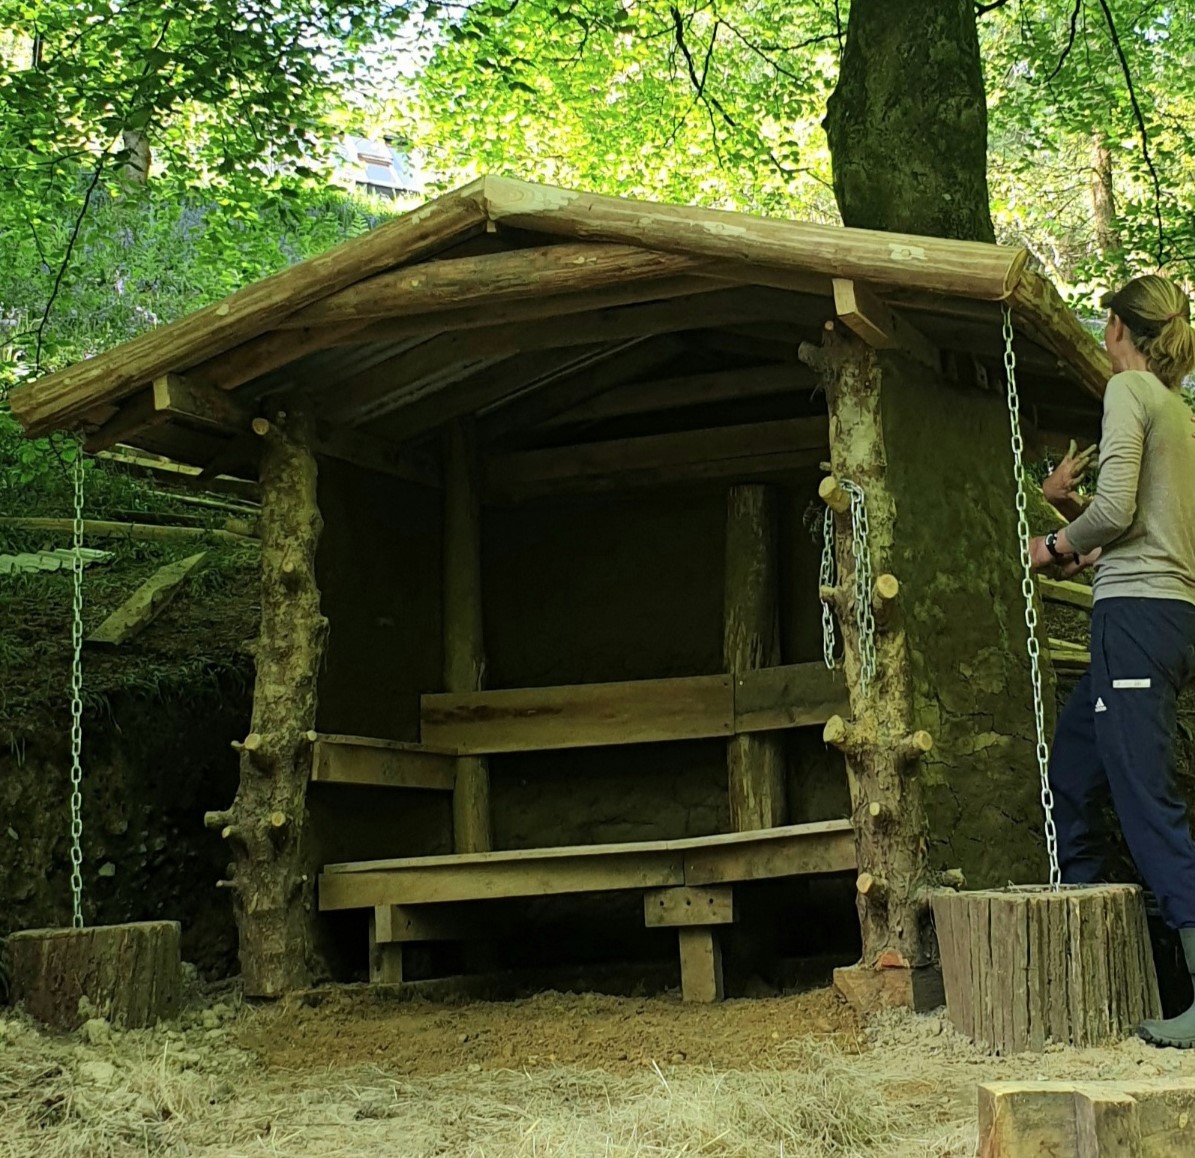
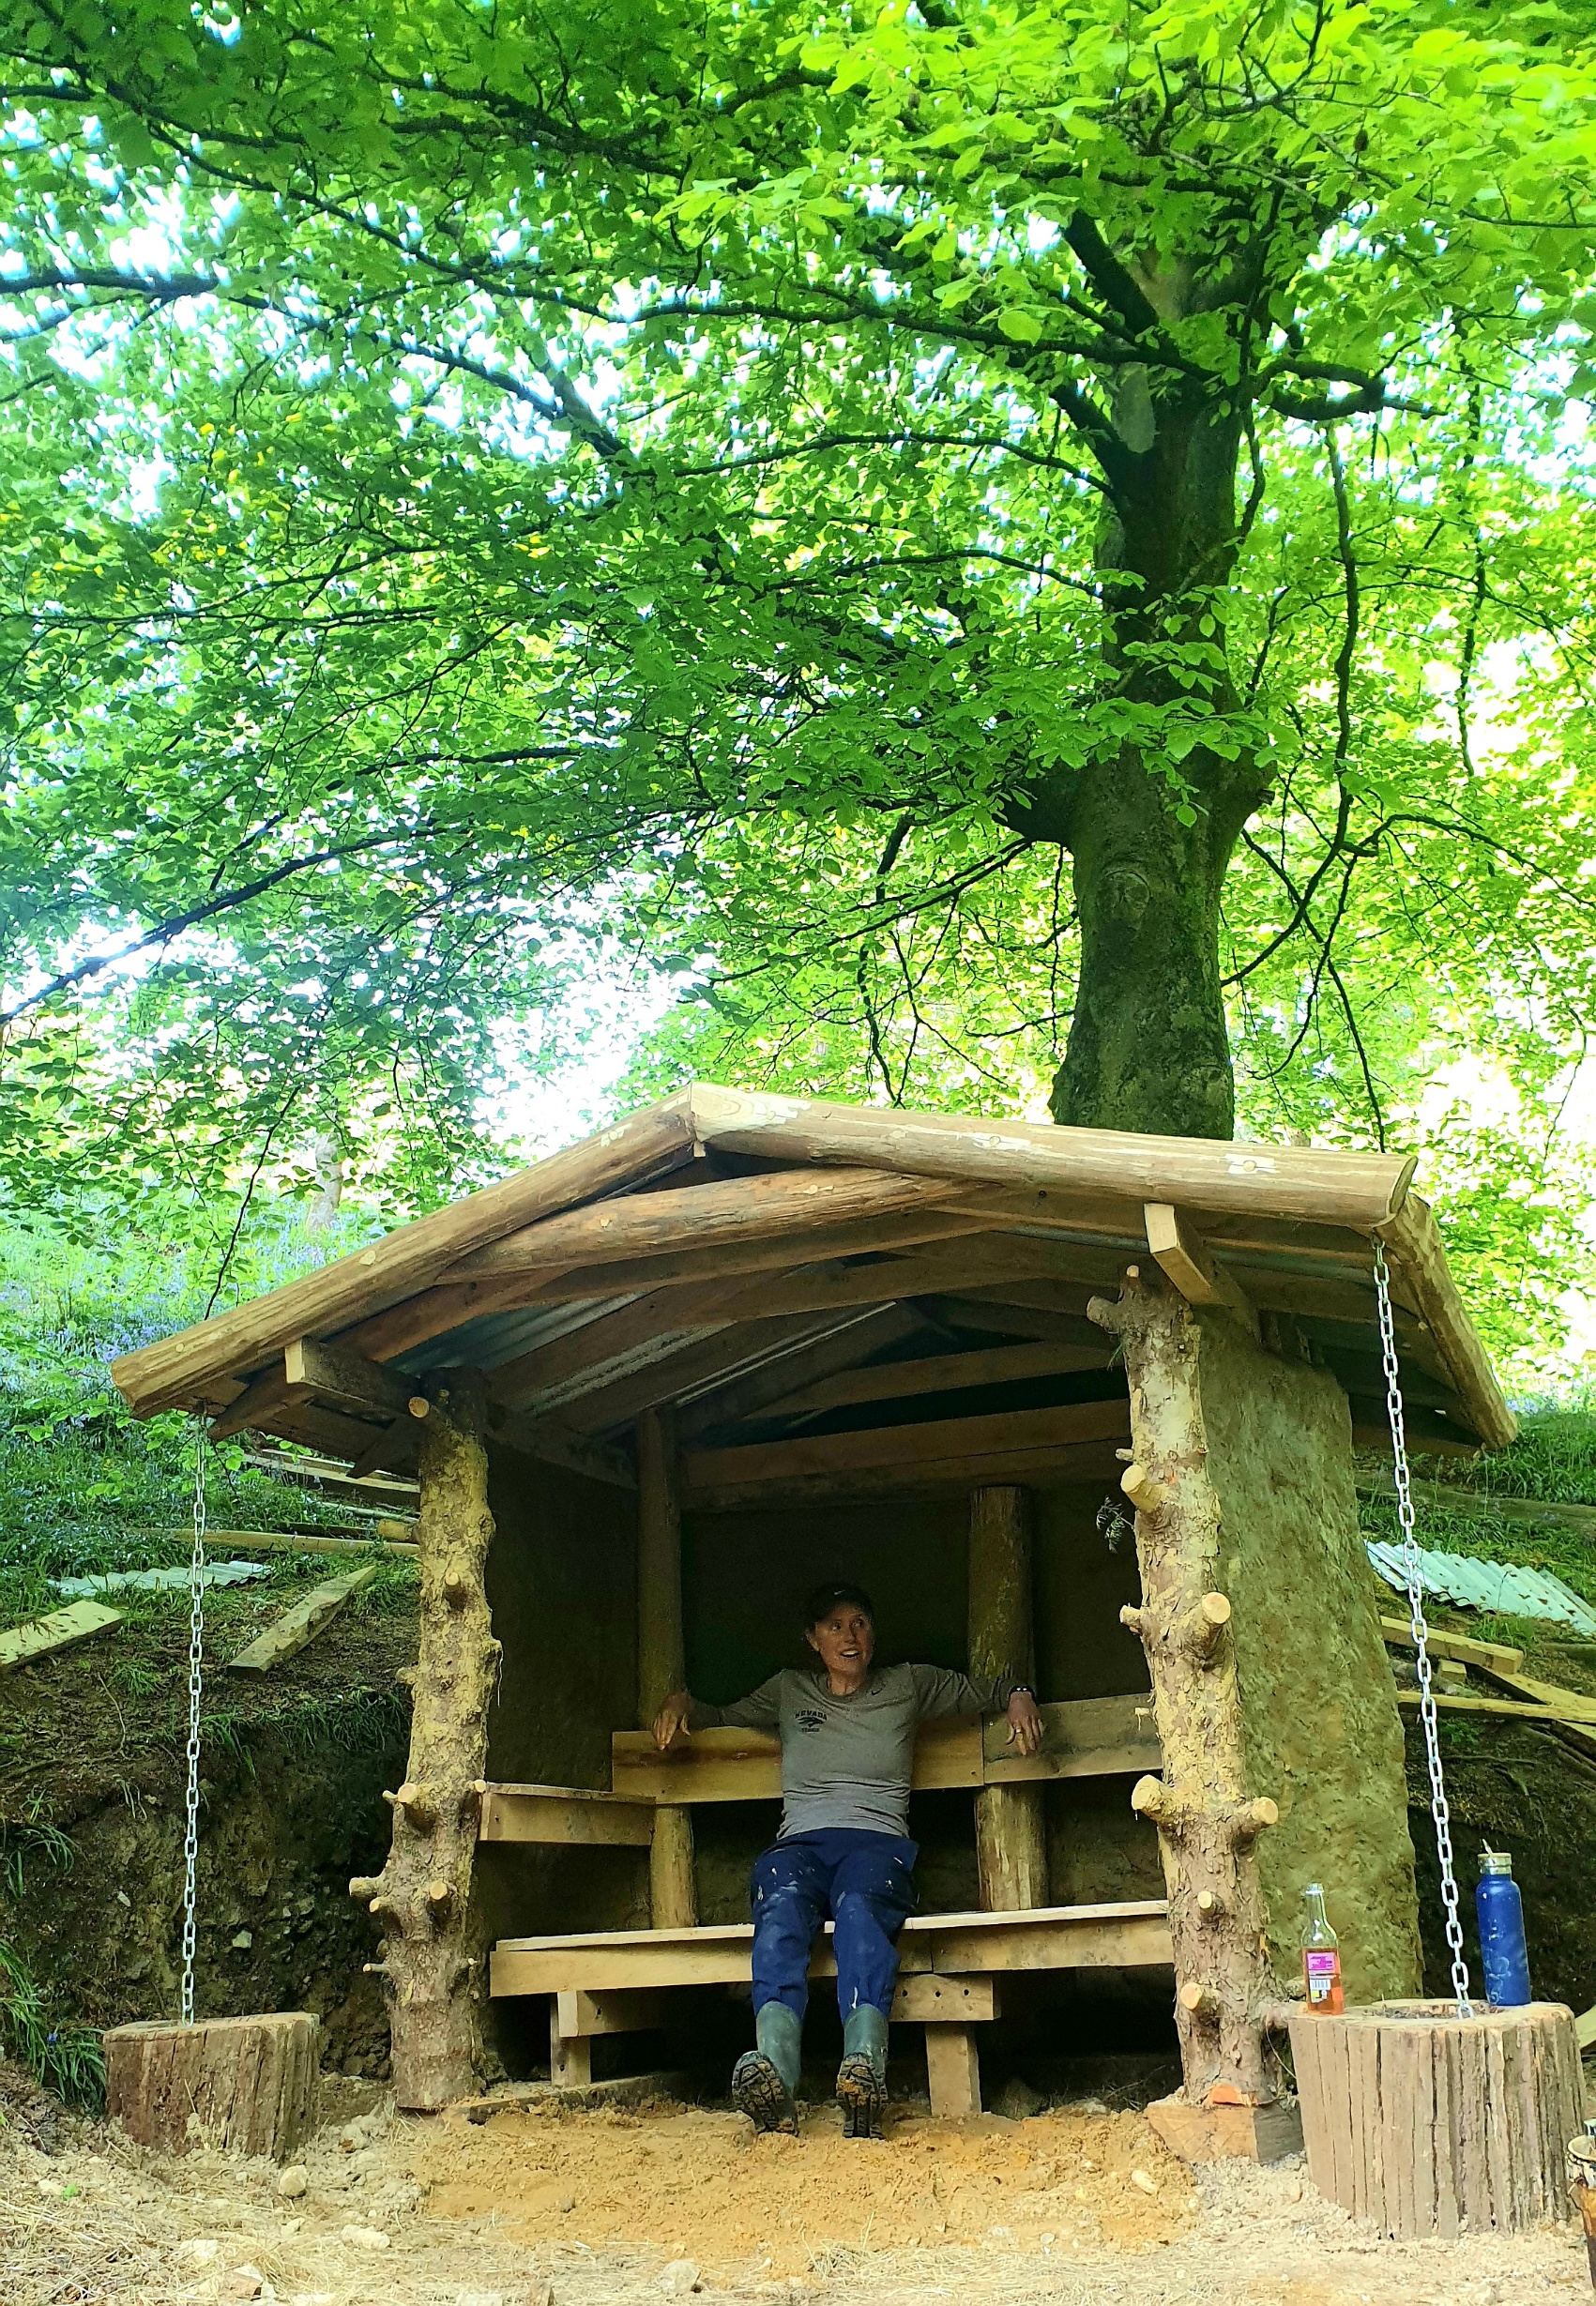
Once the hazel was at the required height, we built a tin roof over the structure. I designed it to have a shallow pitch to maximise the sound created when rain-drops land on it. I made some oak gutters and fixed a chain in place as an alternative to down-pipes. Water runs down chains really nicely. The chains run into oak plant-pots where water loving plants such as ferns and mosses can thrive.
Now the building is watertight, the daubing begins. I researched many papers on daub mixtures. Ancient daubs have been forensically researched to work out the ingredients. There’s lots of different analysis and hypothesis out there. The one common ingredient is sticky mud – clay being ideal. I found accounts of clay being transported by the cart-load to daub larger houses. The trouble with clay is that it shrinks and cracks as it dries. You’ll never stop this happening, but the cracking can be reduced by mixing in some sand or aggregate. In the past they would have used whatever stone, chalk or aggregate that was local. Our mix was three parts clay for one part sand/aggregate.
Mixing the clay and aggregate sounds a lot easier than it actually is, and that’s an understatement!! I dug my clay from the bottom of a pond to ensure it was good and wet, but it still wasn’t wet enough to mix with sand. We cut it into smaller and smaller pieces with a spade, applied more water and shovelled and squidged the sand and clay together. We walked on it barefoot, regularly turning it over with a shovel and mixed and mixed. This is truly hard work. What we were aiming for is the consistency of play-doh or soft plasticine.
When the consistency of the daub is about right, we mixed in hay. Traditionally they would mix in hay, long horsehairs from manes and tails or even straw. This fibrous material helps hold the daub together as it dries and cracks. It literally strings it together. Mixing in the hay was also hard work. Clay is so heavy and sticky, but good for an all-body work-out.
Interestingly lots of the old daubs contained cow or horse dung. Some theories have dung as a necessary ingredient, whereas others disagree. I fall into the latter camp. I can’t really imagine how semi-digested well chewed grasses are going to help bind the material together. Having laboured and sweated in mixing daub, I can well imagine using horses or cattle to trample the clay for me. If they were penned in a small area, on a mix of clay, sand and hay and made to walk around as you threw water to the ground their weight would do the mixing for you. The only downside would be a bit of dung in your mix, which believe me, is a price worth paying for the labour it saves!
Having made your daub mix you then roll it into balls about the size of your palm, known as cats. You’ll know if your mix is the right consistency if you can squidge it at least half way through your withies. Start at the bottom and daub both sides of your wall at the same time so it meets in the middle and binds together. You’ll be amazed how much daub you get through. We used well over a tonne on this little summerhouse.
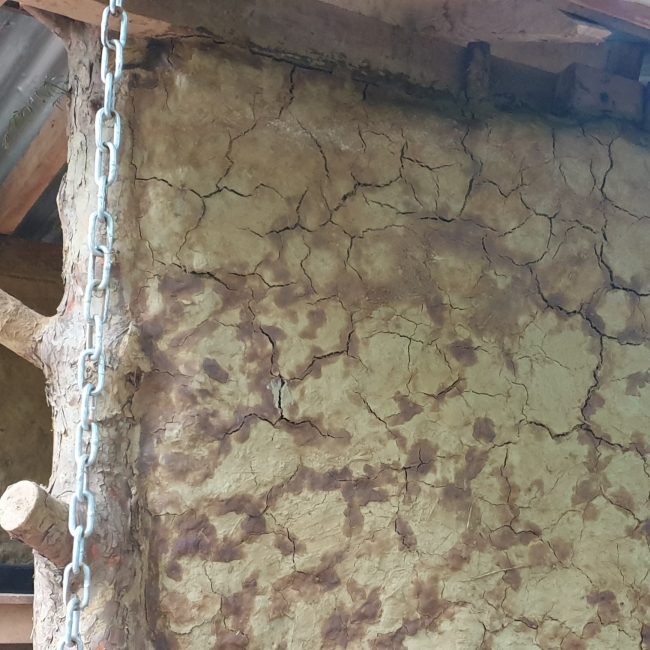
Cracking-up and Buttering up
You’ll stand back and think your wattle and daub looks amazing! Job well done and congratulate yourself with a cider or three!! Then a few days later ‘cracks will appear’ – (could be the origins of that term). This is perfectly normal, so don’t panic. I recently visited a 15C farmhouse where lathe and plaster had been applied to the servant’s quarters. That plaster had never been buttered up and still showed the drying cracks which were almost identical to the cracking on this summerhouse.
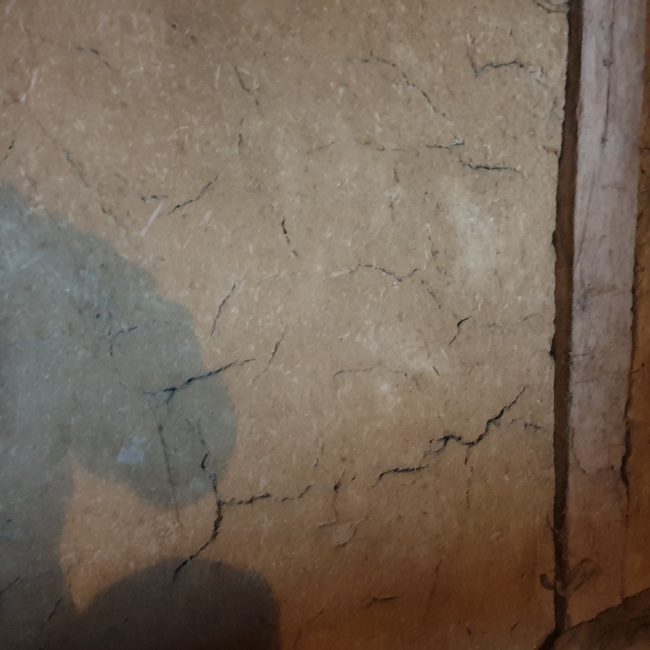
To fill the cracks, also known as buttering up, just push some more of your daub mix into them. Given that the walls are some 10cm thick, the drying/cracking process may last several months. Rest assured, once it’s dry, the cracking will stop. Once dry the walls were often plastered or painted with thick limewash, which I suspect filled in any hairline cracking as well as for aesthetics. However, we like the warm earthen finish of the natural daub on this structure.
Experiential
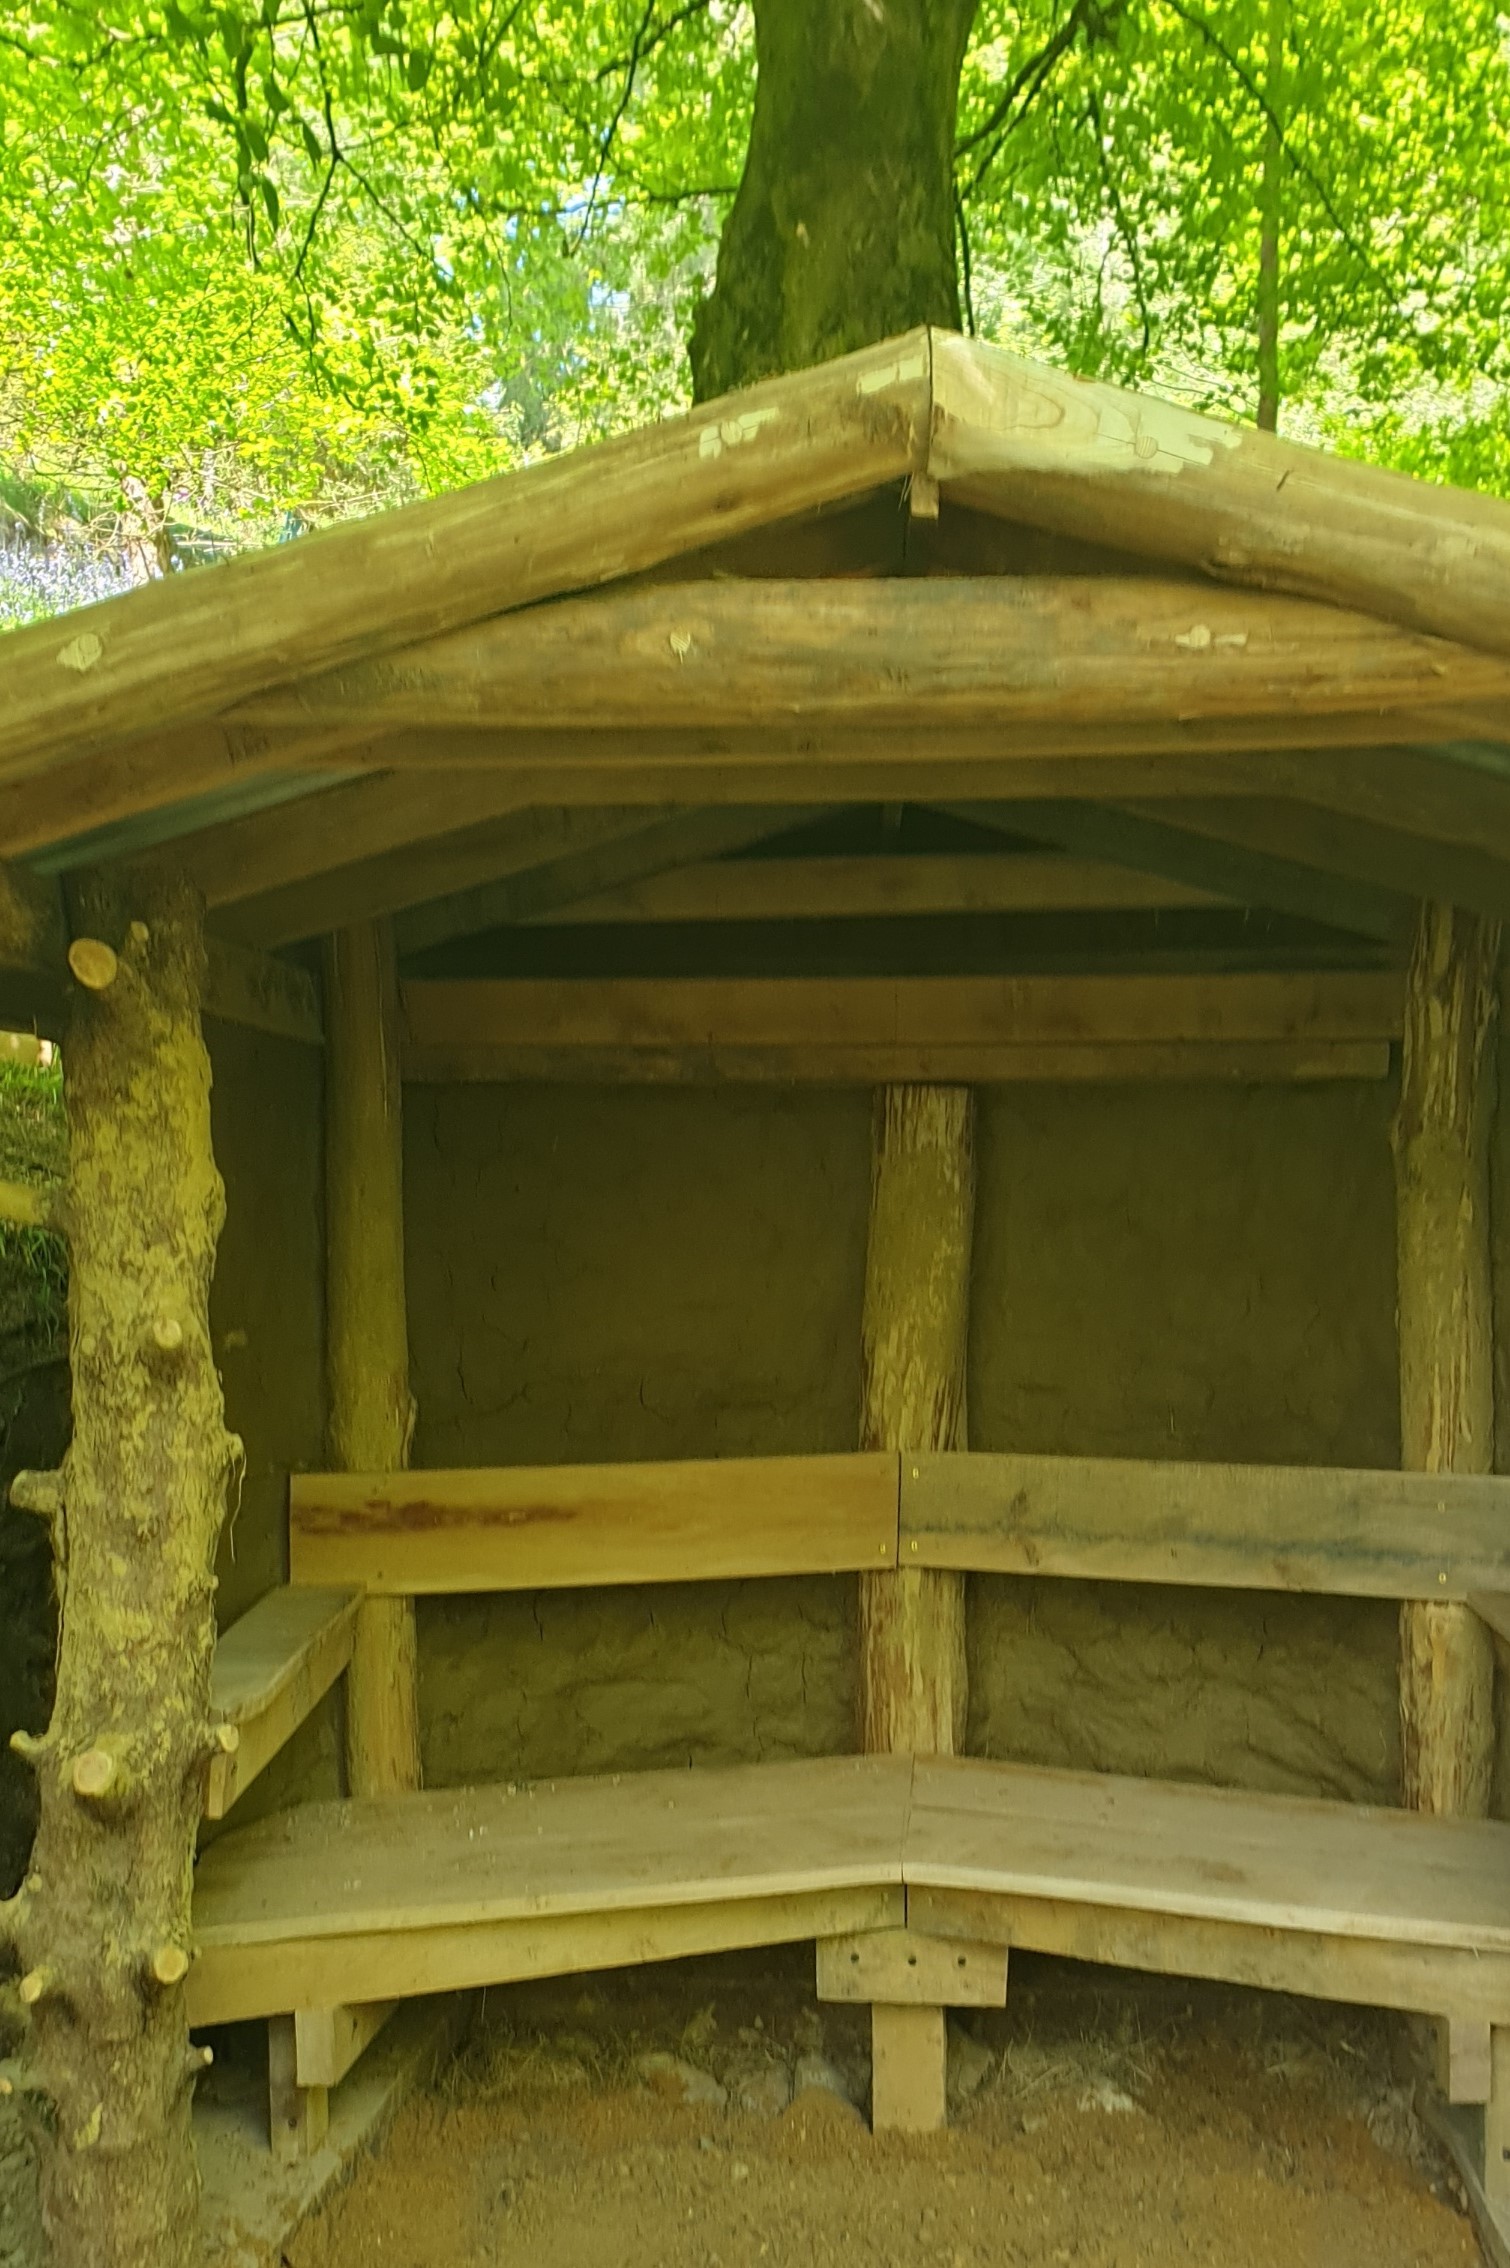
I was surprised by the intimacy of sharing this space with another person. I think that experience is a sum of several different factors. Obviously knowing and liking your company is essential, but over and above that, the earthen walls seem to offer unique acoustics. They deaden sounds from the outside world, and internally your voice seems to carry better. There’s no echo at all and I became aware that I could talk quietly and found listening easy. Its a very intimate experience, in some ways cut off from outside, but with a beautiful vista of it. Visually the outside world is framed by the knobbly yew trees which looks beautiful on a sunny day. I can imagine how cosy and nurturing that space is going to feel when rain is drumming on the tin roof with that wet earth smell all around.
I’ve loved building this creative structure and thoroughly enjoyed the company of all those who’ve helped in its development. It’ll be durable enough to last decades. Over that time I really hope some fabulous experiences and memories are made there. I know I’ll always treasure my time there.
8 comments on Building with Wattle and Daub

This is awesome!
Thank you so much Robert. Very kind of you to say so.
Thank you so much.
This is really cool. I love the use of chains. I might have a go at a bit if hazel weaving myself!
Do it. So satisfying. 🙂
The most beautiful structure!
Thrilled it’s so enjoyed. Thank you.
This is amazing !!!