You’ve decided you want to hang a wooden gate across your drive or in your field boundary and need to know how to go about it. I’m covering the standard five bar field gate here as it’s the most widely used product. It’s not brain science, but there are quite a few bits and bobs you can come unstuck with.
Do you want a left hanging gate or right hanging gate?
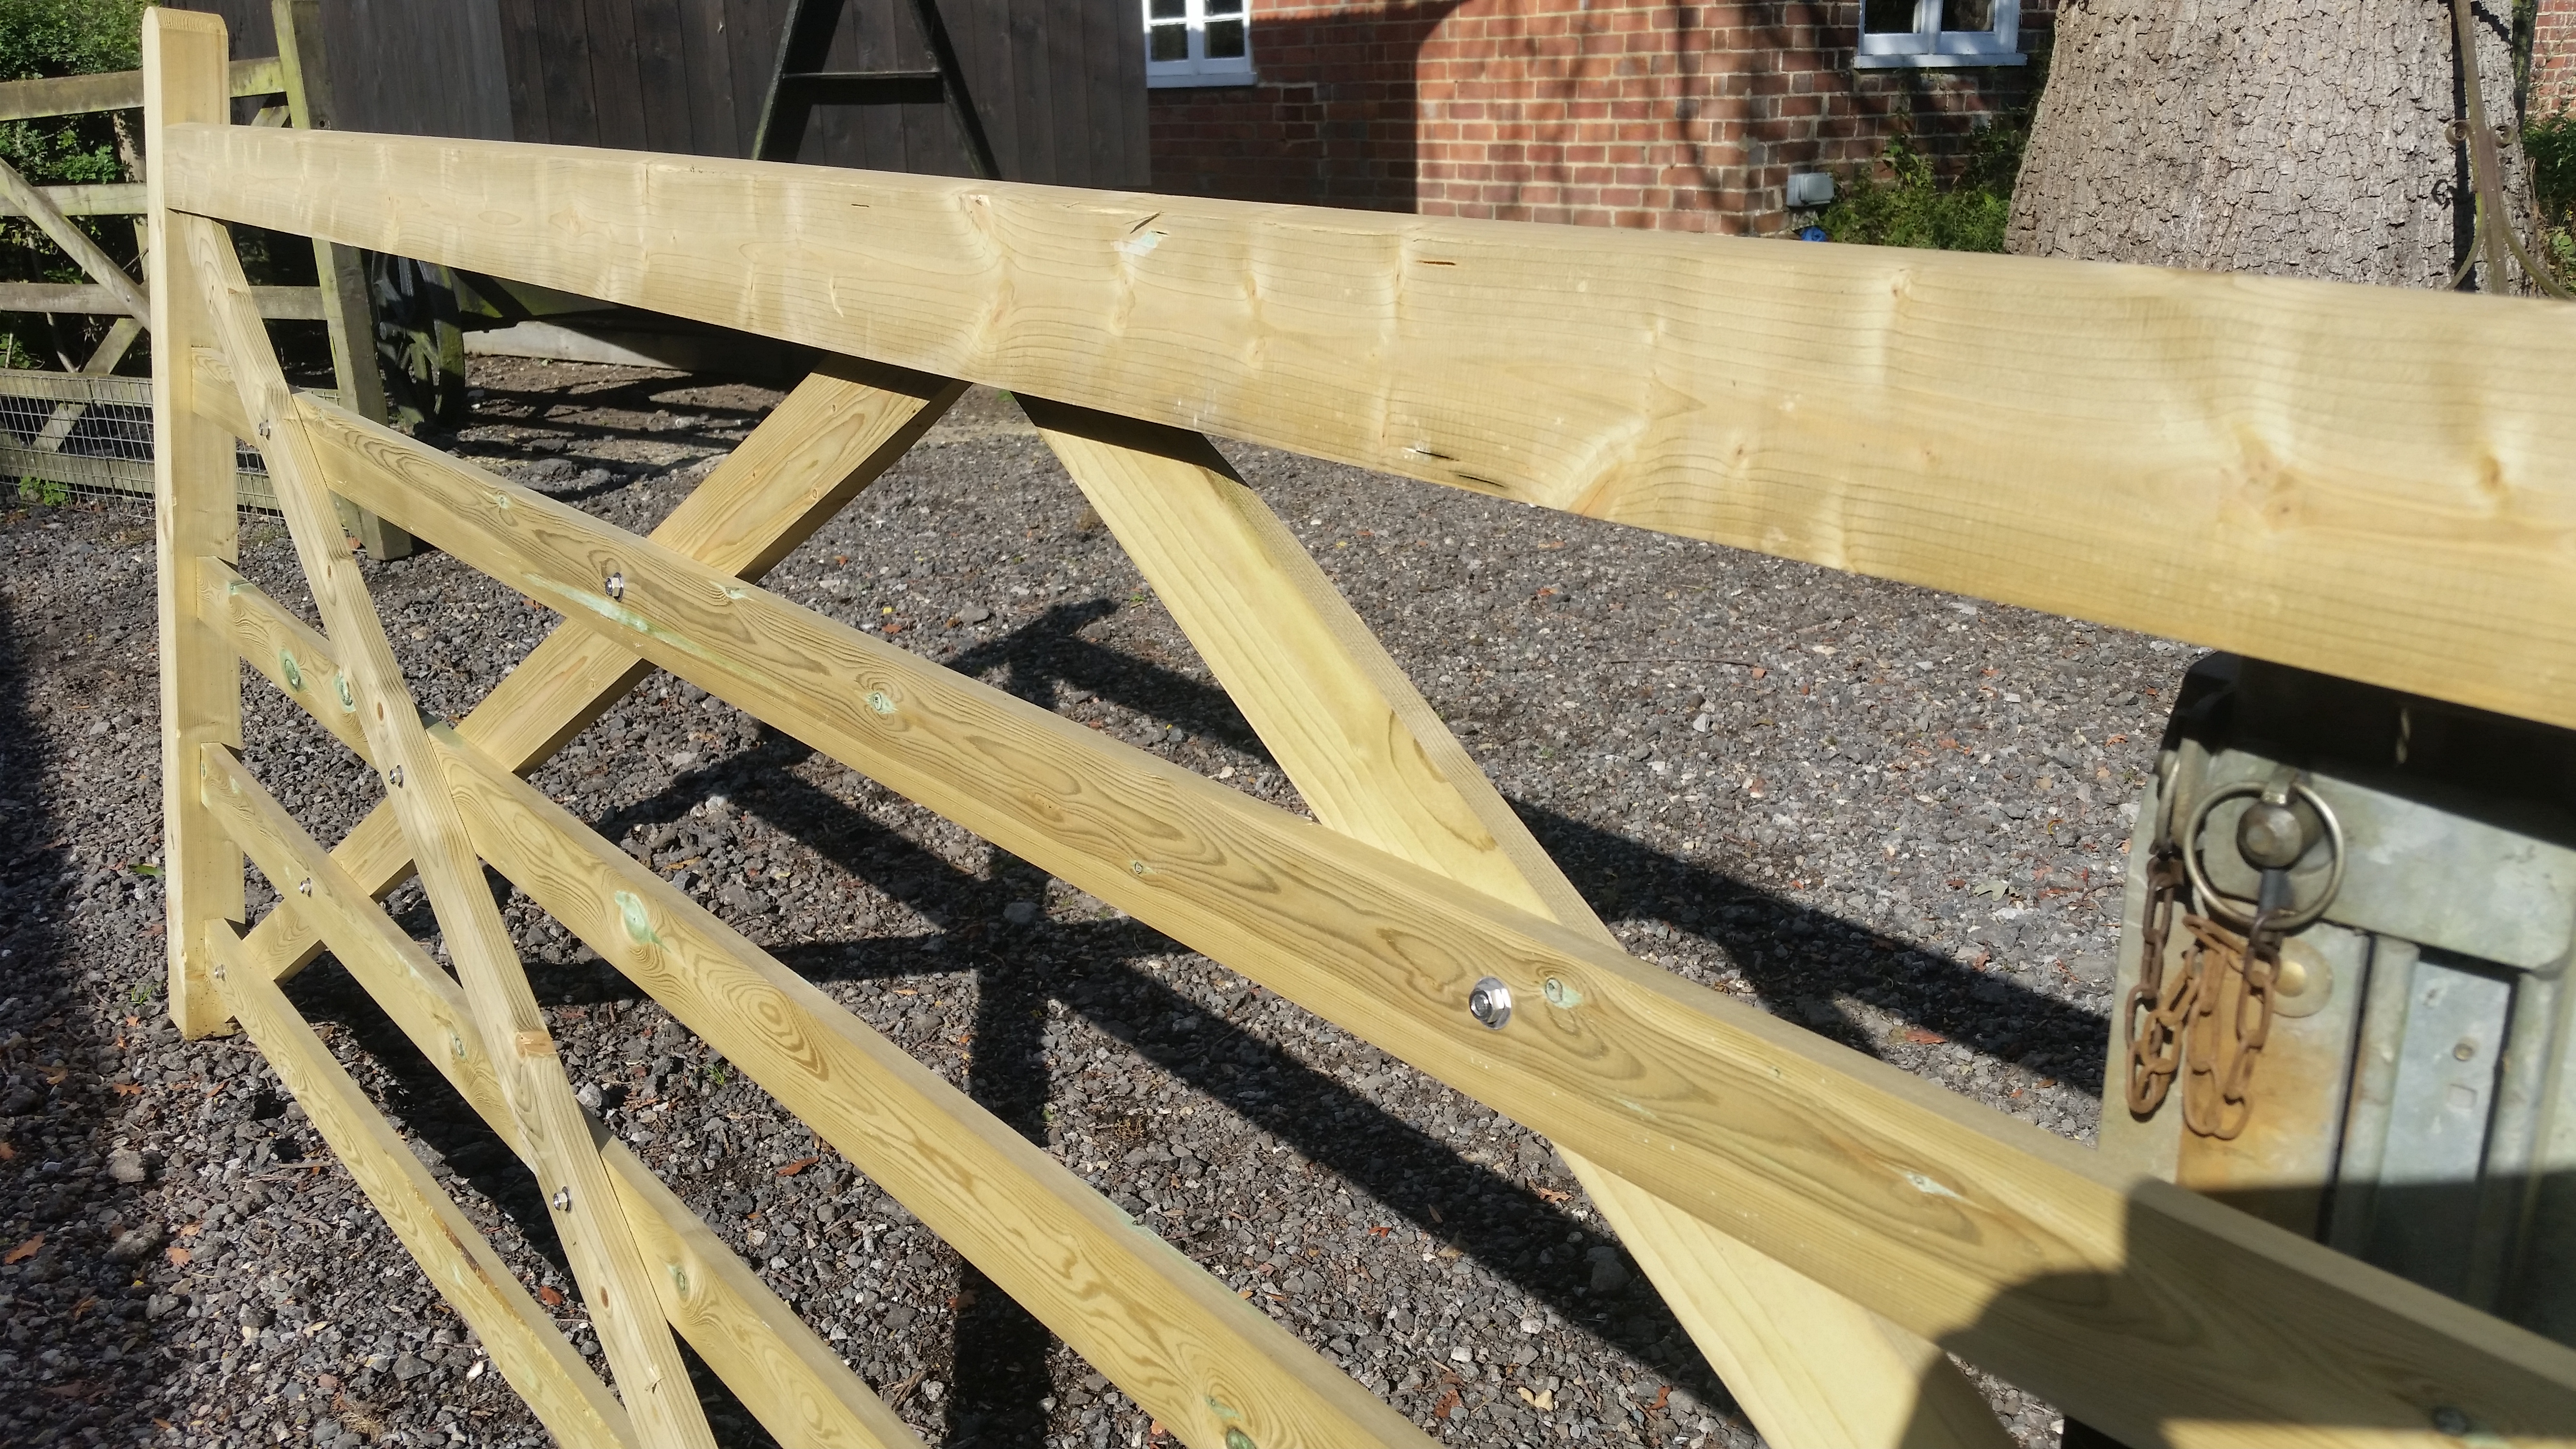
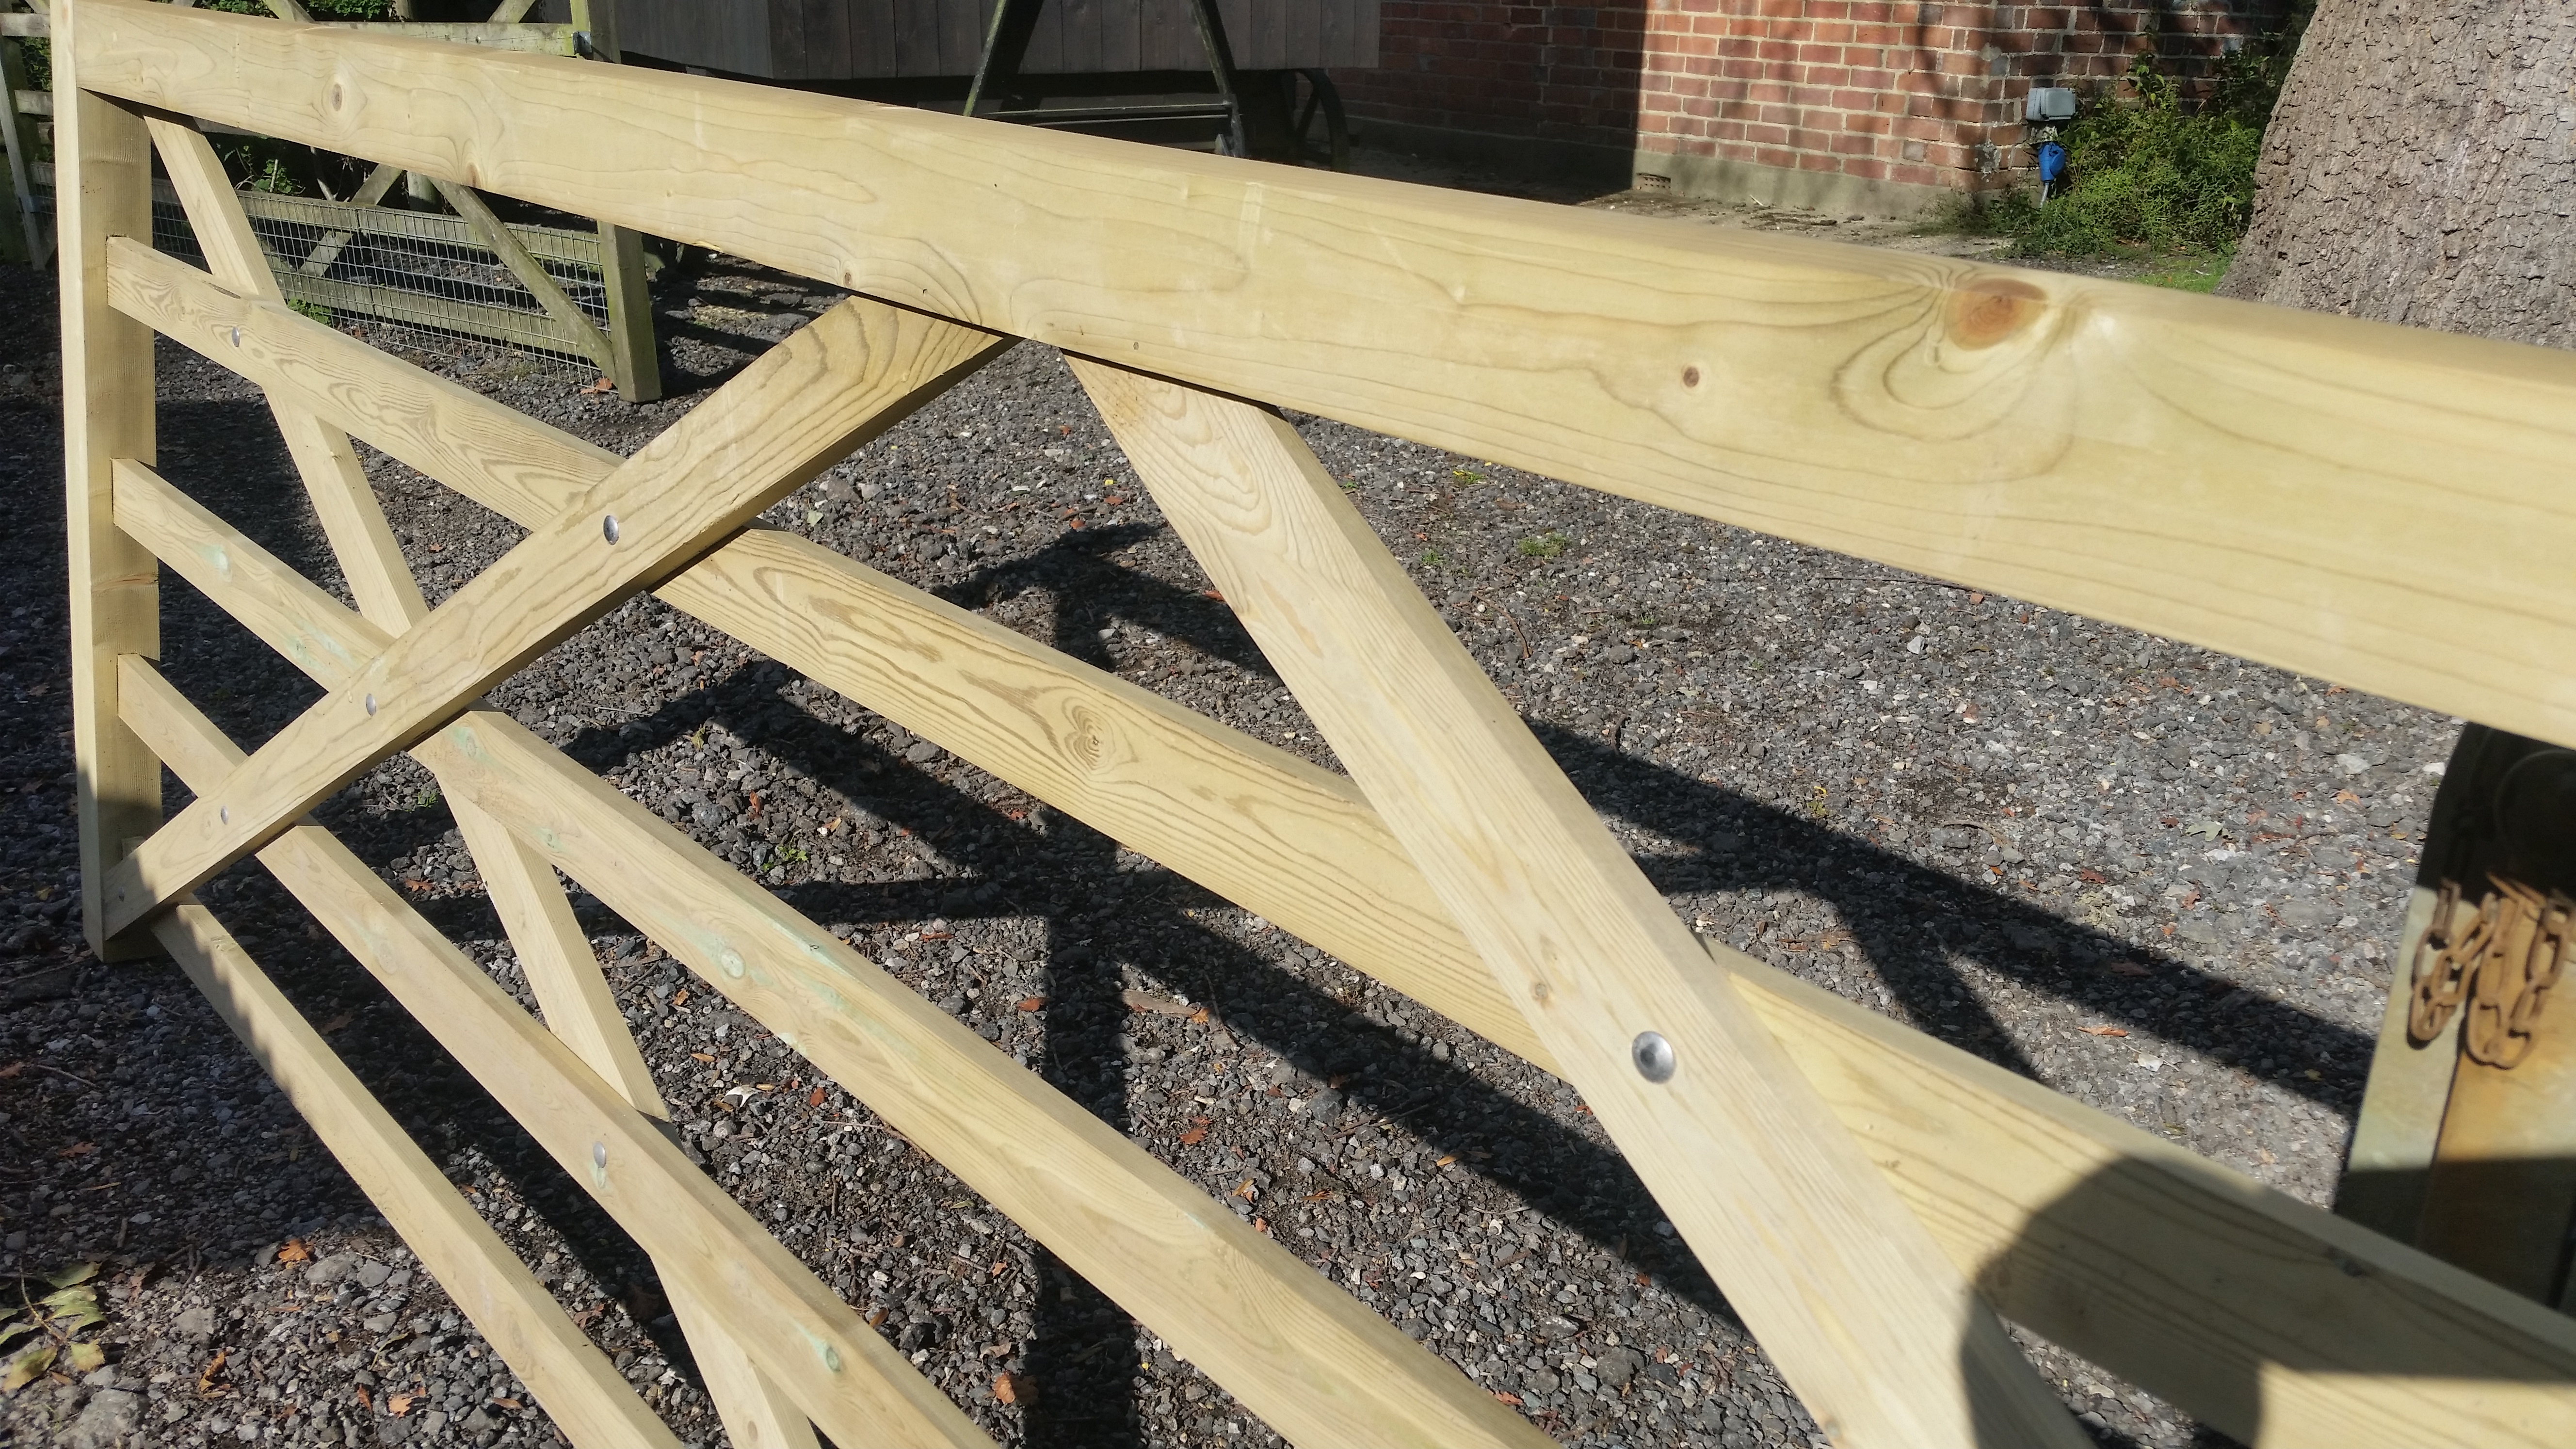
Yep, that’s a real question you’ll get asked at your gate suppliers. To us ‘gate nerds’ there’s a front and a back to gates. The round heads of the bolts and the upper central bracing is always on the front of a double diamond gate. Ideally the front of your gate is what greets visitors as they approach your property.
So depending on which way you want your gate to swing, you need to know if you want a left or right hanging gate.
Gates generally open inwards to your property. This is especially important with field gates that are containing animals. If the gate isn’t properly latched and livestock rub against it they close the gate. If it opened outwards, their rubbing would open an unlatched gate enabling their escape – you really don’t want that!
Materials
So you’ve decided on your gate, its length and which side you are going to hang it. You’ll need a couple of sturdy gateposts and a hinge set.
I wouldn’t go smaller than a seven inch by seven inch post that’s a good seven foot long, and longer if you’re digging into a very soft soil like peat. You don’t save much money buying smaller posts and the larger ones look good and will last longer. If an job’s worth doing………
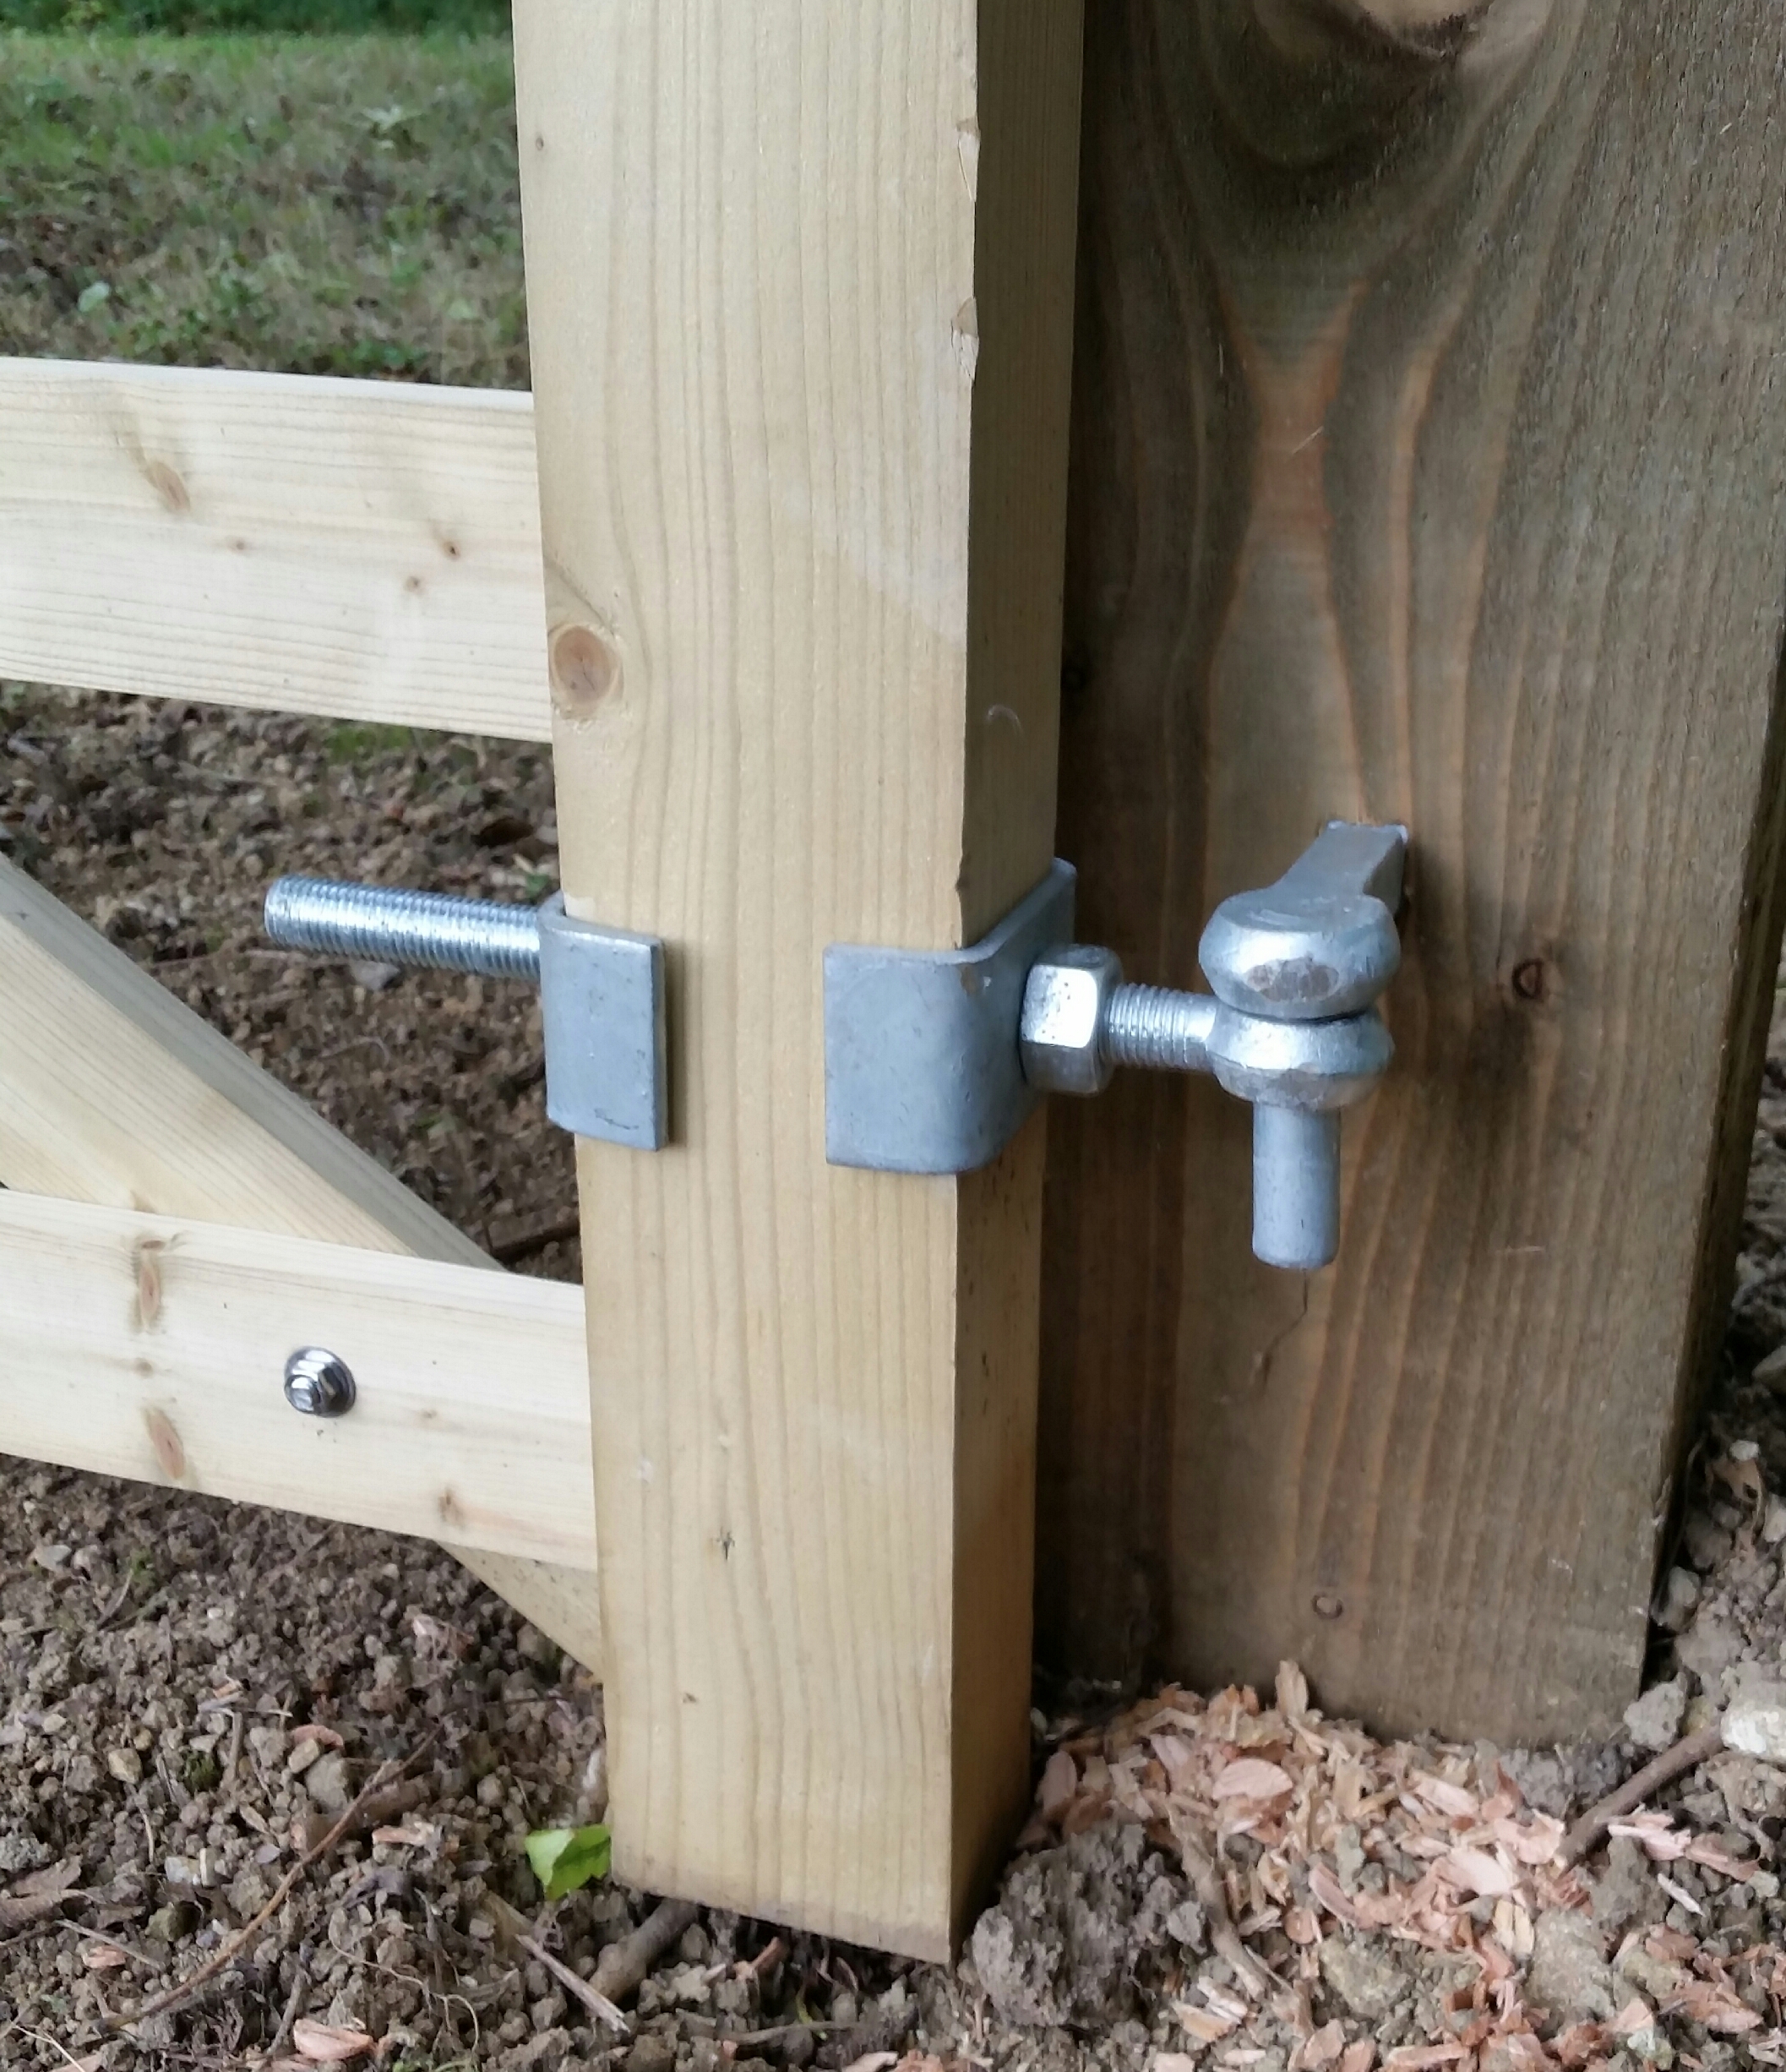
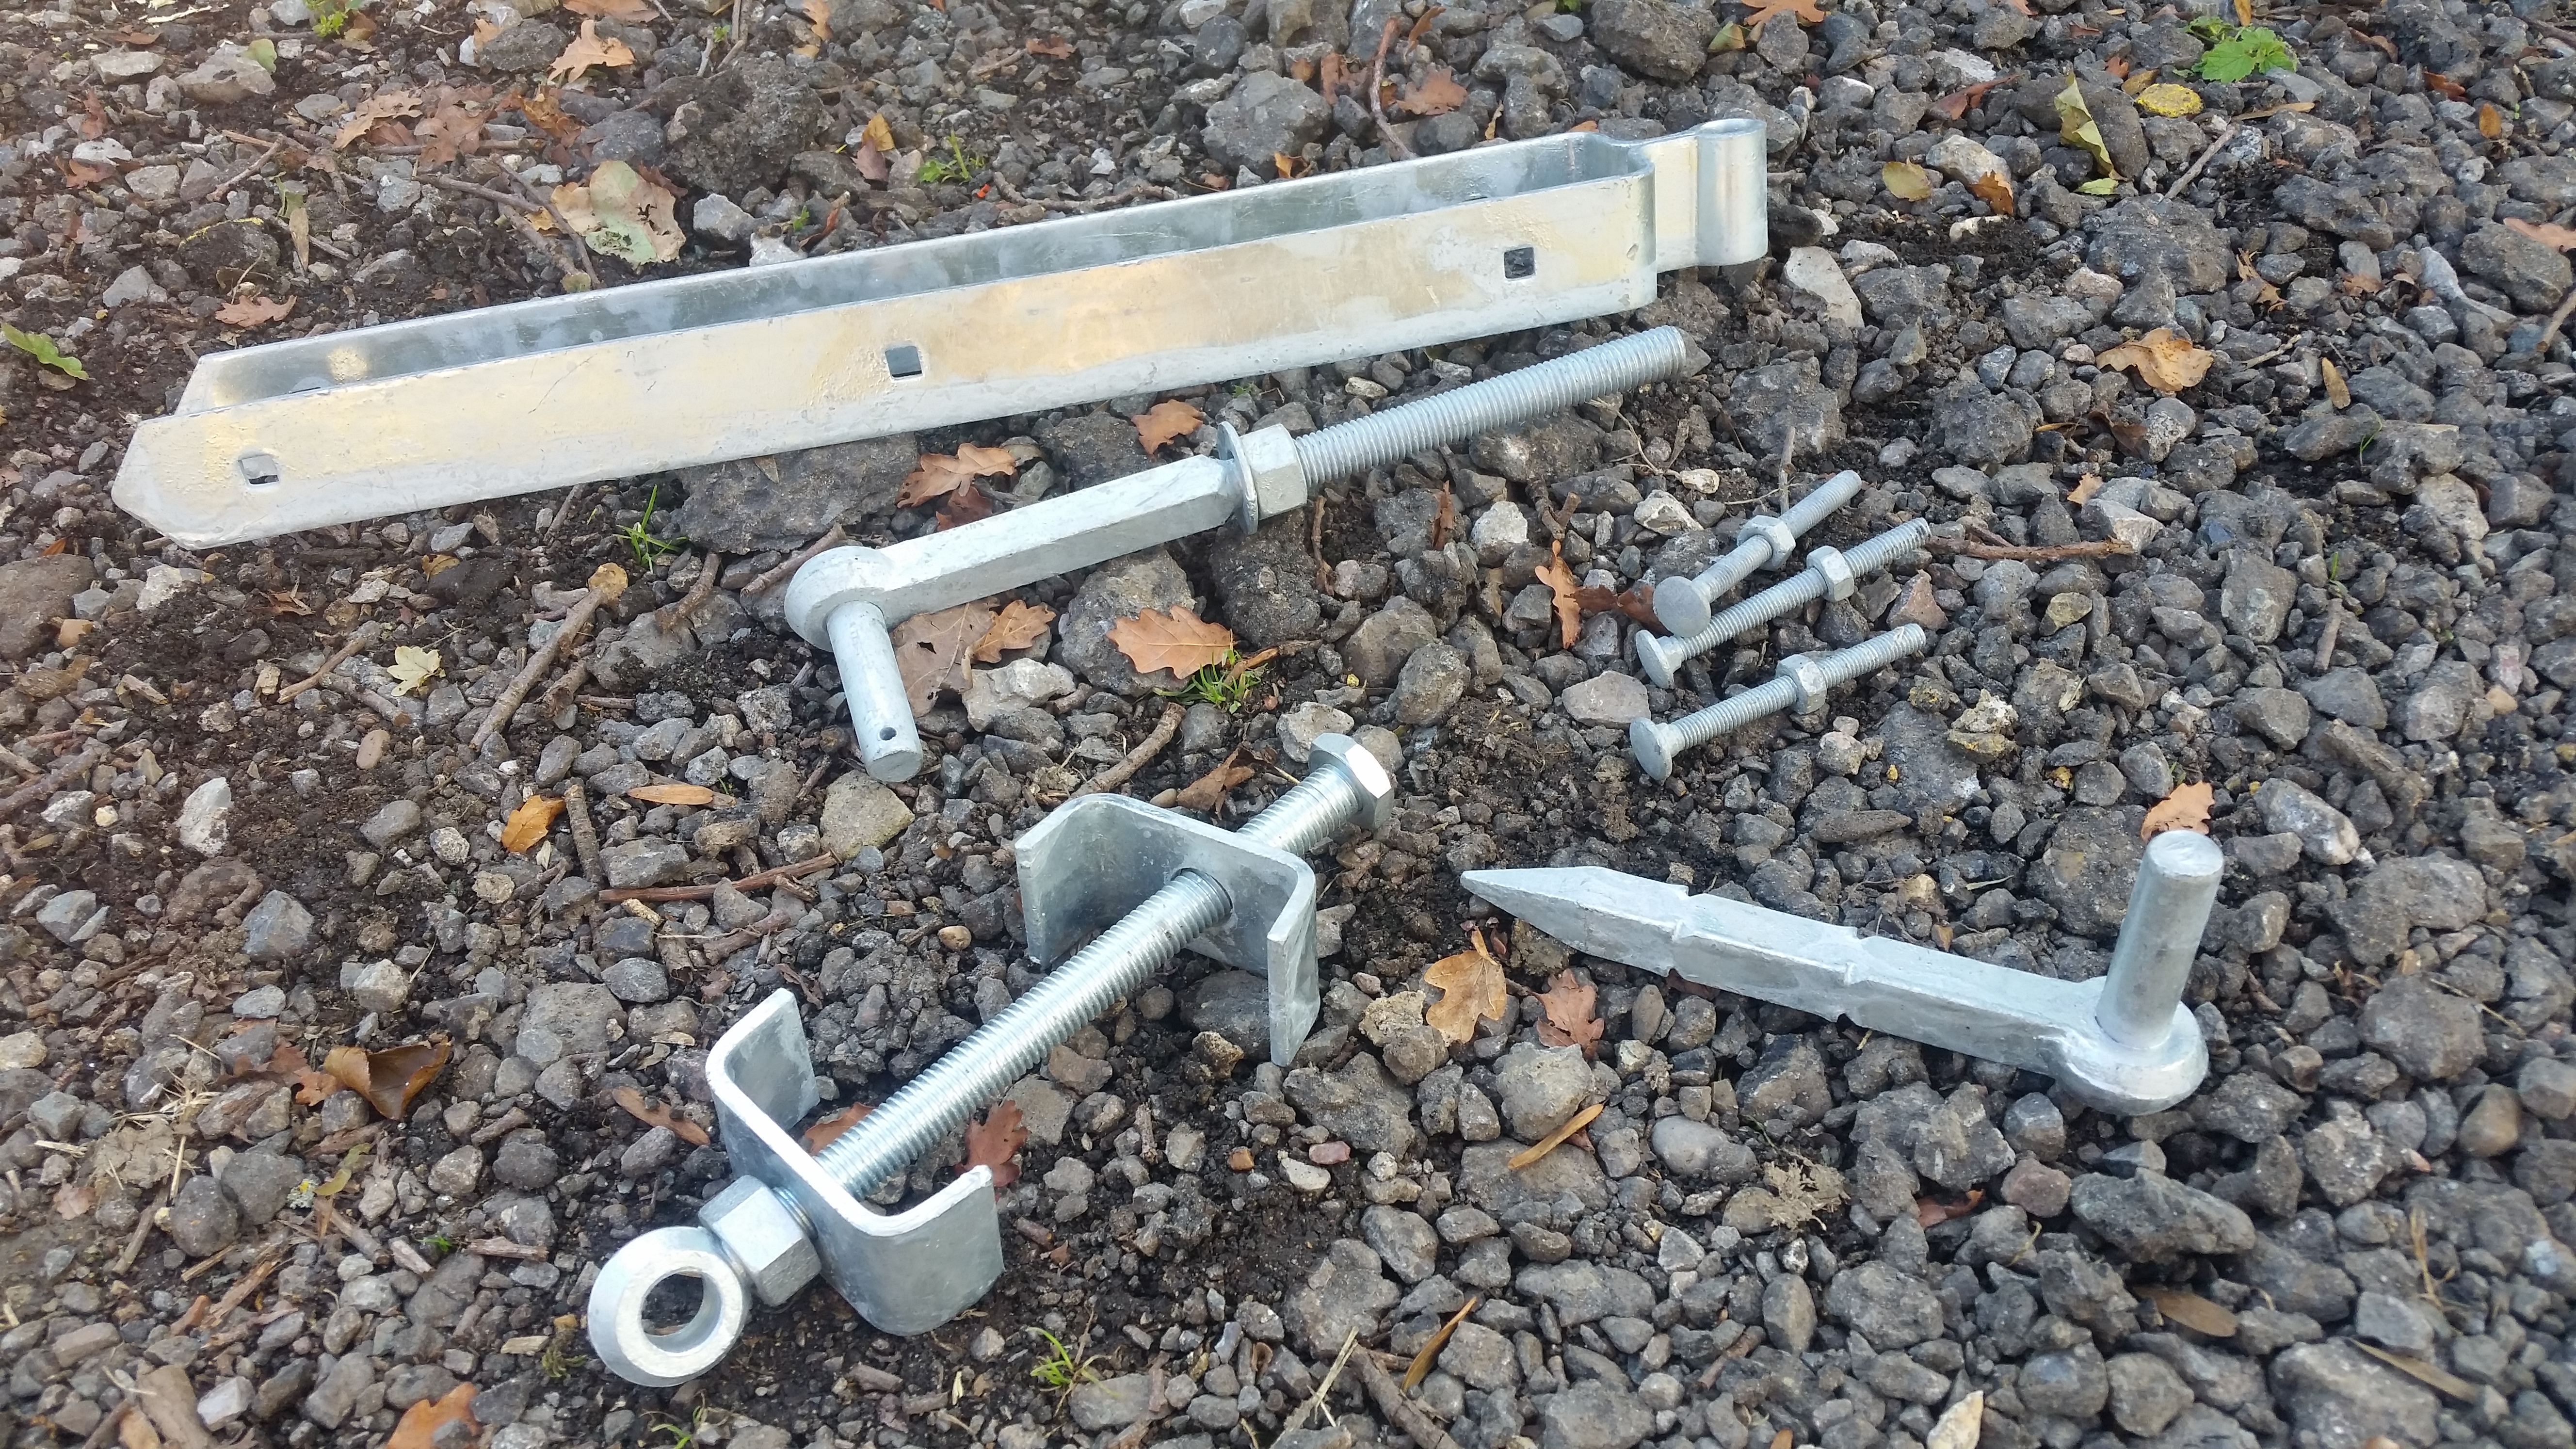 When it comes to hinges I always buy the adjustable hinge sets. It takes the pressure of getting the hinge position spot-on. It also means you can adjust your gate if things sag or if the ground moves a little, as it often does on clay. I’d steer well clear of the none-adjustable hinge sets as it’s all too easy for things to end in tears!
Getting your gate ready
For the sake of 5mins, it’s well worth giving all those little nuts on the back of the gate a tighten-up. Sometimes they come out of the shop only finger tight.
To attach your top hinge you need to drill three holes so you can bolt it onto your gate. Sounds simple enough doesn’t it, but very easy to mess-up. That gate has probably just cost you around £100+, so you really don’t want to mess this bit up.
Hold your top hinge into position, make sure its level and mark the holes. Remove your hinge making sure you knew which way round you had it on your gate so you can put it back that way round. These hinges aren’t always symmetrical and may not line up ok if you return it the other way round. Find a drill-bit roughly the same size as your bolts and drill your gate half way through, trying to keep your drill at ninety degrees to the gate from all angles. It’s easy to drill skew-whiff if you’re not concentrating or inexperienced. Then do the same from the other side and hopefully your two drill holes should meet up. Guide the drill so it exits through the hole on the other side and all should be well. Don’t be tempted to just drill straight through the gate form one side as the holes will rarely line up and you will be in all sorts of misery trying to bolt that top strap on. I’m speaking from painful experience.
 Bolt up your top strap hinge nice and tight ensuring the round heads of your bolts are on the front of the gate.
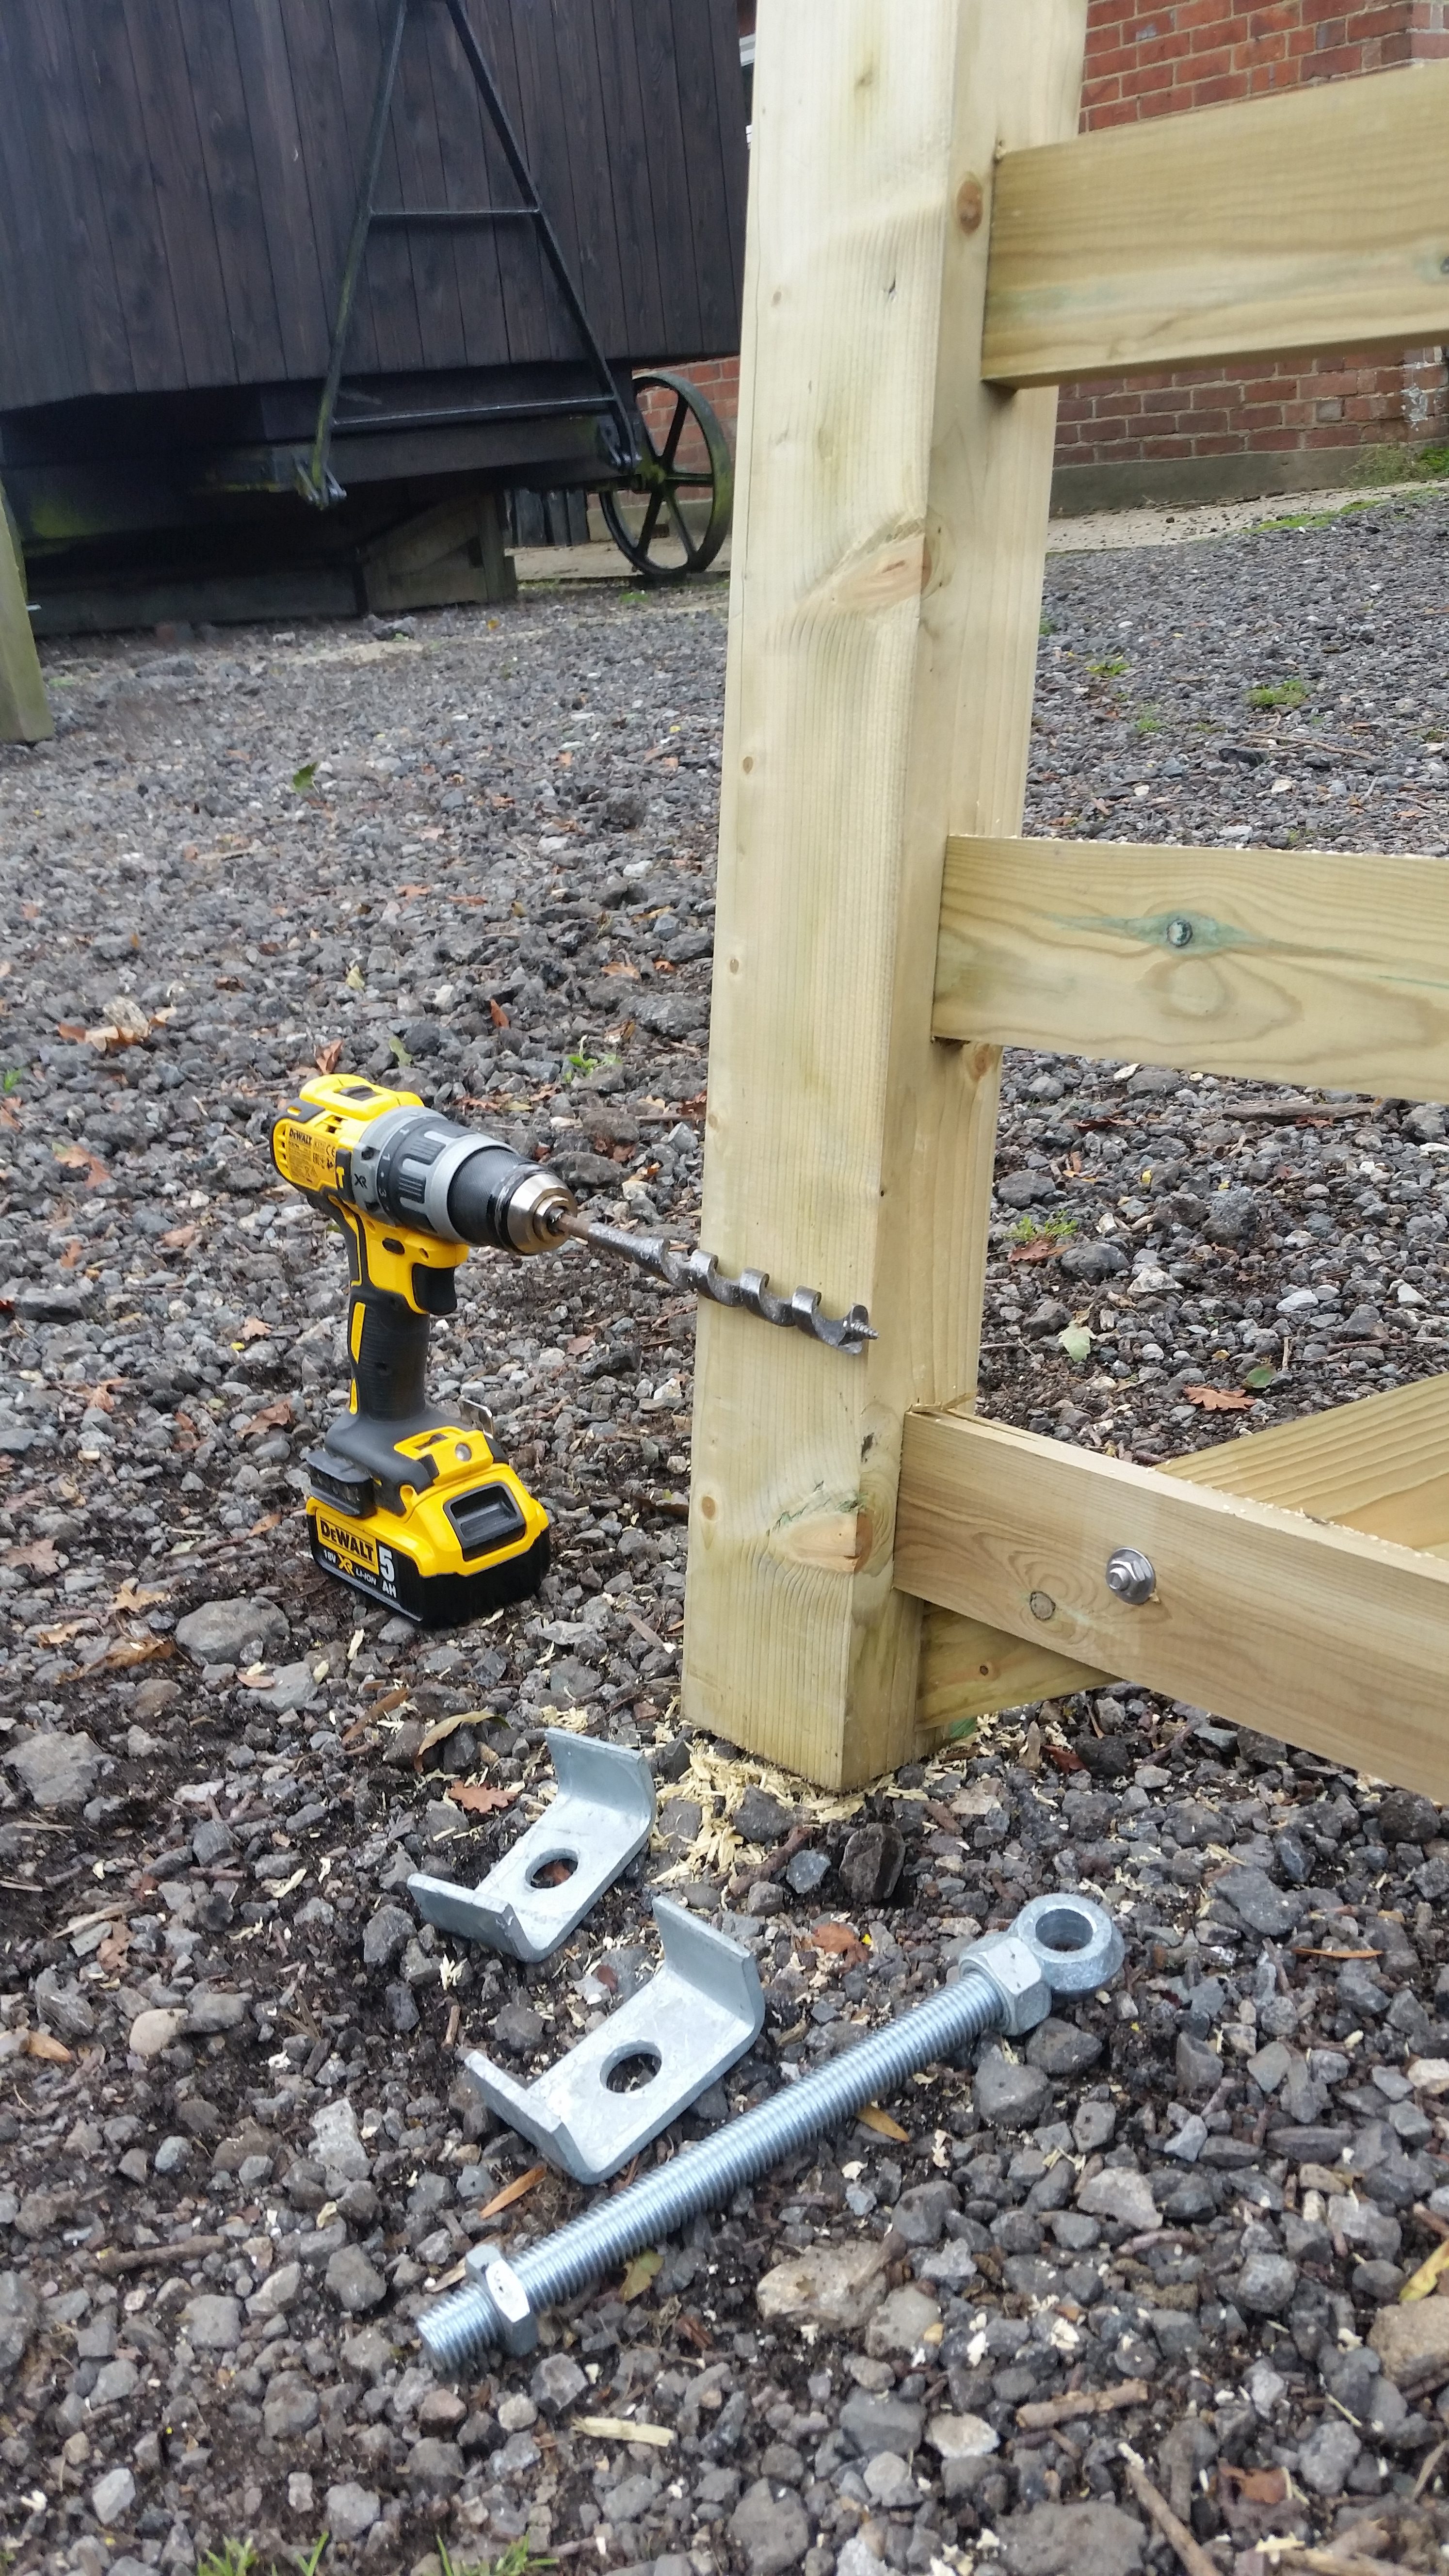 With an auger bit you can then drill through the bottom of the gate, again taking care you don’t go skew-whiff and slide in your adjustable hinge.
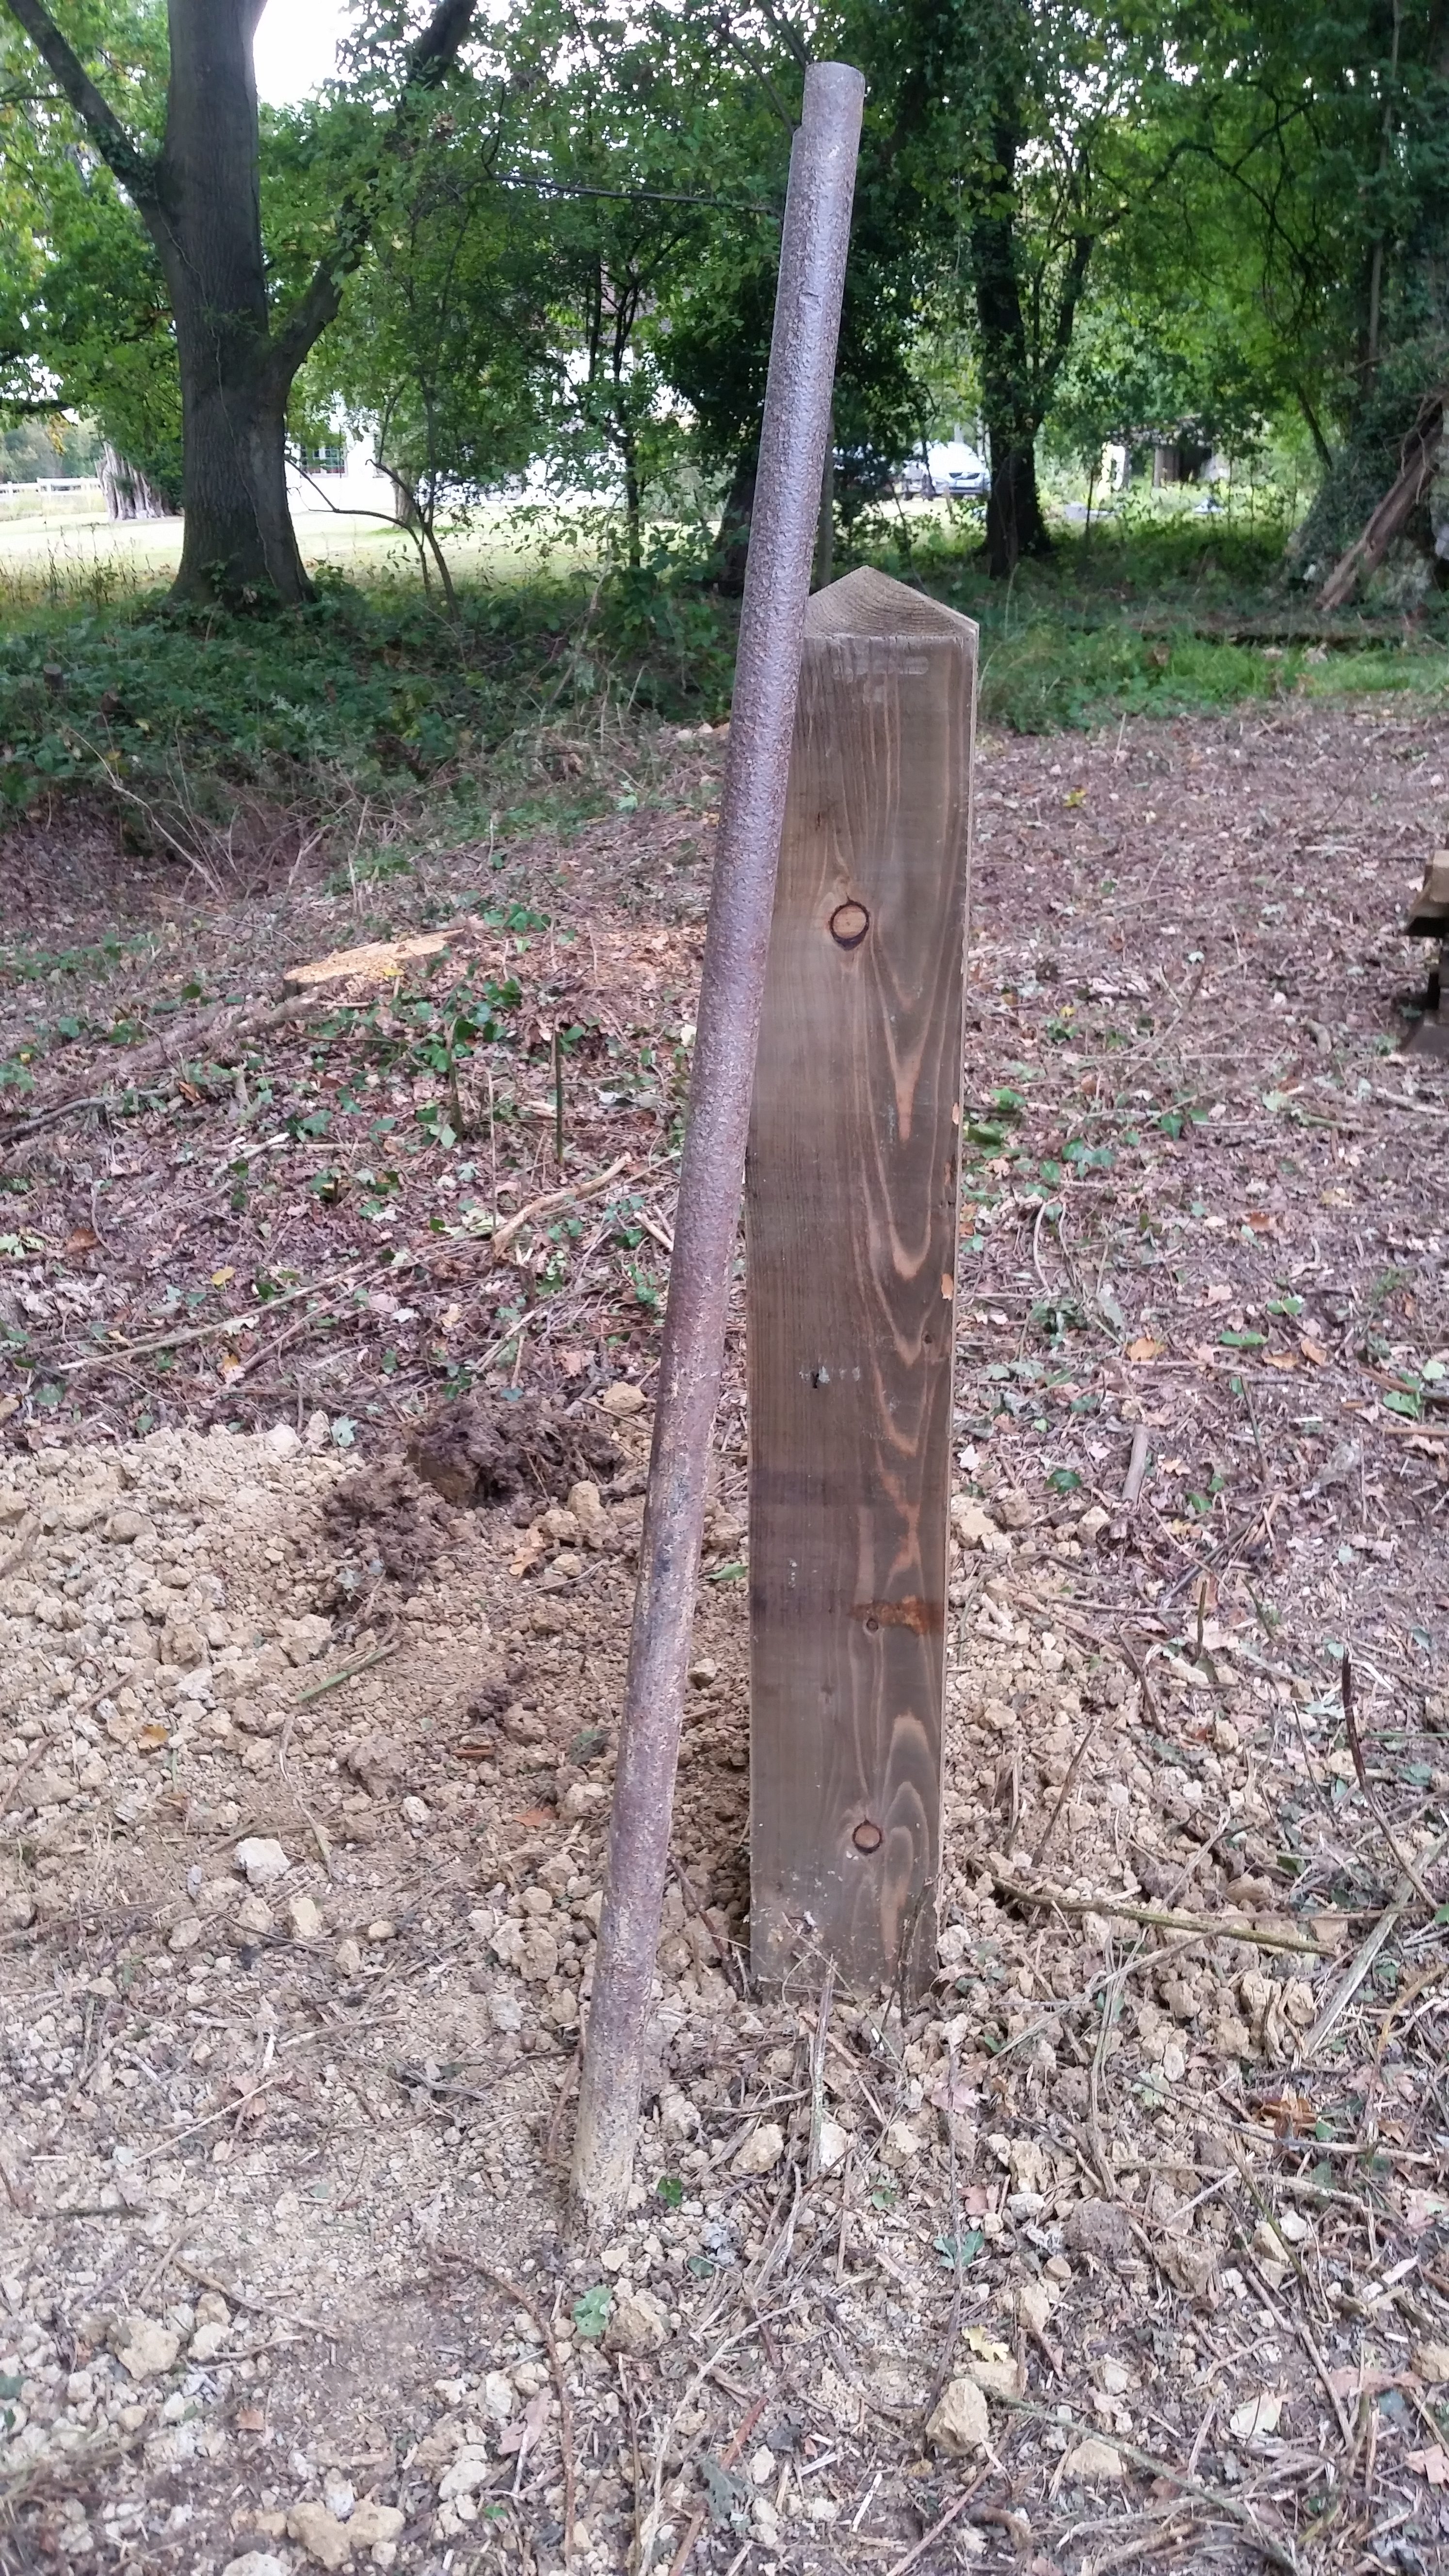
Digging your posts in
Hold your gate up in the gap you wish to fill and check it out. Move it about until you’re happy it’s in the right place and mark your position for the hanging post. Remove your gate and start digging.
 Your hole needs to accommodate your seven or eight inch square post and leave enough room around it for firming the soil in as you back-fill, so it’s going to be about two foot across. Then just dig down and keep digging. There’s no substitute for digging these things really deep. They don’t make hanging posts seven to eight feel long for you to cut a foot or two off the end as a free fire log. You might get away with that on the shutting post as it takes much less pressure, but NOT on the hanging post. Imagine the leverage that post is going to have with a gate hanging off it and possibly a couple of twelve year old kids swinging on the other end. The leverage is enormous so get that post into the ground as deep as you can.
The other thing that people often do, but that is totally unnecessary, is use concrete. There is absolutely no need to use concrete if you firm in the soil as you backfill. In fact, a post hole that’s entirely filled with concrete can result in your gate posts being a secure as a wobbly tooth the following summer. Wood swells when wet and shrinks when dry, but concrete stays the same. Most posts are bought wet, so you can see how your post might wobble as it dries and shrinks.
The key to a firm post is digging it in a good depth and then firming in your back-fill every few inches. I use a six foot length of scaffold bar to firm my back-fill in. Some of the commercial punners have big heads on them that don’t deliver the same force as the end of a scaffold pole. Keep checking your post with a spirit level as you back-fill. I’m always amazed that I can dig a hole, insert a huge volume of wood and still not have enough soil to fill it up again. You’d think I’d have soil left over, but if it’s really compacted in there often isn’t enough.
 Don’t be tempted to dig in your shutting post just yet. Trust me, it won’t end up in the right place. Hang your gate first!!
Hanging your gate
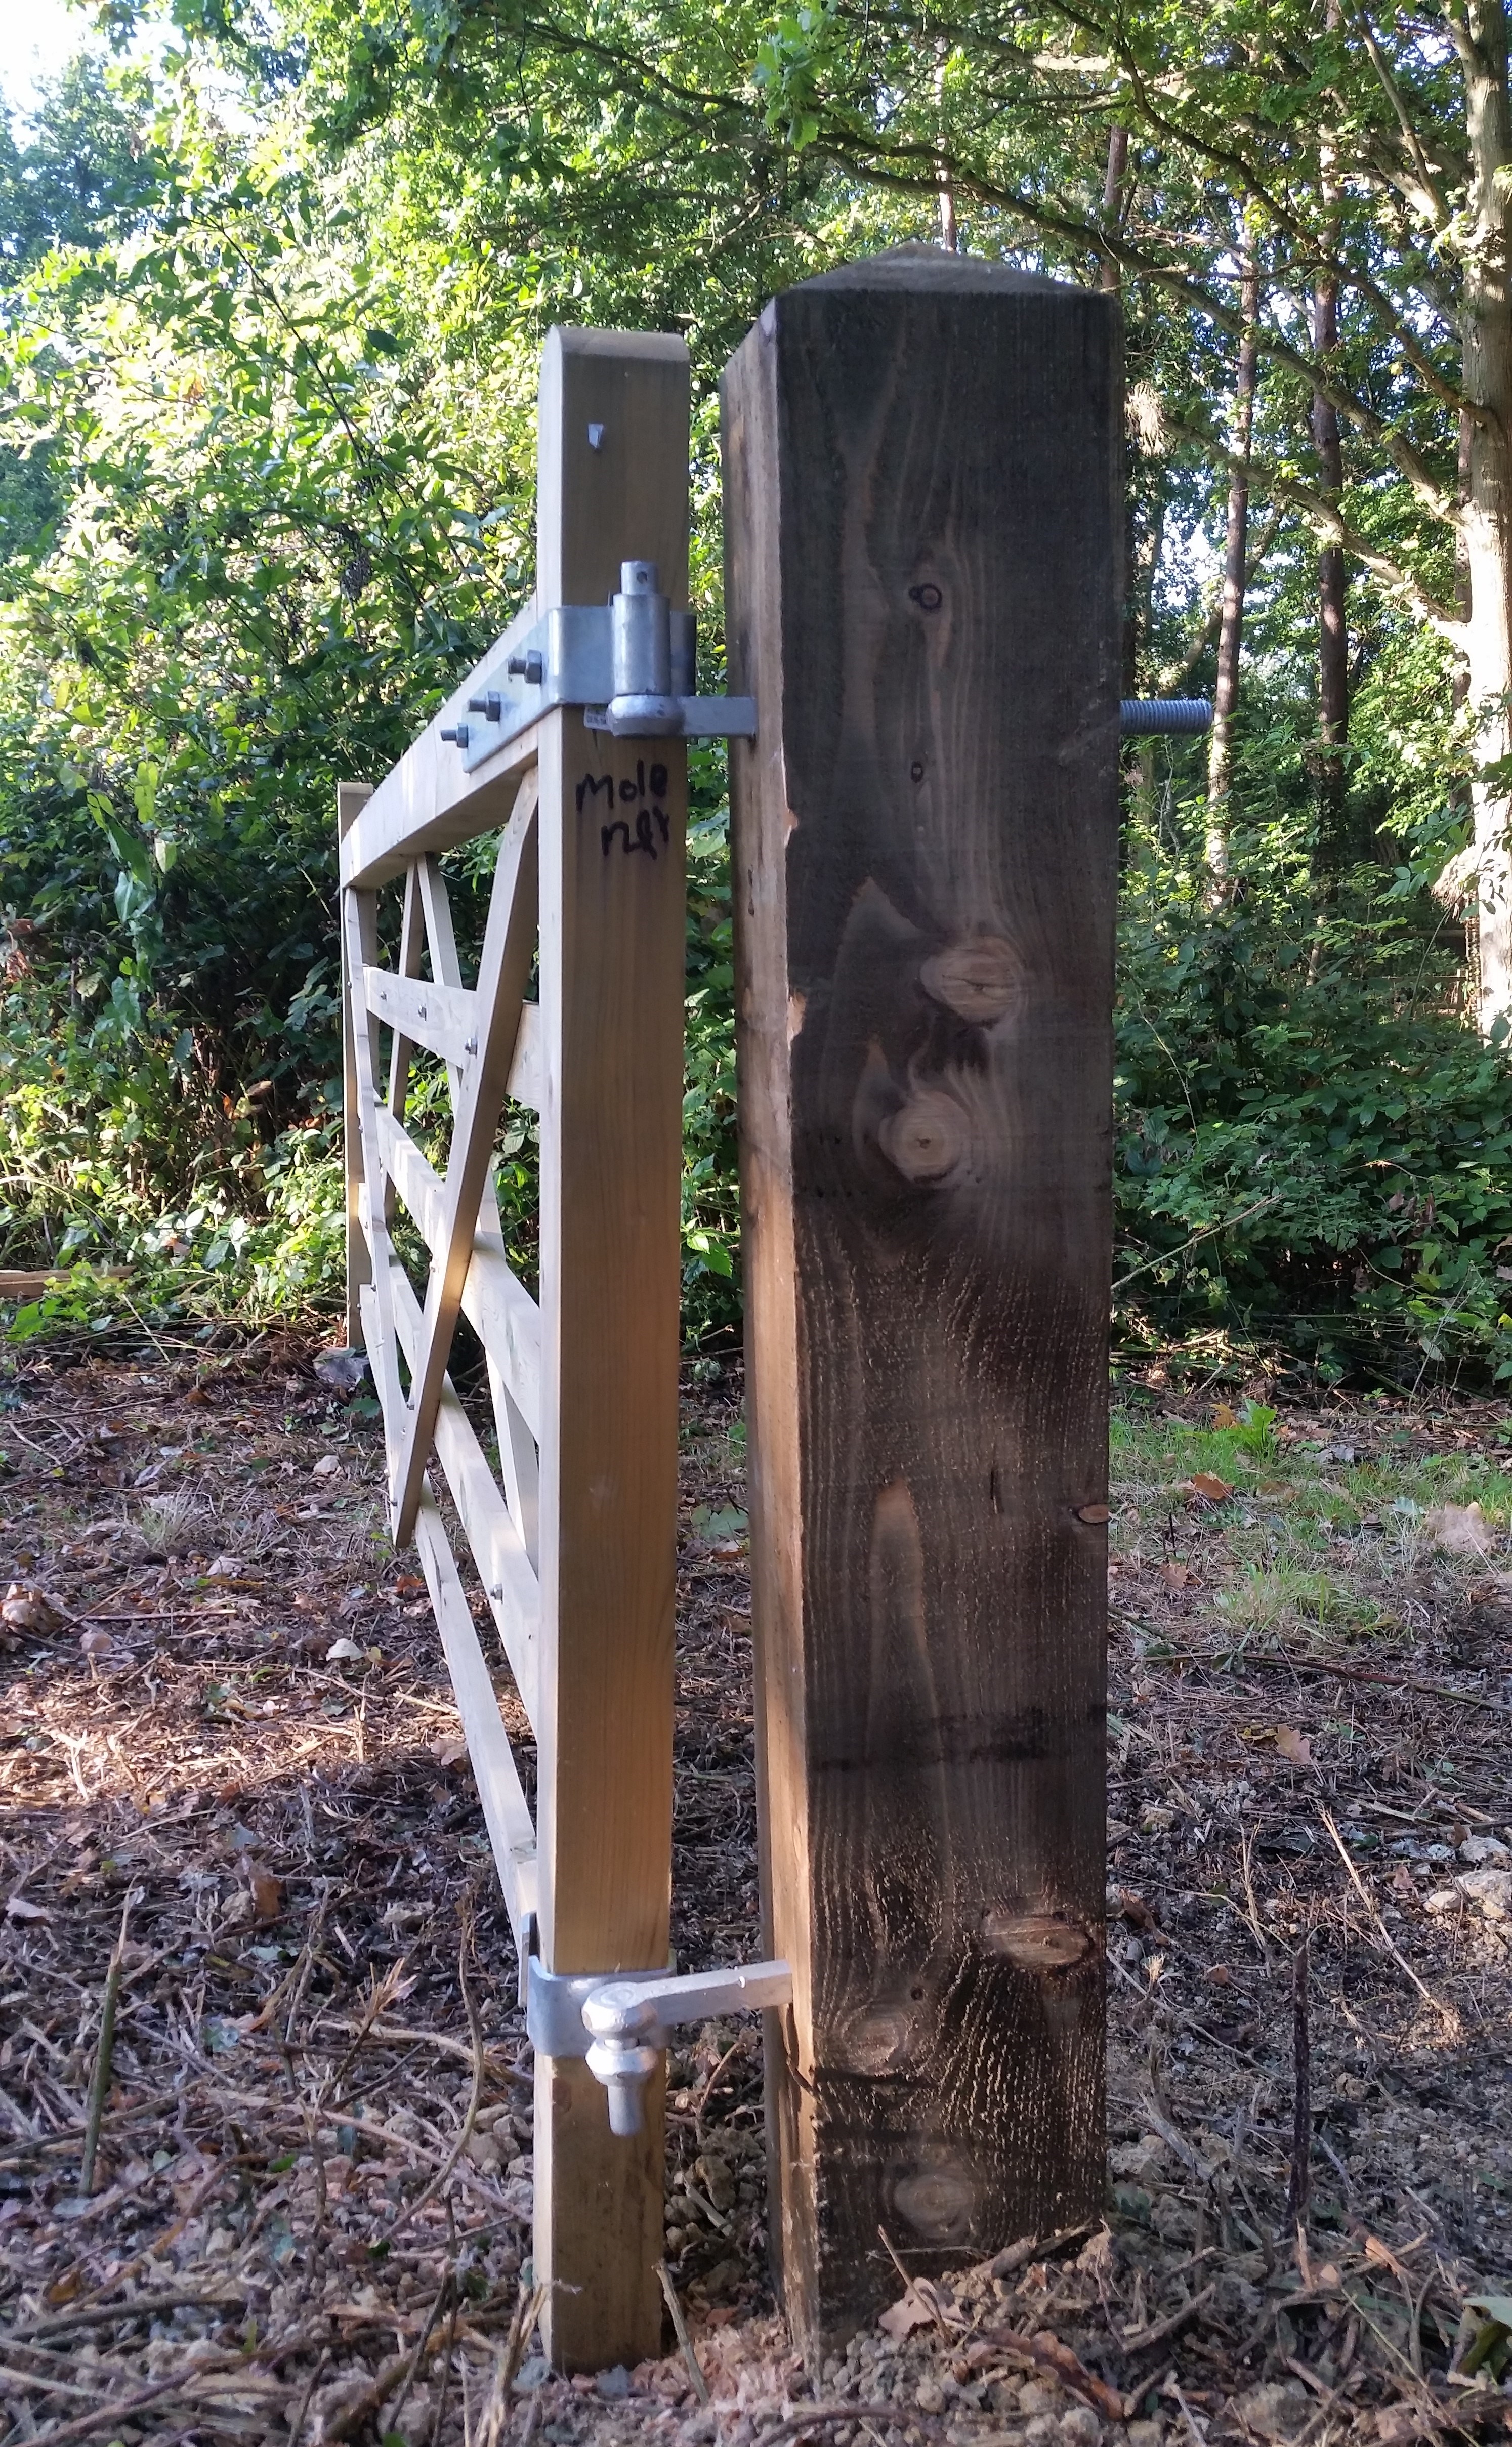
Position your gate where you want it next to you hanging post with the hinge eyes in the centre of the post. Hold it off the ground at its finished height with a brick or piece of wood at either end. Stand back and have a look at it in position. Once you’re happy, auger your hole into your post for the top hinge. Select an auger bit that’s the same size as the hinge thread so it’s smaller than the square section. You want that square section to bite into the wood.
Once you’ve drilled right through your gatepost tap your top hinge partially in with the pin pointing upwards. Don’t tap it all the way in yet. Leave a gap of a good six inches between the gate and gate post or you won’t get your bottom hinge in.
Now hang you gate on the top hinge and prop up the other end so the whole gate is at its finished height. To prevent theft it’s advisable to position your lower hinge pin down. This will prevent the gate from being lifted of it’s hinges. Auger a hole that’s a fair bit smaller than the shaft for your bottom hinge. Then put the pin in the ring hinge of your gate and offer the point up to the hole you’ve just drilled. Then tap in the top and bottom hinges at a similar rate with a lump hammer. Once the threads are showing on the top hinge you can use a big spanner to pull your top pin in instead of hitting it.
Sloping ground
You can make a gate rise (or kick) as it opens, which can be useful if the ground slopes upwards behind it. In a nutshell, this is achieved by making the bottom hinge much longer than the top hinge when the gate is in the open position. One way to make this happen is to make the top hinge much closer to the post than the bottom hinge. You can also drill your top and bottom hinges so they are not central to the post, the top being nearer to the gate and the bottom pin being further away.
If the ground is severely sloping you can also buy offset hinges, where the eye of the hinges isn’t central. It might be best to get an experienced contractor in if the ground is that bad.
The shutting post
Once you’re happy with your gate and you’ve fiddled about with the adjustments so it looks right, (by eye is often better than spirit leveled), you’re ready to dig in your shutting post. Same score as your hanging post, but I will forgive you if you if you chop a little off the bottom of this one.
Keep checking your shutting post with the gate as you back-fill and firm. Don’t use the spirit level as the end of the gate may not be level, depending on the kick you’ve given it. You want your gate to shut against the post flush from bottom to top.
If you’ve got this far successfully you don’t need my advice on how to fit latches to your shutting post.
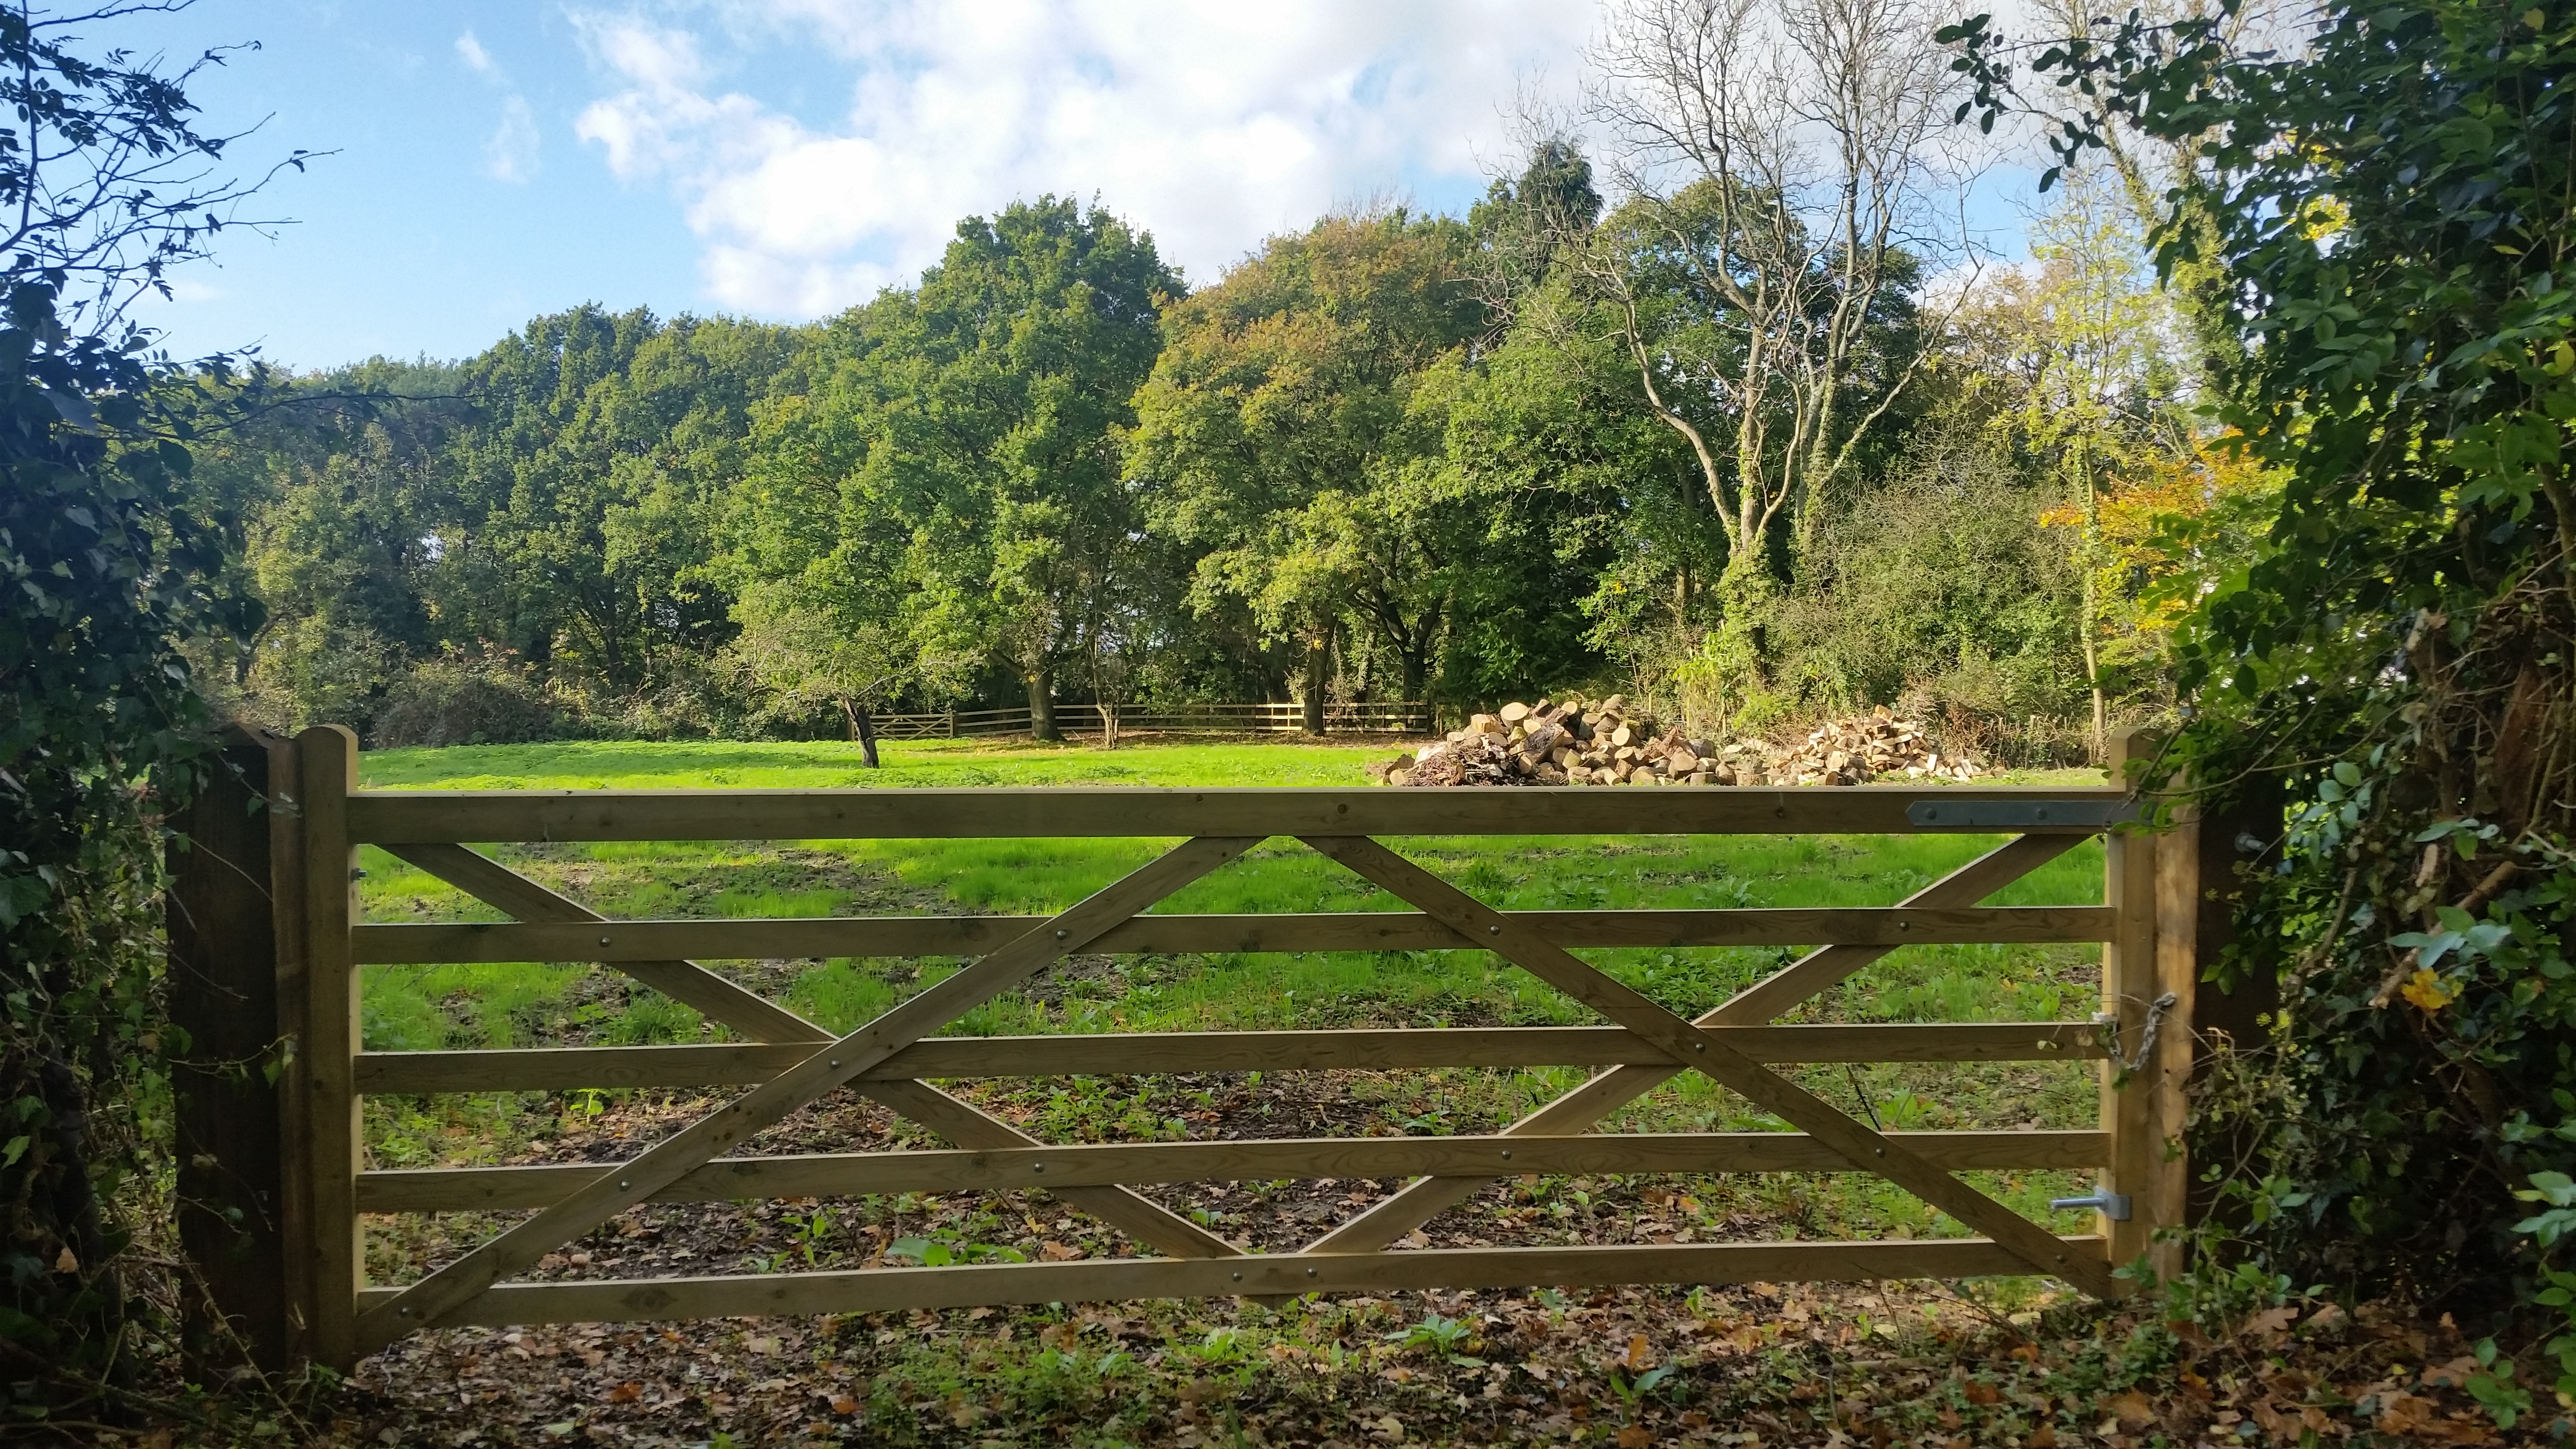 Hey presto – you’ve a smart new gate!!
Fencing
It’s ok to attach post and rail to your gateposts but I’d never strain wire off them. Even if you strut a gate post, strained wire will pull them out of position. In this scenario, I’d always dig a strainer post in next to my gate post to strain the wire off.
7 comments on How to Hang a Gate

Really useful post, thank you!
Excellent. This is an accurate and easy to understand description of the task of installing posts and hanging a five bar wooden gate, that would be applicable in the main to five bar metal gate and posts. Knowing this will help you either do the job yourself or converse knowledgeably with your contractor and not look like a numpty.
Cheers Clive. Nobody wants to look like a numpty, and I should know having been in that position many times!!
Really good detailed instructions. Thank you for taking the time to post.
Excellent! After spending 2 hours looking at all the other guides on Google, i came across this one. My advice – ignore all the other guides and just use this one. Clear text, clear photos.
So glad it was helpful. Thanks Hugh!
Really useful. No waffle like many other videos.